Phaser 7500 Printer Service Manual 8-131
Service Parts Disassembly
REP 13.2 Tray 1 Head Assembly/ Tray 1 Assembly
PL13.1.2/ PL13.1.3
1. Remove the Top Rear Cover and the Rear Cover (REP 19.6, page 8-217).
2. Remove the Left Rear Cover (REP 19.4, page 8-215).
3. Remove the Tray 1 Feeder Assembly (REP 13.1, page 8-130).
4. Remove the Tray 1 Top Cover (REP 13.5, page 8-134).
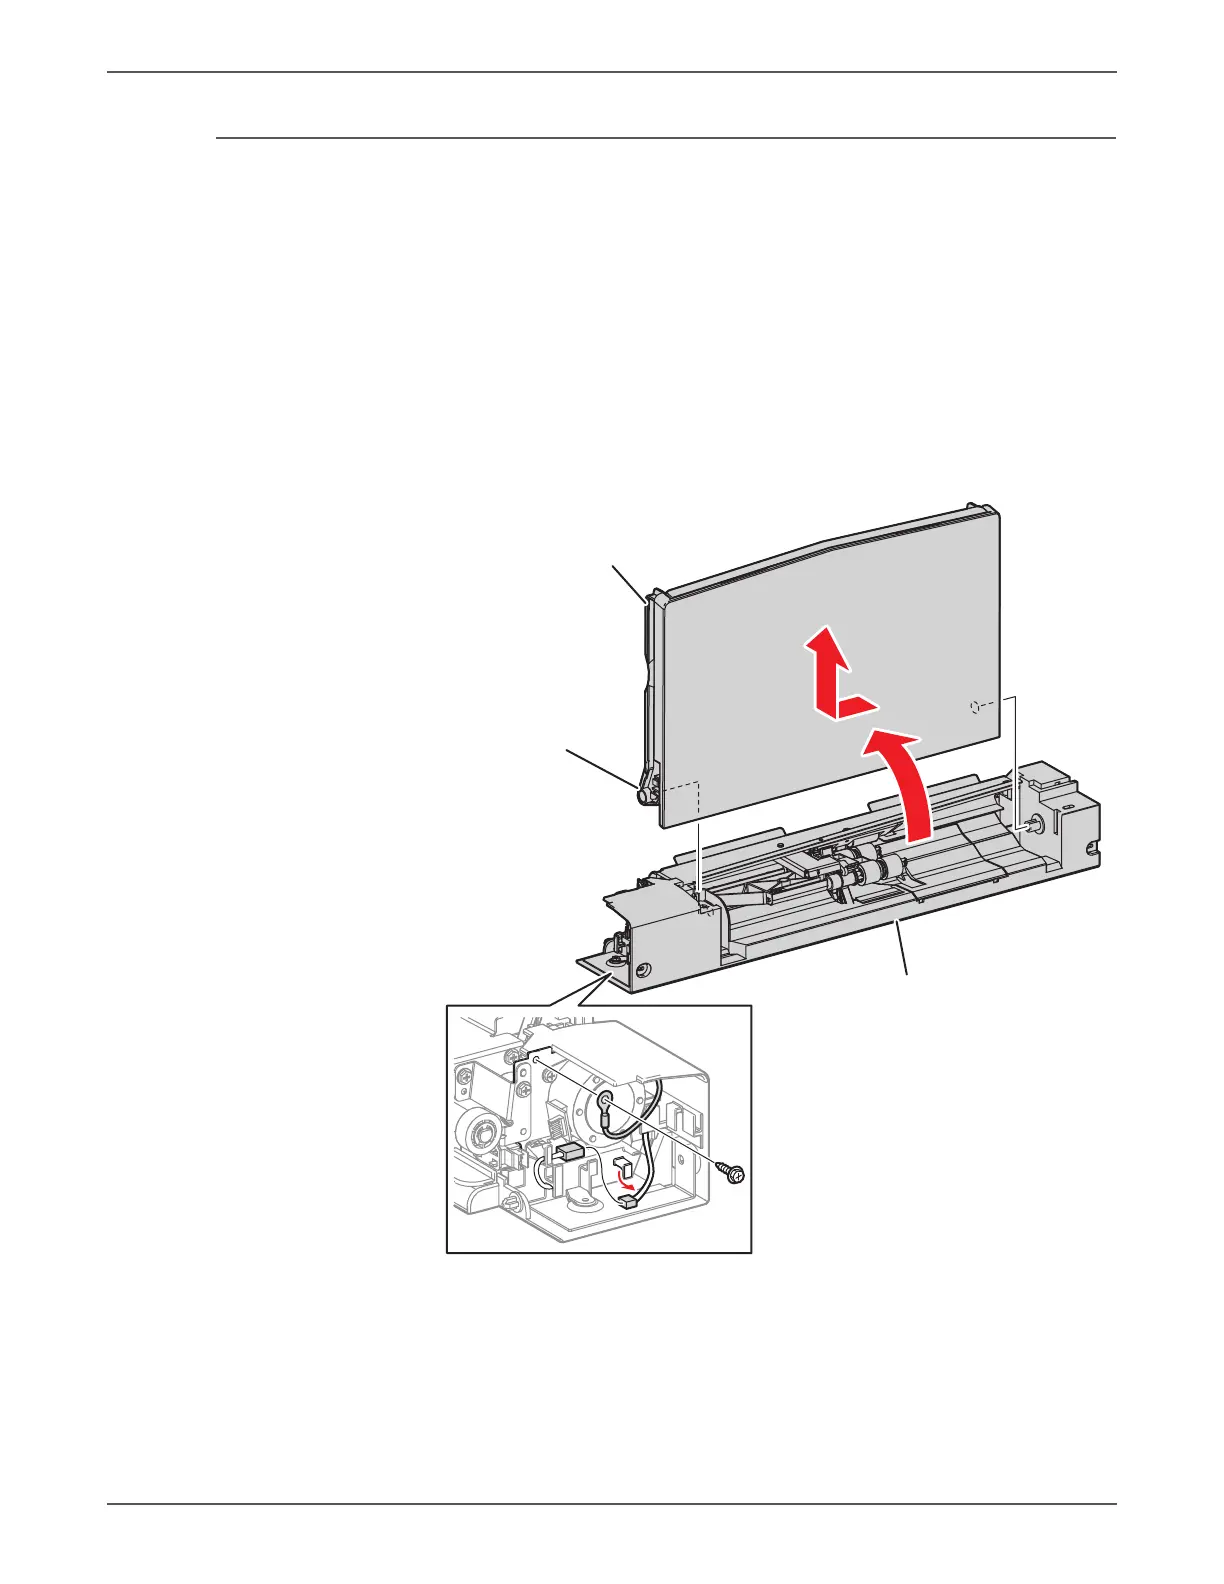
5. Remove 1 screw (silver, Tapped, 8mm) that secures the Ground Wire and
disconnect the Ground Wire.
6. Disconnect the wiring harness connector that is connected from the Tray 1
Assembly, and pass the harness and the Ground Wire through the hole.
7. Raise the Tray 1 Assembly by 90°, slide it towards the rear, remove the
installation holes from the 2 bosses, and remove the Tray 1 Assembly.
s7500-192
MPT (Tray 1) Assembly
2 Washers Behind
LH Pivot Point
MPT (Tray 1) Head Assembly
 Loading...


