GASOLINEVEHICLE-ELECTRICAL
COMPONENTSLowOilWarningLight
19
LOWOILWARNINGLIGHT
SeeGeneralWarningsonpage1-2.
TESTINGTHELOWOILWARNINGLIGHT
SeeTestProcedure17–LowOilWarningLight(LED)onpage18-30.
LOWOILWARNINGLIGHTREMOVAL
1.Disconnectbatteryandsparkplugwire(s).
SeeDisconnectingtheBattery-GasolineVehiclesonpage1-3.
2.Removetheinstrumentpanel.SeeKeySwitchRemovalonpage19-18.
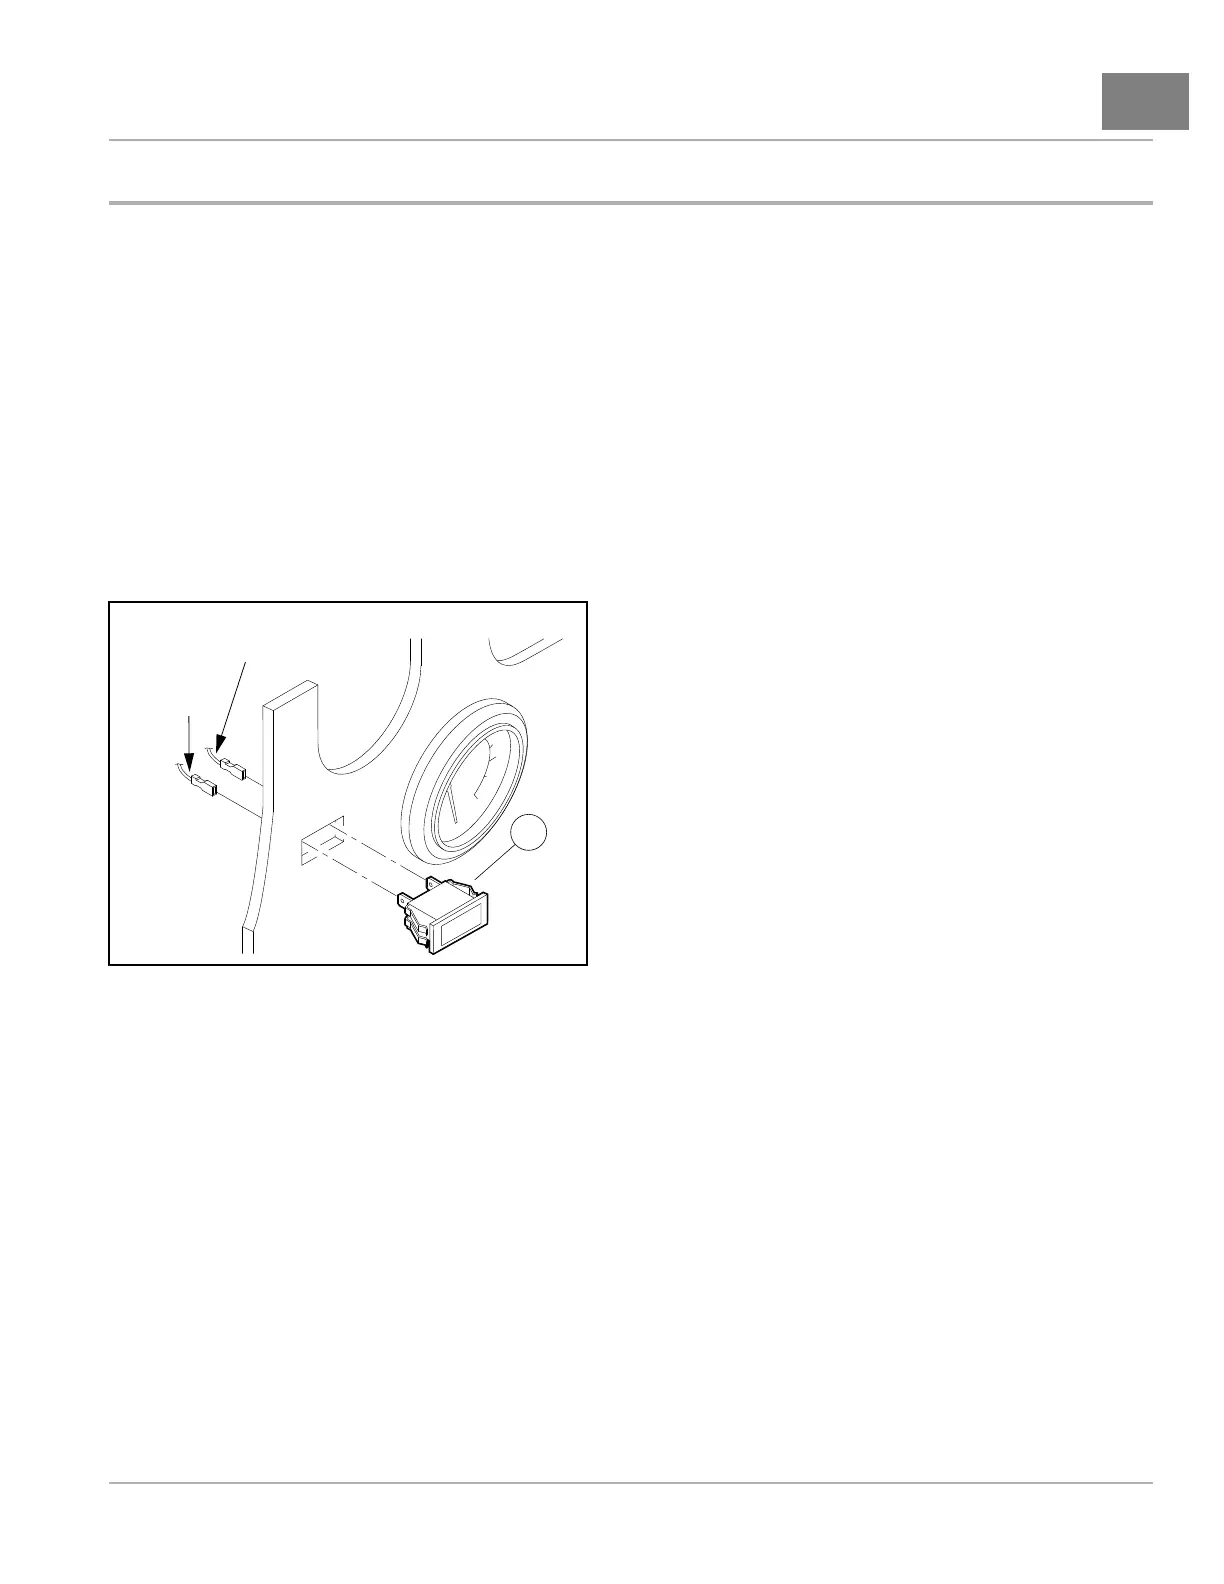
3.Disconnectthewiresfromthelowoilwarninglight(11)(Figure19-23,Page19-27).
4.Presstheretainingtabsandremovethelowoilwarninglightfromtheinstrumentpanel.
2436
Figure19-23LowOilWarningLight
LOWOILWARNINGLIGHTINSTALLATION
1.Pushanewunitintoholeininstrumentpaneluntilplastictabsengage(Figure19-23,Page19-27).
2.Connectyellowandyellow/whitewiresfromthewireharnesstothelowoilwarninglight.
3.Installtheinstrumentpanel.
3.1.Connecttheelectricalconnector(3)(Figure19-19,Page19-18).
3.2.Positiontheinstrumentpanel(2)onthedashassembly.Makesuretabsonupperedgeproperlyengage
withthecorrespondingslotsonthedashassembly.Ensurethattherearenowiresexposedorpinched
duringpositioning.
3.3.Secureinstrumentpaneltothedashassemblywiththreescrews(1).Tightenscrewsto1.8ft·lb(2.5N·m).
4.Connectbatteryandsparkplugwire(s).
SeeConnectingtheBattery-GasolineVehiclesonpage1-3.
2019PrecedentVillager2MaintenanceandServiceManualPage19-27

 Loading...