Engine Mechanical: 1D-75
4) Apply engine oil to the conrod cap bolts.
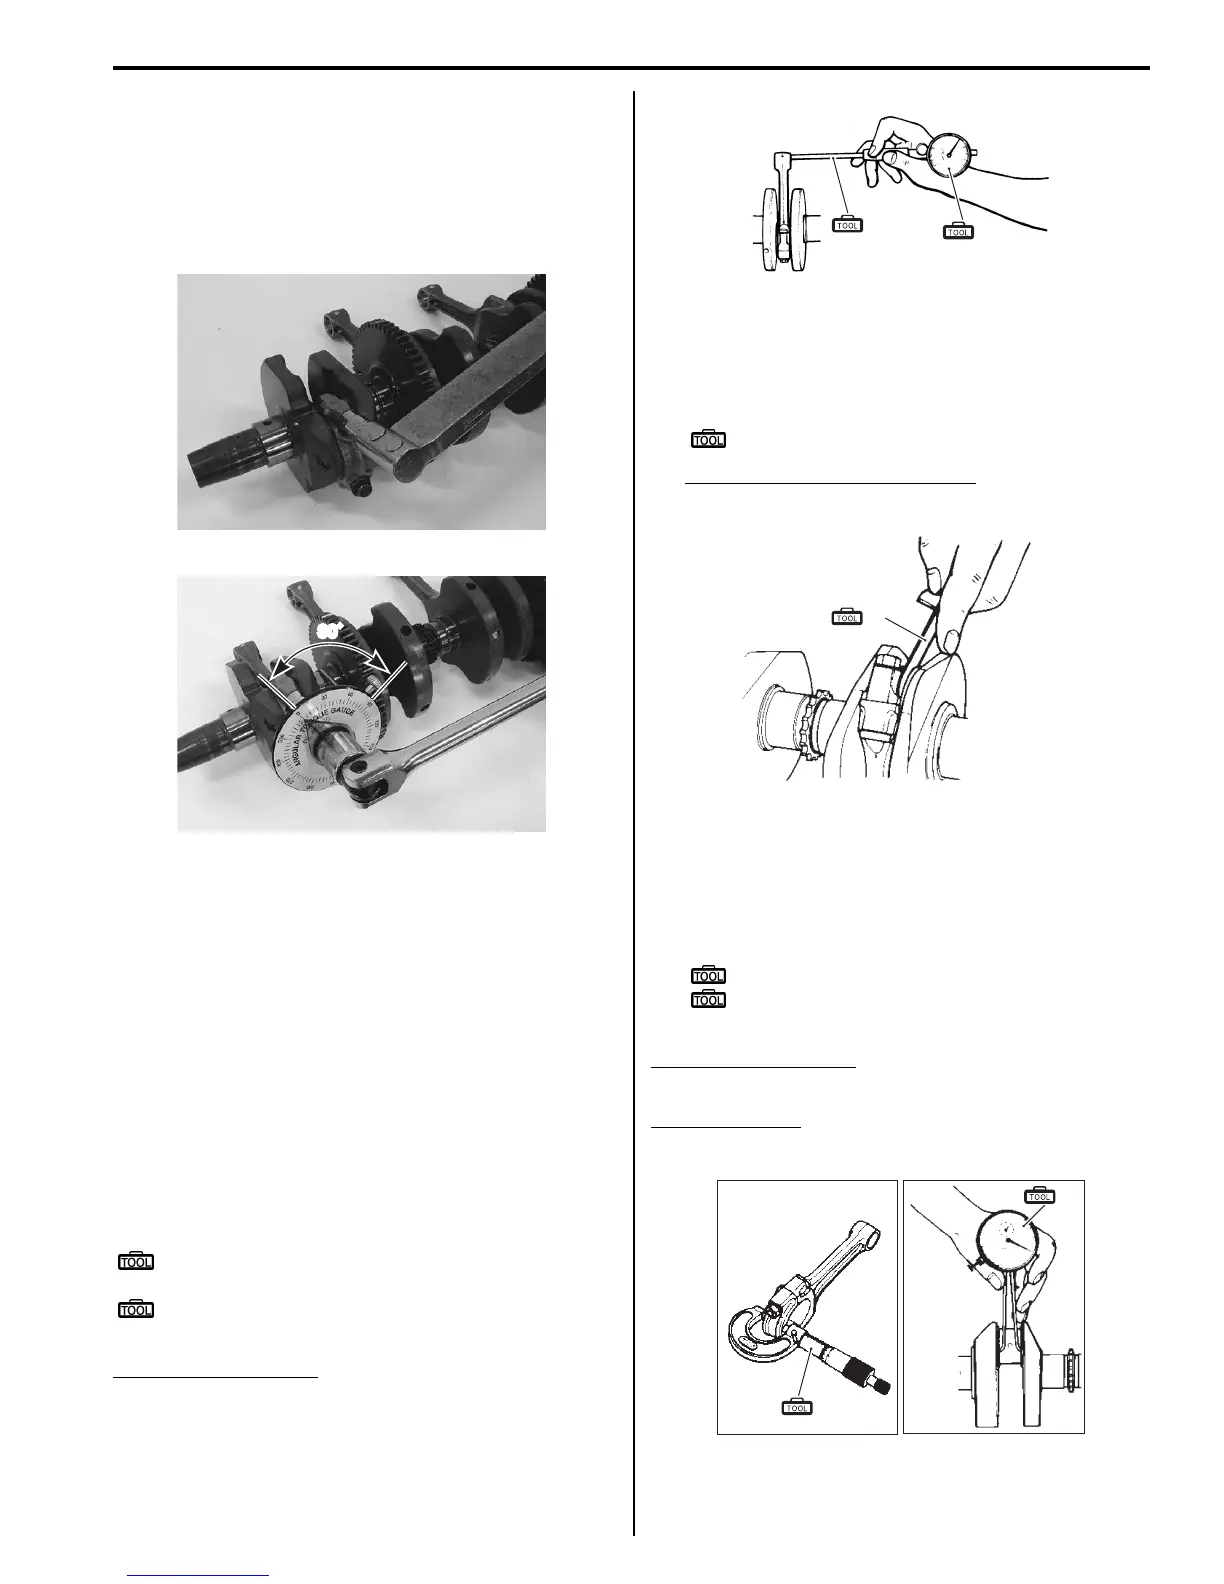
5) Tighten the conrod cap bolt by using a 10 mm, 12
point socket wrench in the following two steps.
Tightening torque
Conrod cap bolt: 21 N⋅m (2.1 kgf-m, 15.0 Ib-ft)
then turn in 1/4 (90°) turn.
6) Check that the conrod moves smoothly.
7) Install the crankshaft assembly to the crankcase.
Refer to “Engine Bottom Side Assembly (Page 1D-
61)”.
Conrod and Crankshaft Inspection
B718H11406027
Refer to “Conrod Removal and Installation (Page 1D-
74)”.
Conrod Small End I.D.
Measure the conrod small end inside diameter using the
small bore gauge.
If the conrod small end inside diameter exceeds the
service limit, replace the conrod.
Special tool
(A): 09900–20602 (Dial gauge (1/1000 mm, 1
mm))
(B): 09900–22403 (Small bore gauge (18 – 35
mm))
Conrod small end I.D.
Service limit: 18.040 mm (0.7102 in)
Conrod Big End Side Clearance
1) Check the conrod big end side clearance using the
thickness gauge.
Special tool
(A): 09900–20803 (Thickness gauge)
Conrod big end side clearance
Service limit: 0.3 mm (0.012 in)
2) If the clearance exceeds the limit, remove the conrod
and measure the conrod big end width and crank pin
width. Refer to “Conrod Removal and Installation
(Page 1D-74)”. If any of the measurements are out
of specification, replace the conrod or crankshaft.
Special tool
(B): 09900–20205 (Micrometer (0 – 25 mm))
(C): 09900–20605 (Dial calipers (1/100 mm,
10 - 34 mm))
Conrod big end width
Standard: 20.95 – 21.00 mm (0.825 – 0.827 in)
Crank pin width
Standard: 21.10 – 21.15 mm (0.831 – 0.833 in)
I718H1140275-01
90˚
I718H1140279-01
(B)
(A)
I718H1140280-01
(A)
I718H1140281-01
(B)
(C)
I718H1140282-01

 Loading...


