EasyManuals Logo

Brother PR655 Service Manual

Brother PR655
341 pages
To Next Page IconTo Next Page
To Previous Page IconTo Previous Page
Page #103 background imageLoading...
Page #103 background image
2 - 82
Operation panel
Main unit
Disassembly
Disassembly
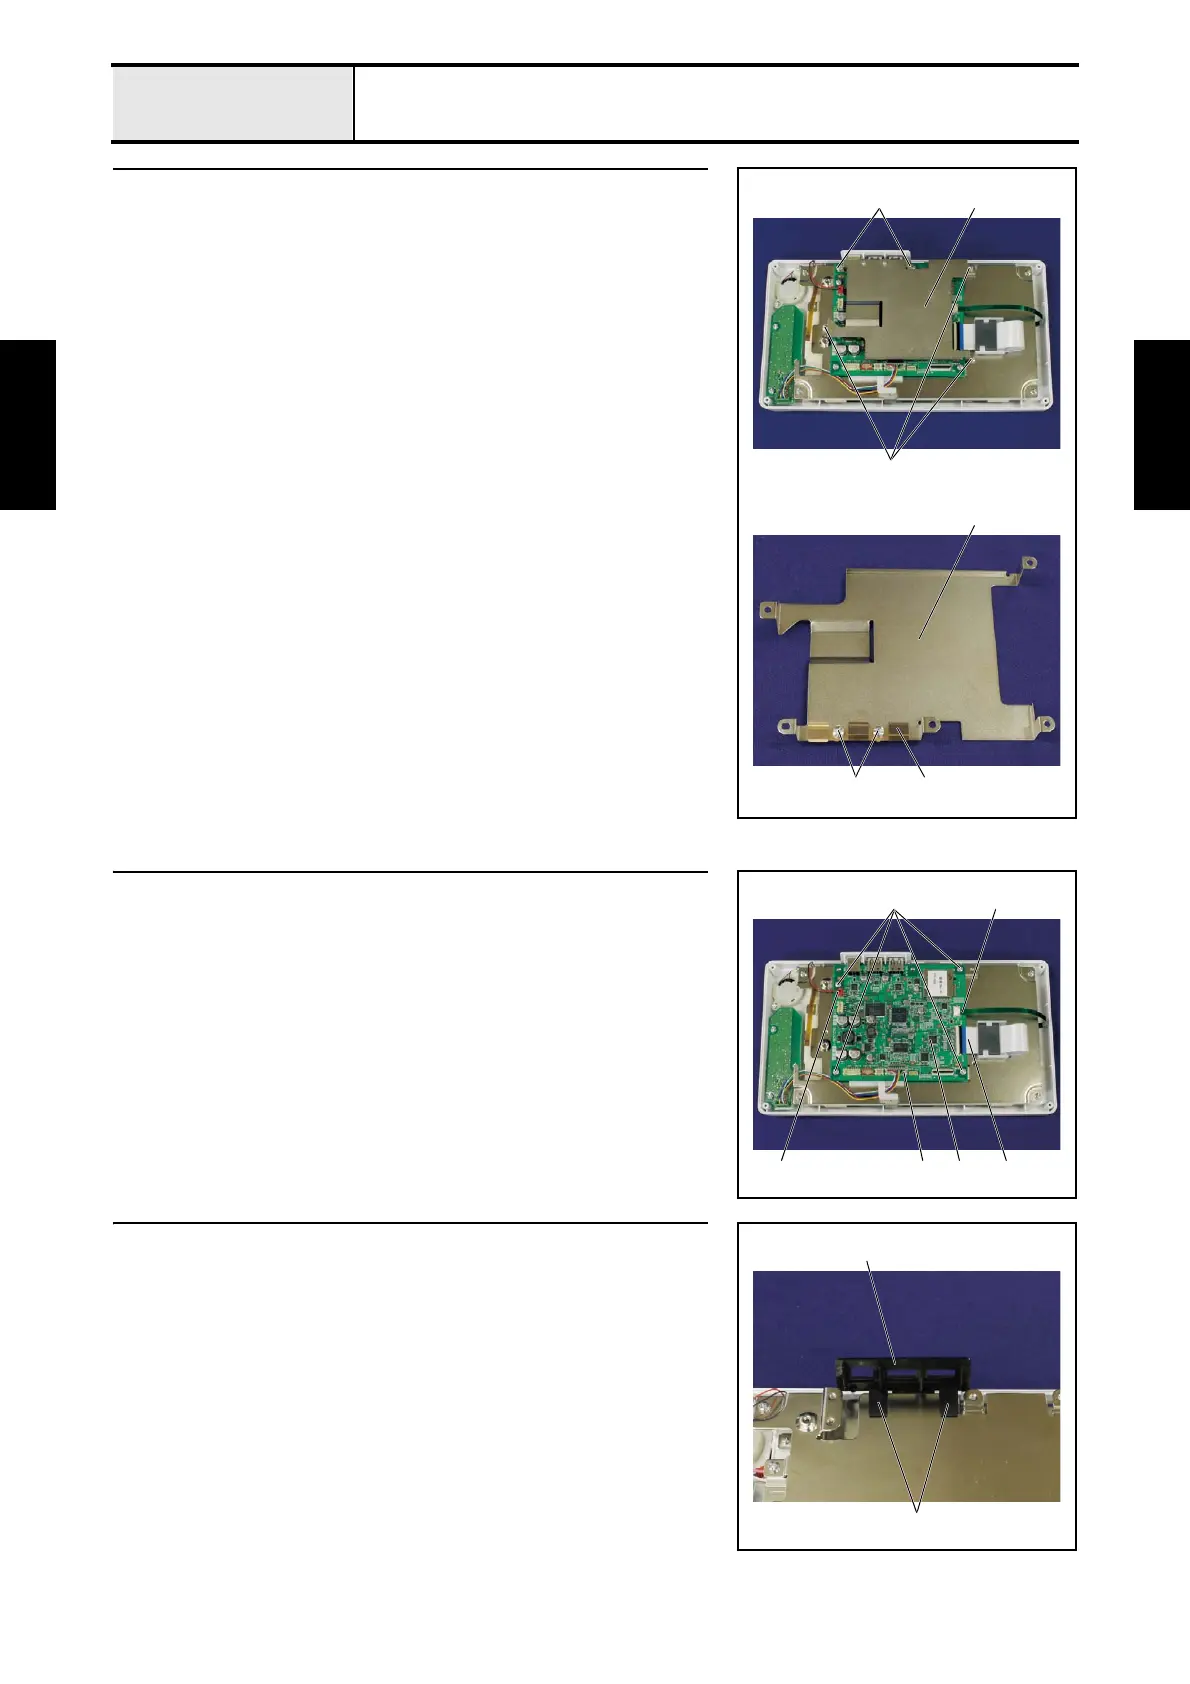
11 Panel PCB case removal
1. Remove the 5 screws 1, and then remove the panel PCB case 1.
2. Remove the 2 scerws 2, and then remove the ground plate USB 2 from
the panel PCB case 1.
1
1
1
1
2 2
12 Panel PCB assy removal
1. Remove the FFC 1 and the FFC 2 from the panel PCB assy 3.
2. Disconnect the connector 4 and connector 5 from the panel PCB assy 3.
3. Remove the 4 screws 1, and then remove the panel PCB assy 3.
1 2
4 135
13 USB cover removal
1. Release the 2 hooks 1, and then remove the USB cover 2 from the PCB
base plate.
2
1

Table of Contents

Other manuals for Brother PR655

Questions and Answers:

Question and Answer IconNeed help?

Do you have a question about the Brother PR655 and is the answer not in the manual?

Brother PR655 Specifications

General IconGeneral
Number of Needles6
Built-in Designs25
USB PortYes
LCD DisplayYes
TypeEmbroidery Machine
Built-in Fonts28
Maximum Speed1000 stitches per minute
Embroidery Area300mm x 200mm

Related product manuals