4 - 29
Inspection and
Adjustment
Inspection and
Adjustment
Adjustment Needle threader (left/right)
[Standard]
The hook should be passed through the needle eye.
[Adjustment]
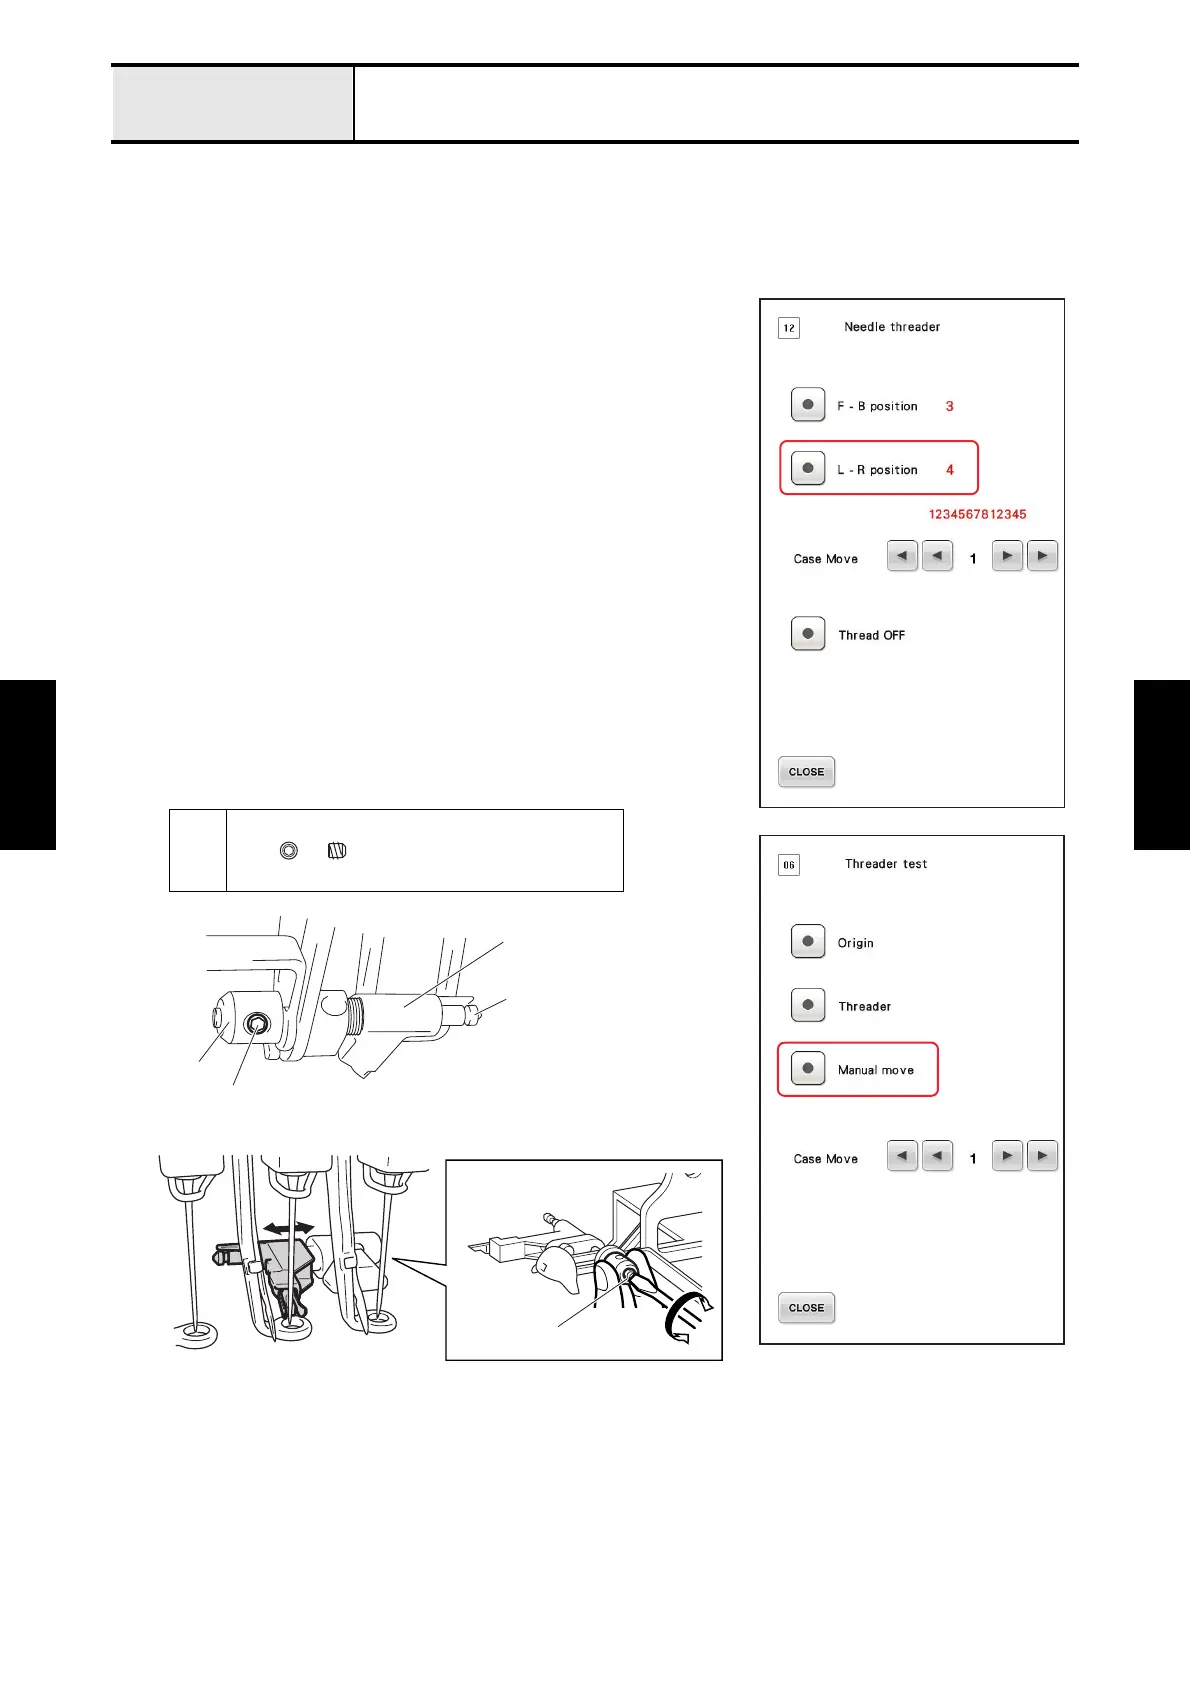
1. Start the test mode and select [#12: Needle threader] under [MAIN
BOARD TEST MODE].
2. Press the [L-R position] and the standard needle bar for adjustment
will be selected automatically. The needle bar case unit will move to
the left and right.
3. Press [CLOSE] to return to the test mode selection screen and select
[#06: Threader test].
4. Press [Manual move] and move the hook to the front of the needle
eye.
5. Loosen the screw 1 of the hook holder assy.
*Key point
• Turn the bush by hand to change the direction of the screw hole.
6. Rotate the hook holder axis B of the hook holder assy while holding
the bush by hand, and adjust the left/right position of the hook.
7. Tighten the screw 1 of the hook holder assy and secure the hook
holder axis B.
8. Re-press [Manual move] to return the hook to its original position.
9. Check that the hook passes through the needle eye for all needle
bars.
1
Set Screw, Socket (CP)
M3X3
1
Back side
Bush
Hook holder assy
Front side
with hex wrench 1.5 mm
Hook holder axis B
Hook holder axis B

 Loading...


