3 - 36
Upper shaft unit
Main unit
Assembly
Assembly
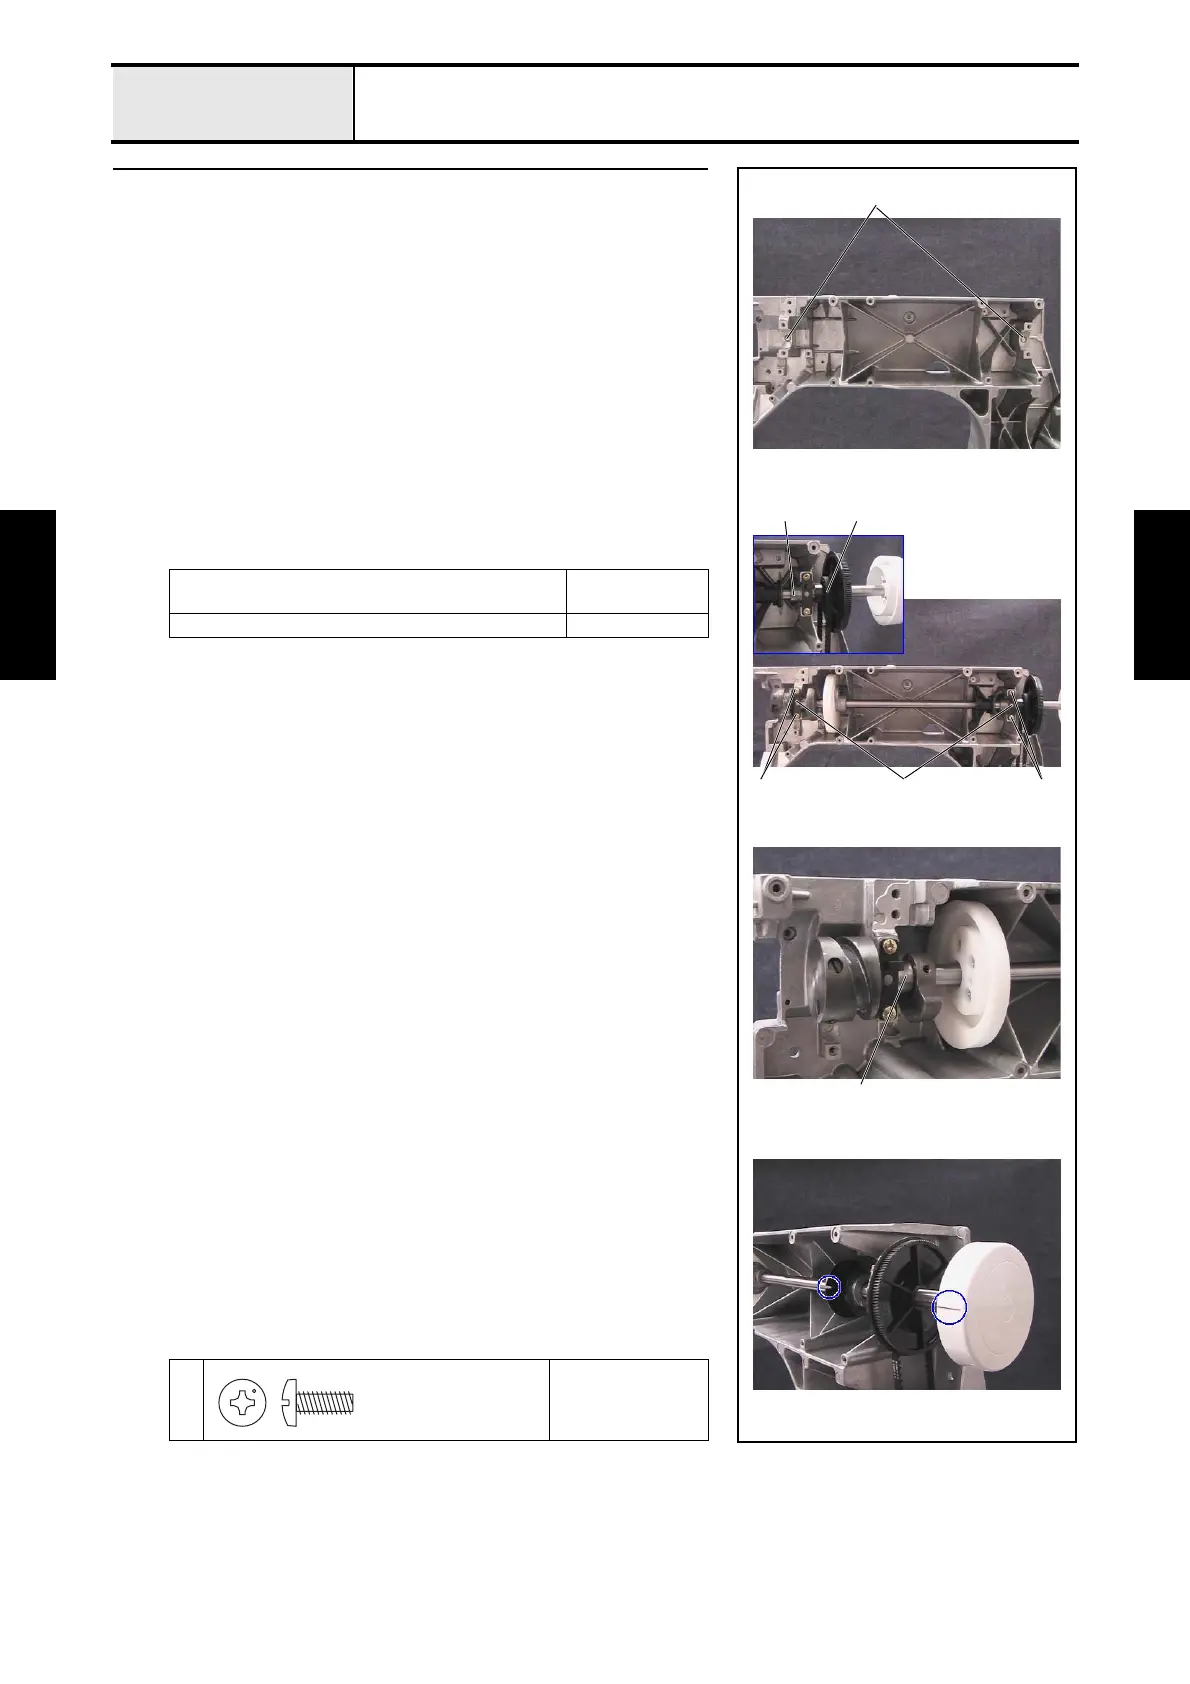
2 Upper shaft assembly attachment
1. Apply FBK OIL RO100 to the 2 felts 1.
2. Attach the felt 1 to the lower shaft metal collar on the arm bed. (2
locations)
3. Hang the T-belt (S5M-525) currently on the lower shaft over the timing
pulley of the upper shaft final assembly 2. Align the upper shaft final
assembly's 2 upper shaft metals with the upper shaft metal collars on the
arm bed, and attach the upper shaft to the arm bed.
*Key point
• Be careful not to damage the encoder.
4. Secure the 2 metal pressers 3 with the 4 screws 1.
5. Apply MOLYKOTE EM-30L to the groove on the presser foot cam and
thread take-up cam.
6. Apply oiler to the upper shaft metal 4.
7. Align the notch on the encoder base with the pulley's base line, and attach
the pulley to the upper shaft assembly.
Apply MOLYKOTE EM-30L to the groove on the
presser foot cam and thread take-up cam.
Cam groove
circumference
Apply oiler to the upper shaft metal. 1 to 2 drops
1
Torque
1.47 — 1.96 N-m
1
4
4
1
2
13
Taptite, Bind S
M4X10

 Loading...


