3 - 45
Upper shaft unit
Main unit
Assembly
Assembly
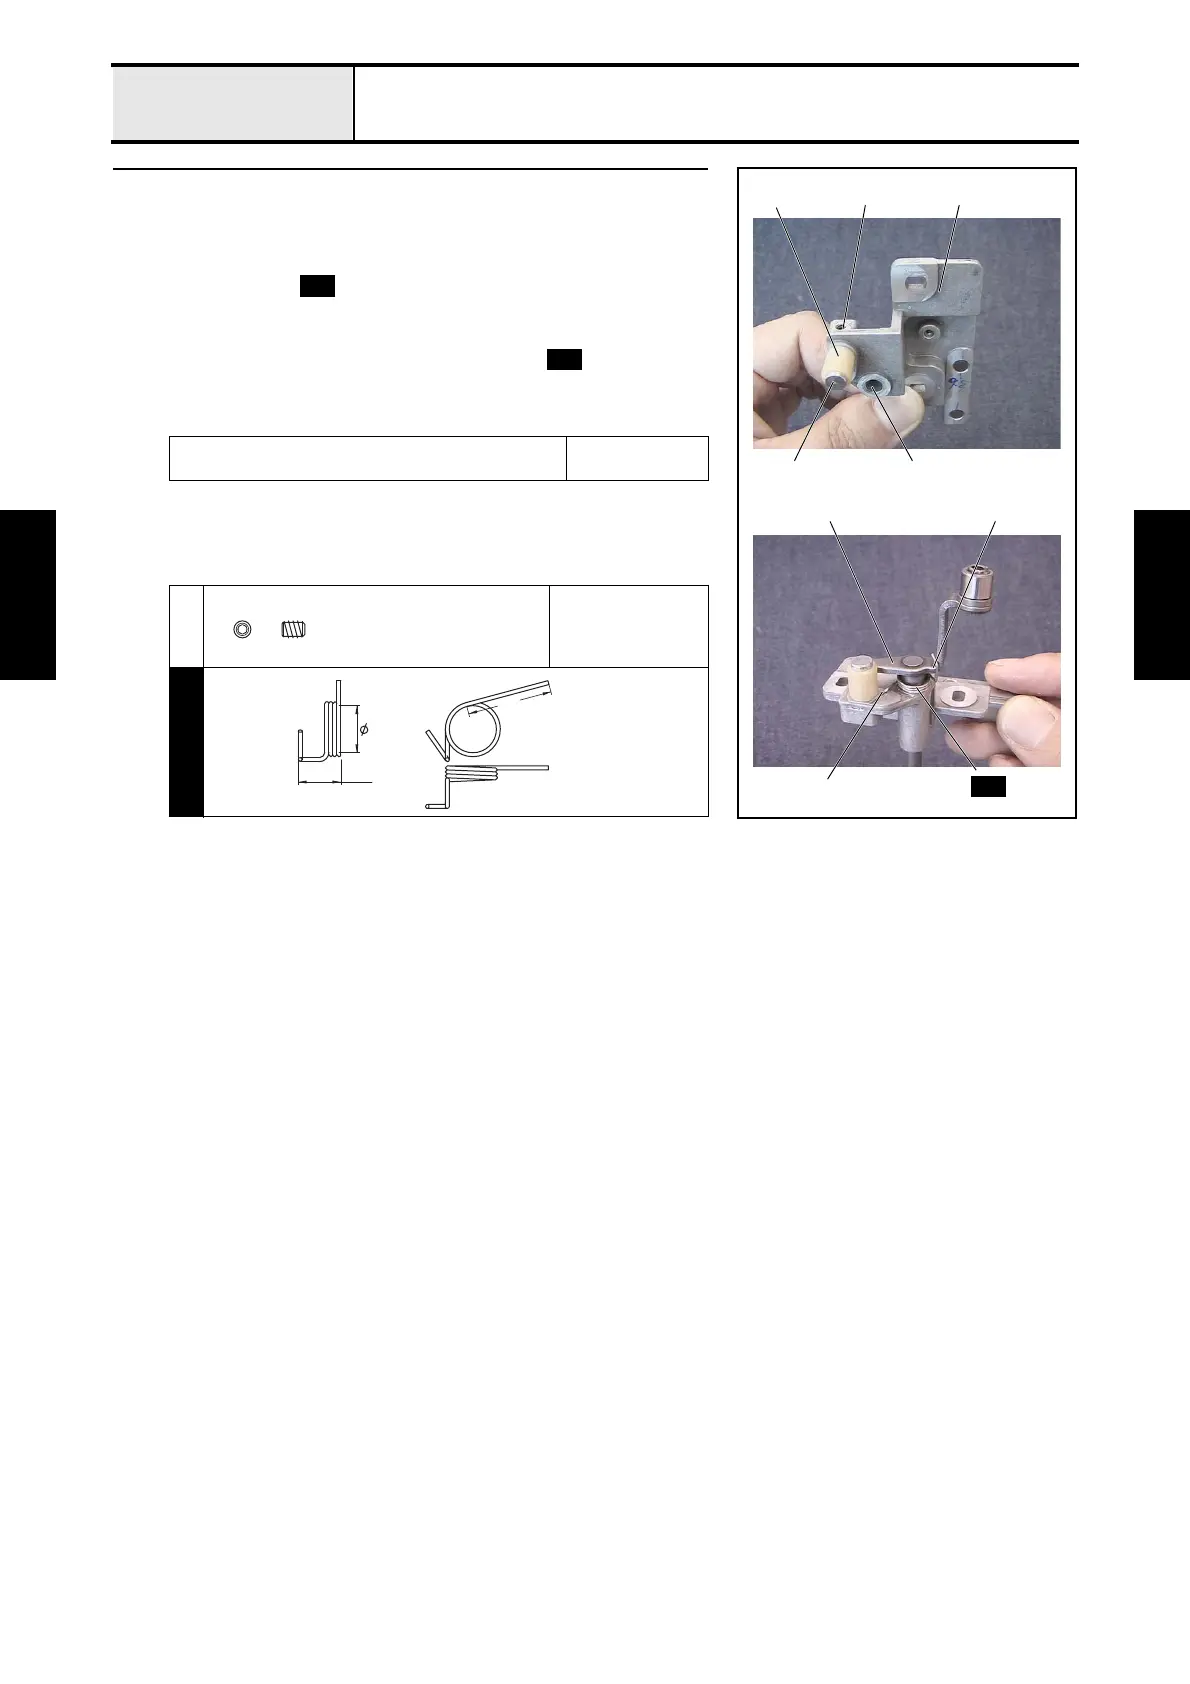
12 Driving jump assembly (1)
1. Attach the J cushion pin 2 and the J cushion 3 to the J base assembly 1,
and then tighten the screw 1.
2. Apply MOLYKOTE EM-30L to the shaft hole 4 on the J base assembly.
3. Thread the spring through the shaft of the J driving level assembly 5,
and insert the J driving lever assembly 5 to the J base assembly.
*Key point
• Hang the U-shaped hook 6 of the spring over the J
driving lever assembly, and then the other hook 7 over the J
cushion 3.
Apply MOLYKOTE EM-30L to the shaft hole on the J
base assembly.
Size of a grain of
rice
1
Torque
0.59 — 0.78 N-m
S46
3
6
7
1
2 4
5
S46
1
S46
S46
Set Screw, Socket (FT)
M3X4
J LEVER SPRING
XC5665***
29
8.3
15

 Loading...


