3 - 7
Operation panel
Main unit
Assembly
Assembly
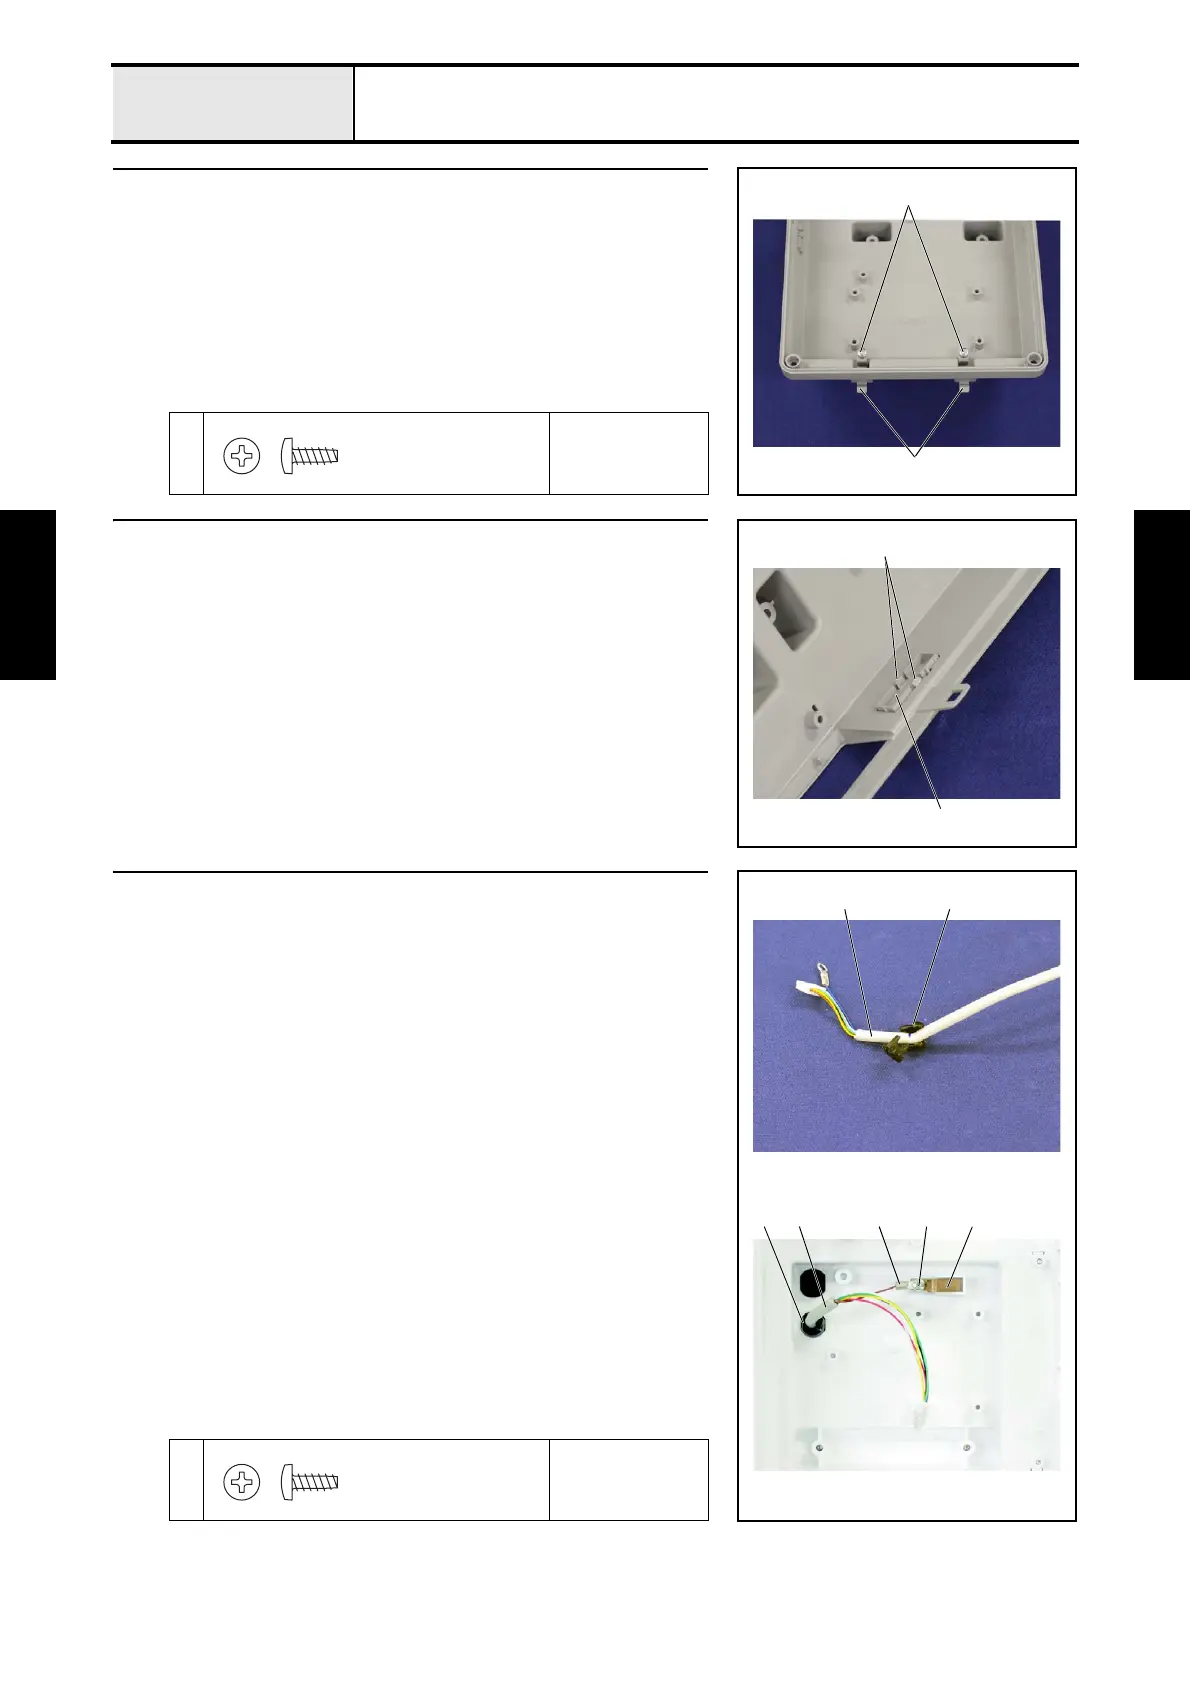
10 Pen holder attachment
1. Attach the 2 pen holders 1 to the panel rear cover with the 2 screws 1.
1
Torque
0.59 — 0.78 N-m
1
1
Taptite, Bind B
M3X8
11 Card cover attachment
1. Attach the card cover 1 to the panel rear cover.
*Key point
• Check that 2 hooks 2 of the card cover 1 hang on the panel
rear cover.
1
2
12 Lead wire assy panel attachment
1. Attach the cord bushing 1 to the lead wire assy panel 2.
*Key point
• Open the lid of the cord bushing 1, attach the cord bushing 1
to the lead wire, and then close the lid.
2. Insert the lead wire assy panel 2 from the back of the panel rear cover as
shown in the photo on the right.
*Key point
• Make sure that the lock holding the cord bushing 1
completely passes through the hole until it reaches the inside
of the panel rear cover.
3. Attach the ground spring 3 and the ground wire 4 of the lead wire assy
panel 2 to the panel rear cover with the screw 1.
1
Torque
0.59 — 0.78 N-m
14 321
12
Taptite, Bind B
M3X8

 Loading...


