3 - 14
Thread tension unit
Main unit
Assembly
Assembly
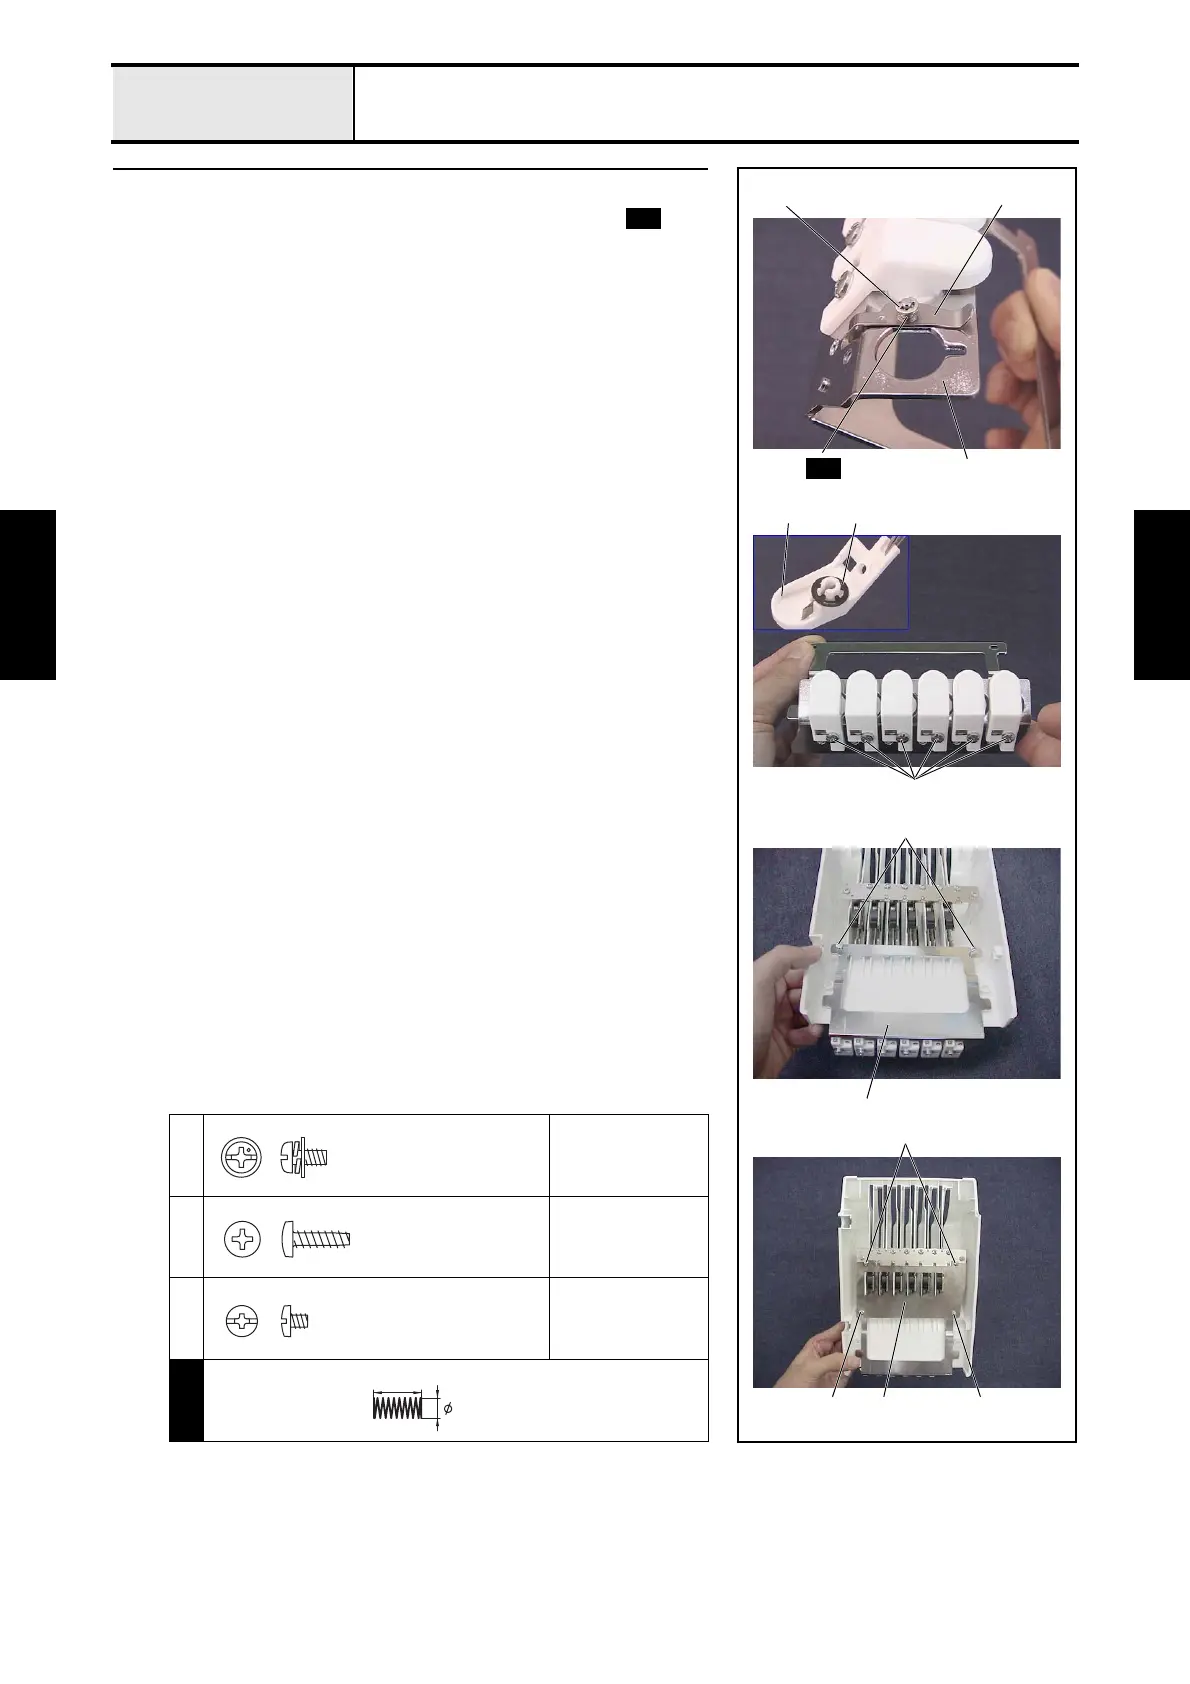
3 Thread take-up lever cover assembly (Step 2)
1. Attach the 6 needle thread presser plates 2 and the 6 springs to the
thread holder base 1, and then attach the 6 retaining rings E1.5.
2. Attach the NT lower thread cutter to the cutter cover 3, and then attach the
6 retaining rings CS5.
3. Attach the cutter cover assembly to the needle thread presser plates with
the screw 1. (6 locations)
4. Temporarily secure the thread holder base to the thread take-up lever cover
with the 2 screws 2.
5. Attach the rear cover 4 with the 4 screws (3 4, 2 each).
*Key point
• Lift the rear cover 4 and secure it.
1
Torque
0.59 — 0.78 N-m
2
3
Torque
0.59 — 0.78 N-m
4
Torque
0.39 — 0.78 N-m
S50
Retaining rings E1.5 2
S50
1
Retaining rings CS5
1
3
4
3
34
2
4
S50
Screw, Pan (S/P washer)
M3X6
Taptite, Bind B
M3X10
Screw, Bind
M2.6X3
SPRING
XC5962***
3.4
5.5
 Loading...


