3 - 47
Upper shaft unit
Main unit
Assembly
Assembly
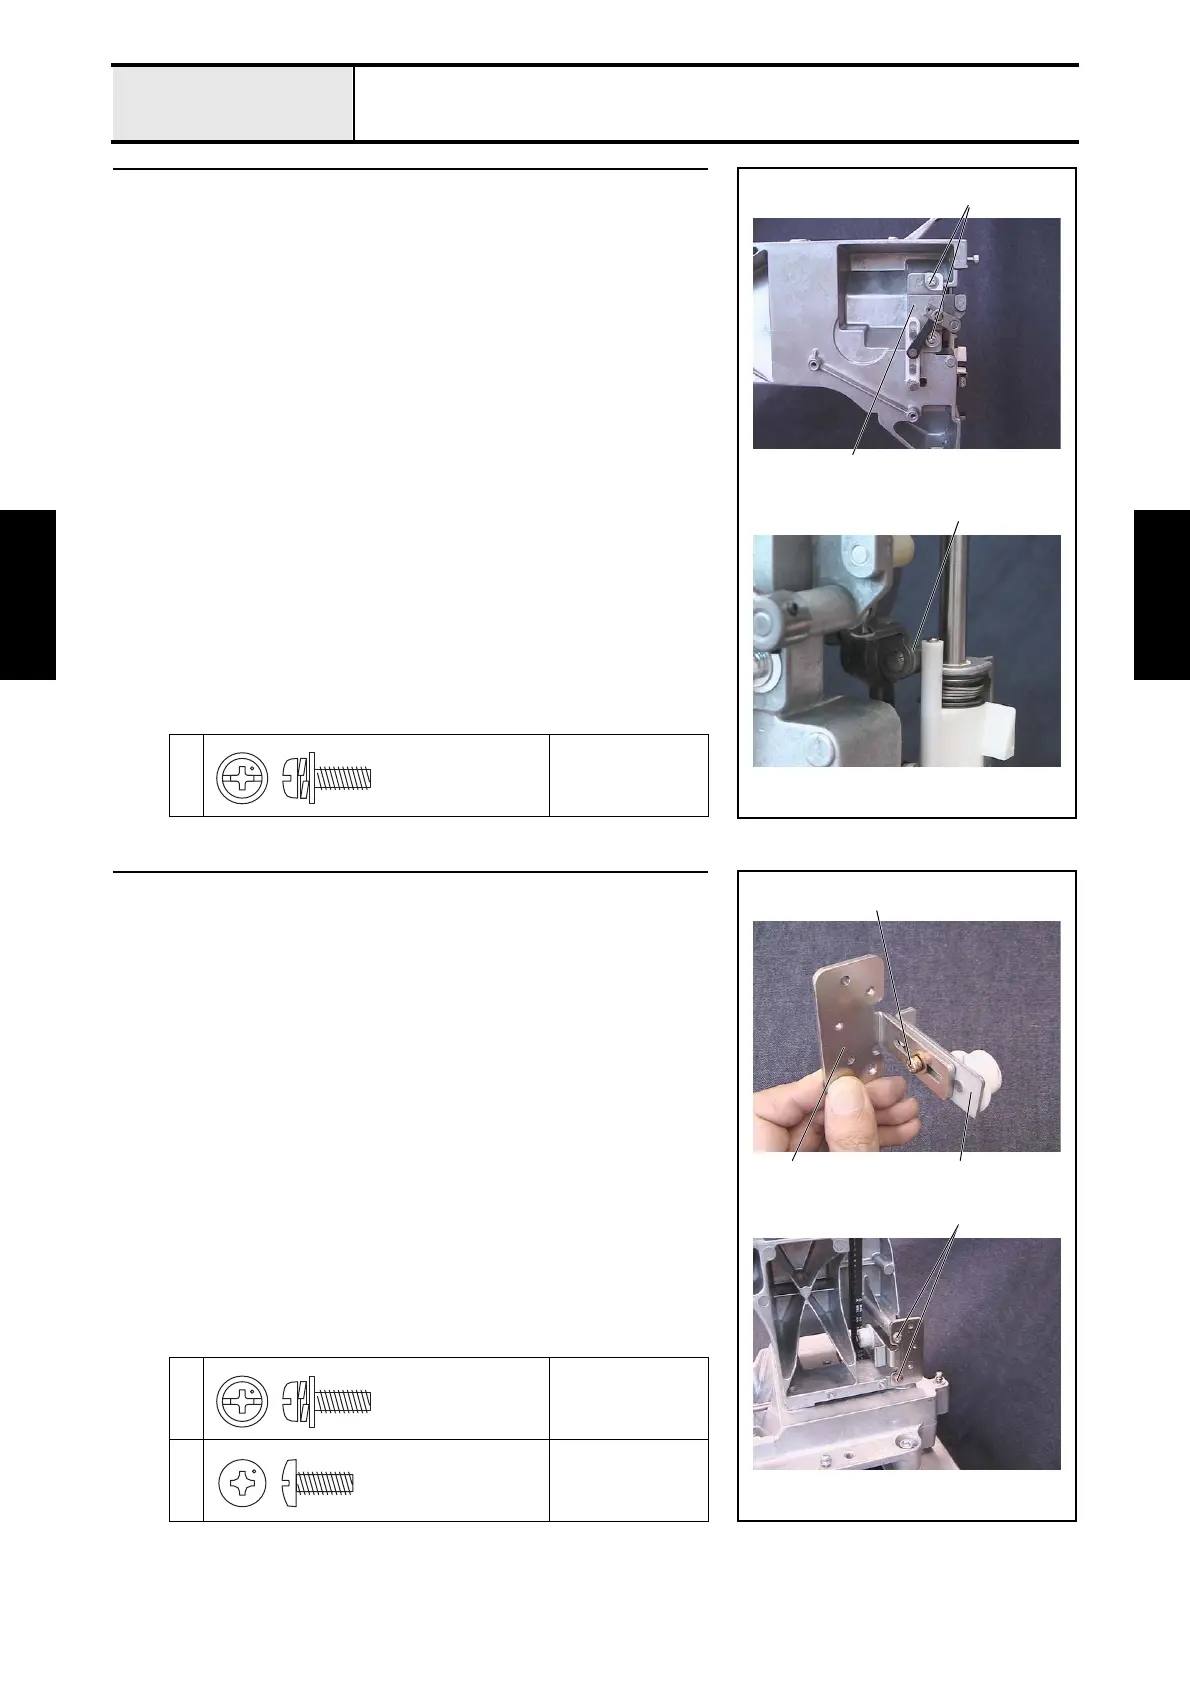
14 Driving jump assembly attachment
1. Attach the driving jump assembly 1 to the arm bed with the 2 screws 1.
*Key point
• Adjust the attachment position of the driving jump assembly 1
so that the clearance 2 between the driving jump assembly's
J driving lever bearing and the J-clamp final assembly's jump
bracket is 0 to 0.2 mm.
1
Torque
1.18 — 1.57 N-m
1
2
1
Screw, Pan (S/P washer)
M4X10
15 Tension pulley assembly attachment
1. Attach the tension pulley assembly 2 to the motor holder base 1 with the
screw 1.
*Key point
• Temporarily tighten the screw 1 first. Firmly tighten it after
completing 4 - 16 "Timing belt tension."
2.
Attach the tension pulley final assembly to the arm bed with the 2 screws
2.
1
Torque
Hand start
2
Torque
1.47 — 1.96 N-m
1
2
1 2
Screw, Pan (S/P washer)
M4X10
Taptite, Bind S
M4X10

 Loading...


