3 - 94
Main unit
Main unit
Assembly
Assembly
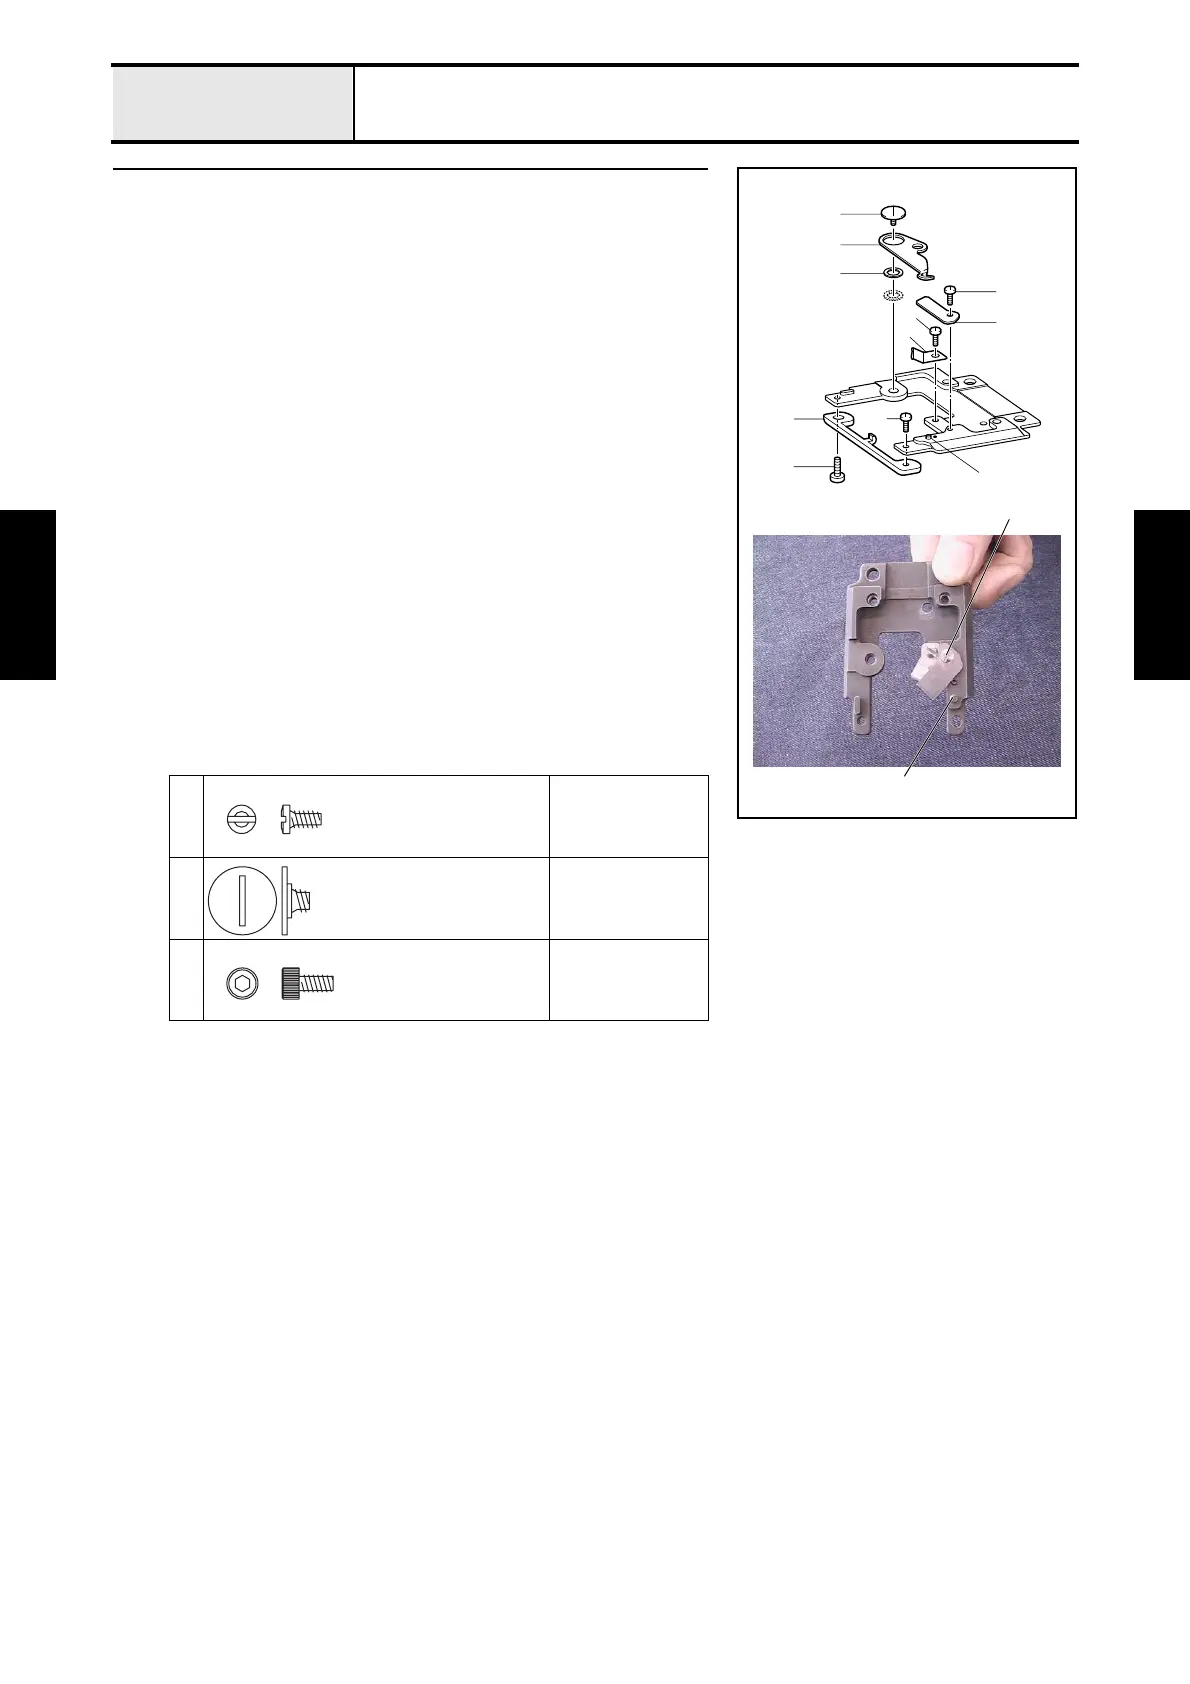
5 Needle plate base assembly
*Key point
• We recommend to replace the fixed knife 2 and movable
knife 4 at once.
• Adjust the following procedure after attaching the needle plate
assy to the arm bed when replacing the fixed knife 2 and
movable knife 4:
4 - 39 "Movable knife and Fixed knife engagement load"
4 - 33 "Movable knife initial position"
4 - 40 "Movable knife and Fixed knife pre-conditioning"
1. Attach the thread holding plate 1 to the needle plate base assembly with
the screw 1.
2. Attach the fixed knife 2 to the needle plate base assembly with the screw
2.
*Key point
• Tighten the screw 2 while pushing the fixed knife 2 against
the pin 3 on the needle plate base assembly.
3. Attach the movable knife 4 and the movable knife collar 5 to the needle
plate base assembly with the screw 3.
4. Attach the rotary hook stopper 6 to the needle plate base assembly with
the screws (4 5).
*Key point
• Temporarily tighten the screws 4 and 5 first. Firmly tighten
them after completing 4 - 24 "Rotary hook stopper clearance".
1
2
5
Torque
0.78 — 1.18 N-m
3
Torque
0.78 — 1.18 N-m
4
Torque
Hand start
3
4
5
6
4
3
5
1
1
2
2
3
2
Screw
Screw
M4
Bolt, Socket
M3X6

 Loading...


