3 - 48
Upper shaft unit
Main unit
Assembly
Assembly
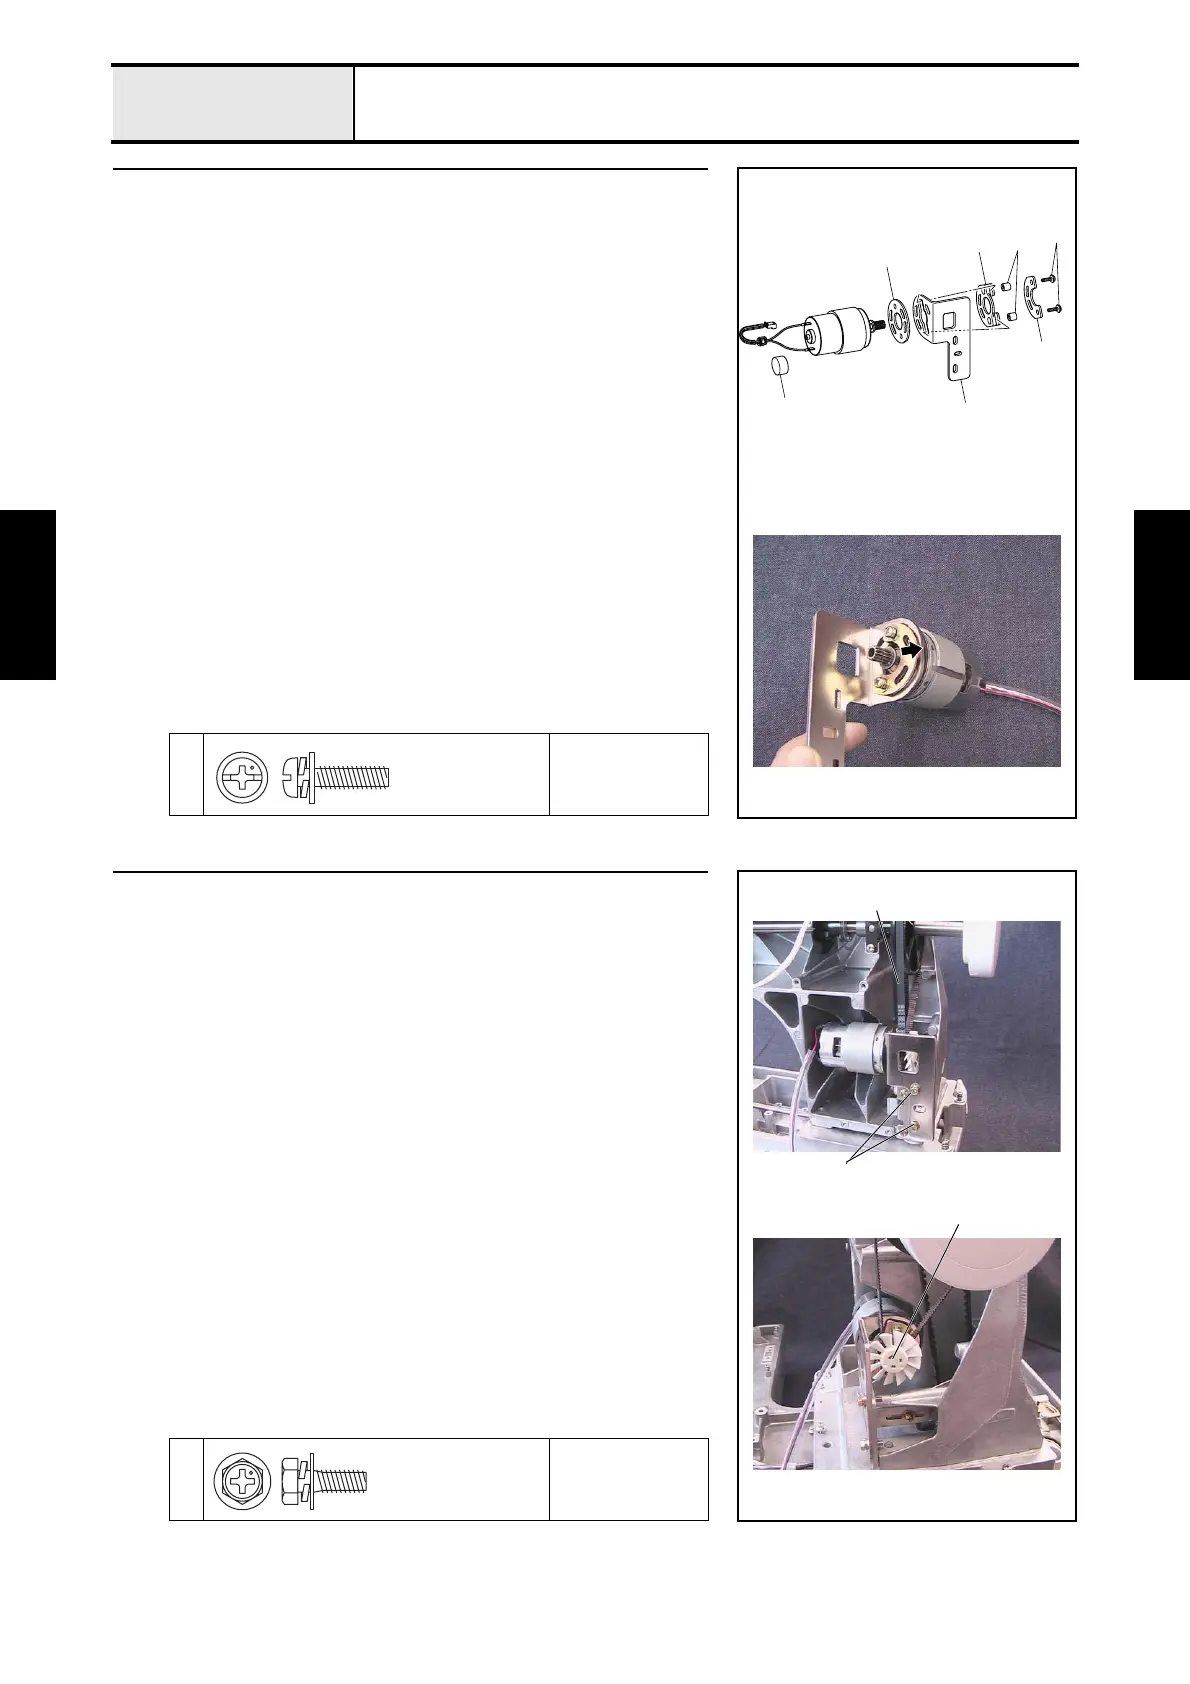
16 Main motor final assembly
1. Attach the motor cap 1 to the main motor assembly.
2. Attach the fender rubber 3 to the motor holder 2.
3. Attach the 2 spacers (4 x 7) 4 to the fender rubber 3.
4. Attach the motor holder spacer 5, motor holder assembly, and motor
spacer presser 6 to the main motor assembly with the 2 screws 1.
*Key point
• Tighten the screw 1 with the main motor moved in the
direction of the arrow.
1
Torque
1.18 — 1.57 N-m
1
3
5
4
6
2
1
Screw, Pan (S/P washer)
M4X16
17 Main motor final assembly attachment
1. Hang the T belt (XA9644-050) 1 over the pulley on the main motor
assembly and the pulley on the upper shaft assembly, and then attach the
main motor final assembly to the arm bed with the 2 screws 1.
*Key point
• Temporarily tighten the screw 1 first. Firmly tighten it after
completing 4 - 15 "Motor belt tension."
2. Attach the motor fan 2 to the pulley on the main motor assembly.
1
Torque
Hand Start
1
2
1
Upset
4X12DB

 Loading...


