3 - 95
Main unit
Main unit
Assembly
Assembly
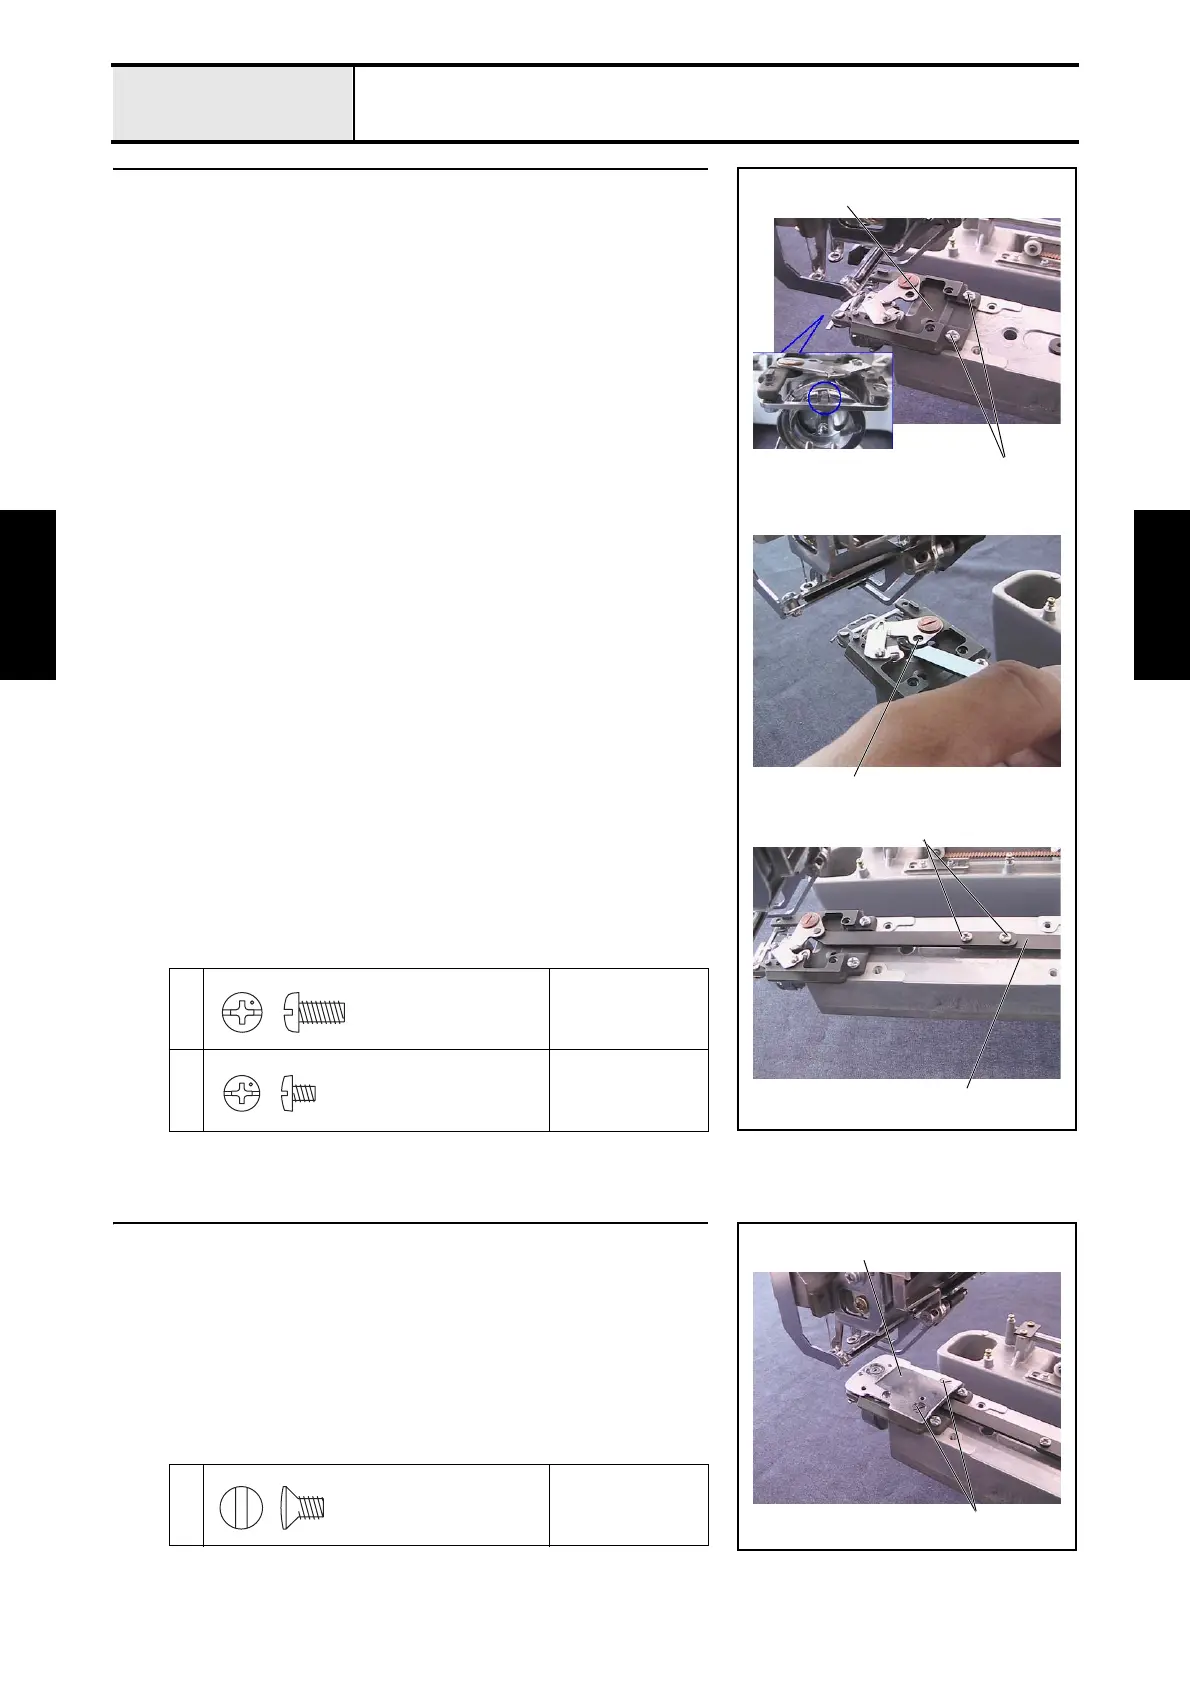
6 Needle plate base assembly attachment
1. Attach the needle plate base assembly 1 to the arm bed with the 2 screws
1.
*Key point
• Attach the needle plate base assembly 1 so that it is parallel
to the arm bed.
2. Attach the cutter link assembly's shaft 2 while aligning it with the hole on
the movable knife.
3. Connect the cutter unit's lever link assembly 3 to the cutter link assembly
with the 2 screws 2.
*Key point
• Temporarily tighten the screws 2 first. Firmly tighten them
after completing 4 - 33 "Movable knife initial position."
• Adjust the following procedure as well when replacing the
fixed knife and movable knife:
4 - 39 "Movable knife and Fixed knife engagement load"
4 - 40 "Movable knife and Fixed knife pre-conditioning"
1
Torque
1.18 — 1.57 N-m
2
Torque
Hand start
2
2
1
1
3
Screw, Pan
M4X8
Screw, Bind
M3X4
7 Needle plate attachment
1.
Attach the needle plate
1
to the needle plate base assembly with the 2 screws
1.
1
Torque
0.78 — 1.18 N-m
1
1
Screw Flat
M4

 Loading...


