3 - 53
Needle bar unit
Main unit
Assembly
Assembly
4 Case positioning plate assembly
1. Attach the ball case positioning shaft assy 2 to the case positioning plate
3 with the nut (2, M4) 1, spring washers (2-4), and plain washers (M4).
*Key point
• Temporarily tighten the nut (2, M4) 1 first. Firmly tighten
them after completing 3 - 58 "Needle bar case final assembly
attachment."
Tightening torque of nut (2, M4):
Temporary tightening:
Torque
Hand start
1
3 2
5 Case positioning plate assembly attachment
1. Attach the case positioning plate assembly 1 to the arm bed with the
screw 1 and the spring washer (2-5).
*Key point
• Temporarily tighten the screw 1 first. Firmly tighten it after
completing 4 - 17 "Needle drop (front/back)."
1
Torque
1.18 — 1.57 N-m
1
1
Bolt, Socket
M5X16
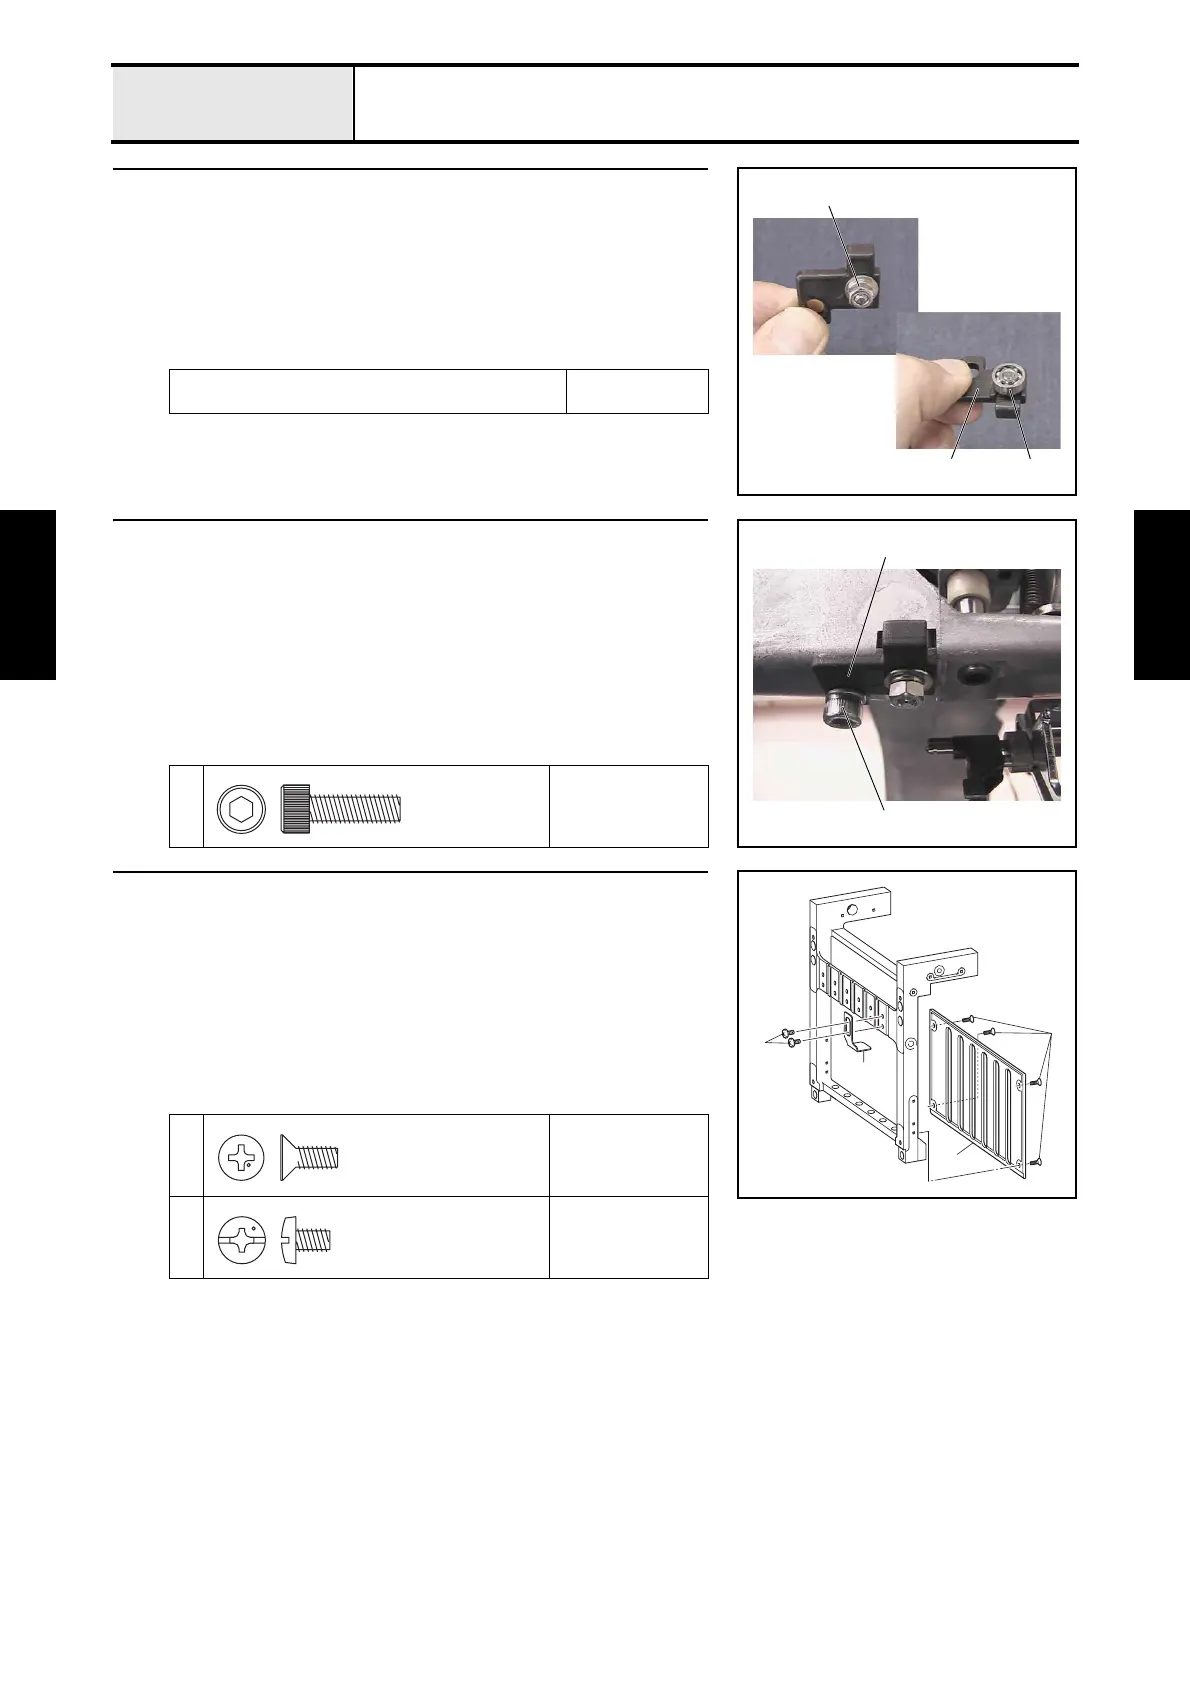
6 Needle bar case final assembly
1. Attach the needle bar guide rail 1 to the needle bar case assembly with the
4 screws 1.
2. Attach the top dead center plate 2 to the needle bar case assembly with the
2 screws 2. (6 locations)
*Key point
• Temporarily tighten the screw 2 first. Firmly tighten it after
completing 4 - 26 "Needle bar top dead center."
1
Torque
1.18 — 1.57 N-m
2
Torque
Hand start
2
1
1
2
Screw, Flat
M4X10
Screw, Bind
M4X6
 Loading...


