2 - 44
Needle bar unit
Main unit
Disassembly
Disassembly
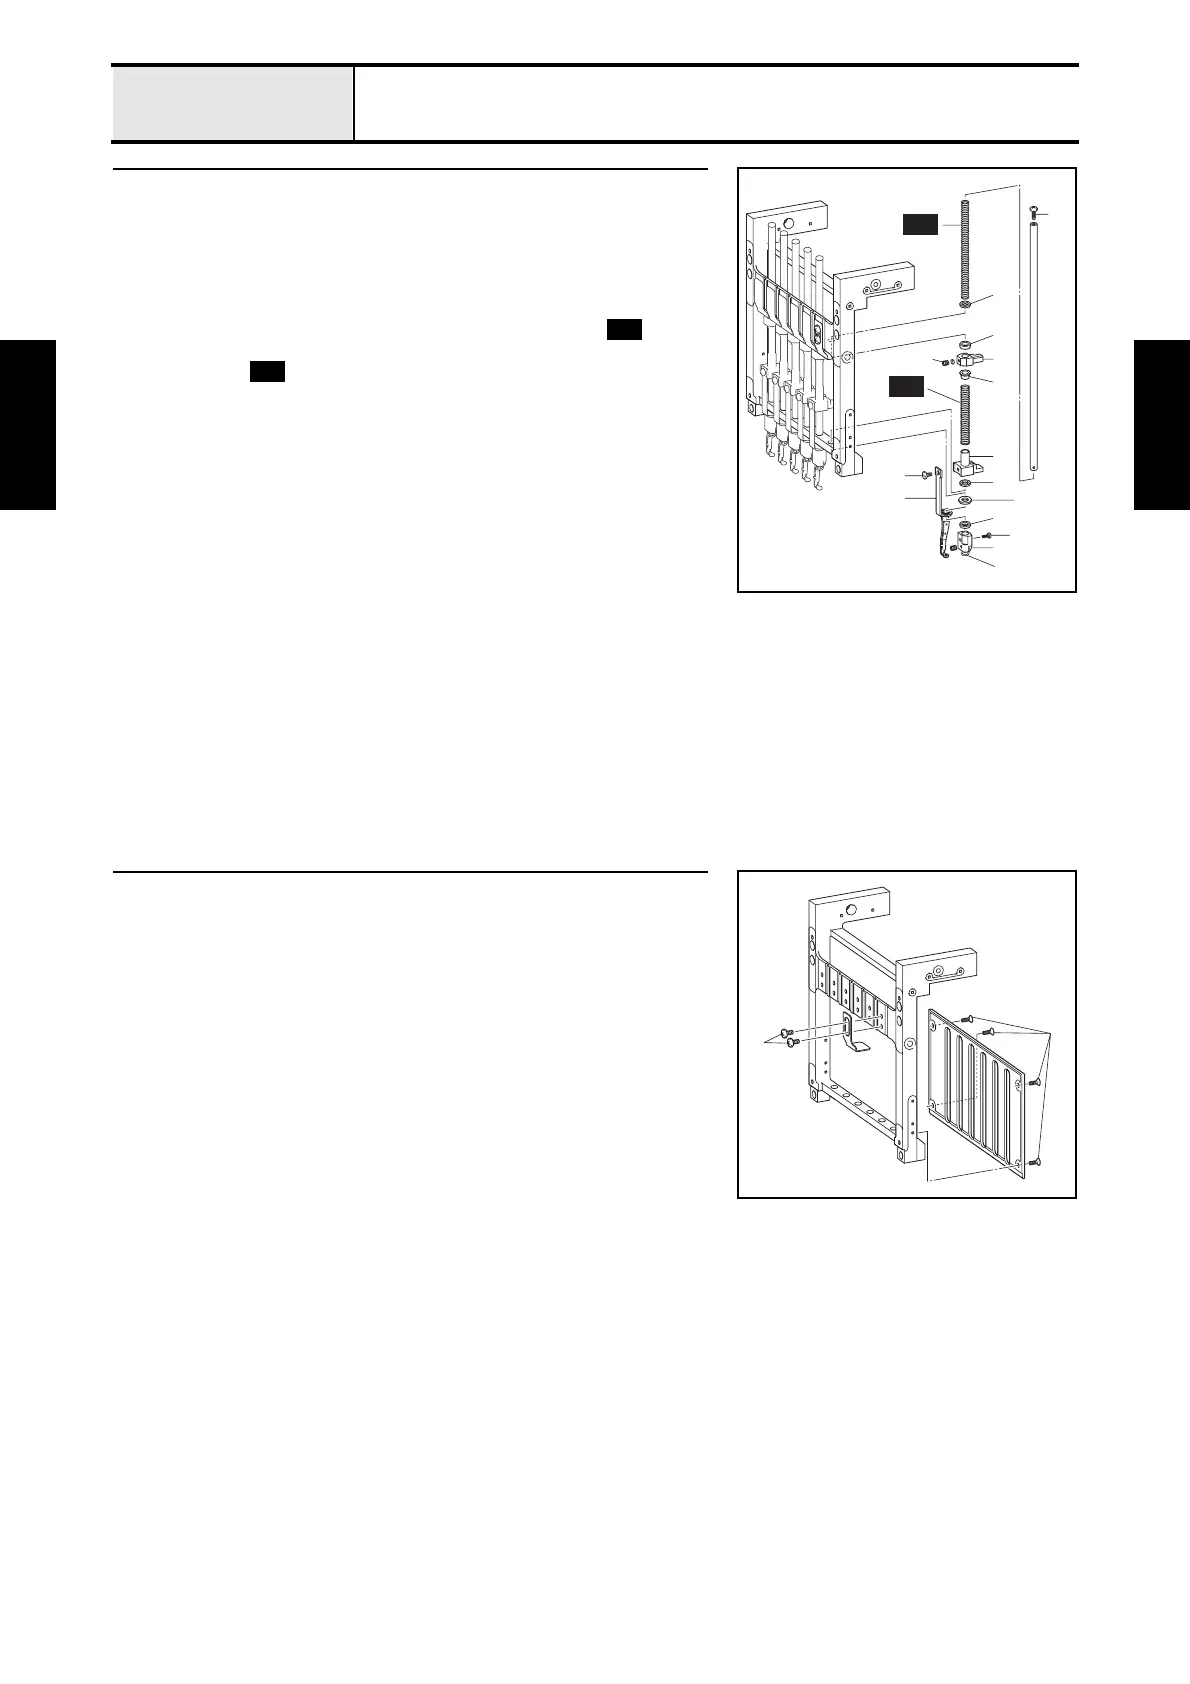
9 Needle bar removal
1. Remove the screw 1 and the washer. (6 locations)
2. Remove the screw 2. (6 locations)
3. Remove the screw 3, and then remove the thread guide 1, needle bar
thread guide 2, presser foot cushion 3, presser foot assembly 4, and felt
5. (6 locations)
4. Remove the felt (S, hard) 6, presser foot clamp 7, spring , presser
foot spring collar 8, needle bar clamp 9, cushion rubber ;, washer A,
and spring while pulling the needle bar upward. (6 locations)
5. Remove the screw 4 from the needle bar. (6 sets)
3
1
2
4
:
9
8
7
6
3
4
2
1
S47
S48
A
5
S48
S47
10 Needle bar case disassembly
1. Remove the 2 screws 1, and then remove the top dead center plate.
(6 locations)
2. Remove the 4 screws 2, and then remove the needle bar guide rail.
1
2

 Loading...


