3 - 38
Upper shaft unit
Main unit
Assembly
Assembly
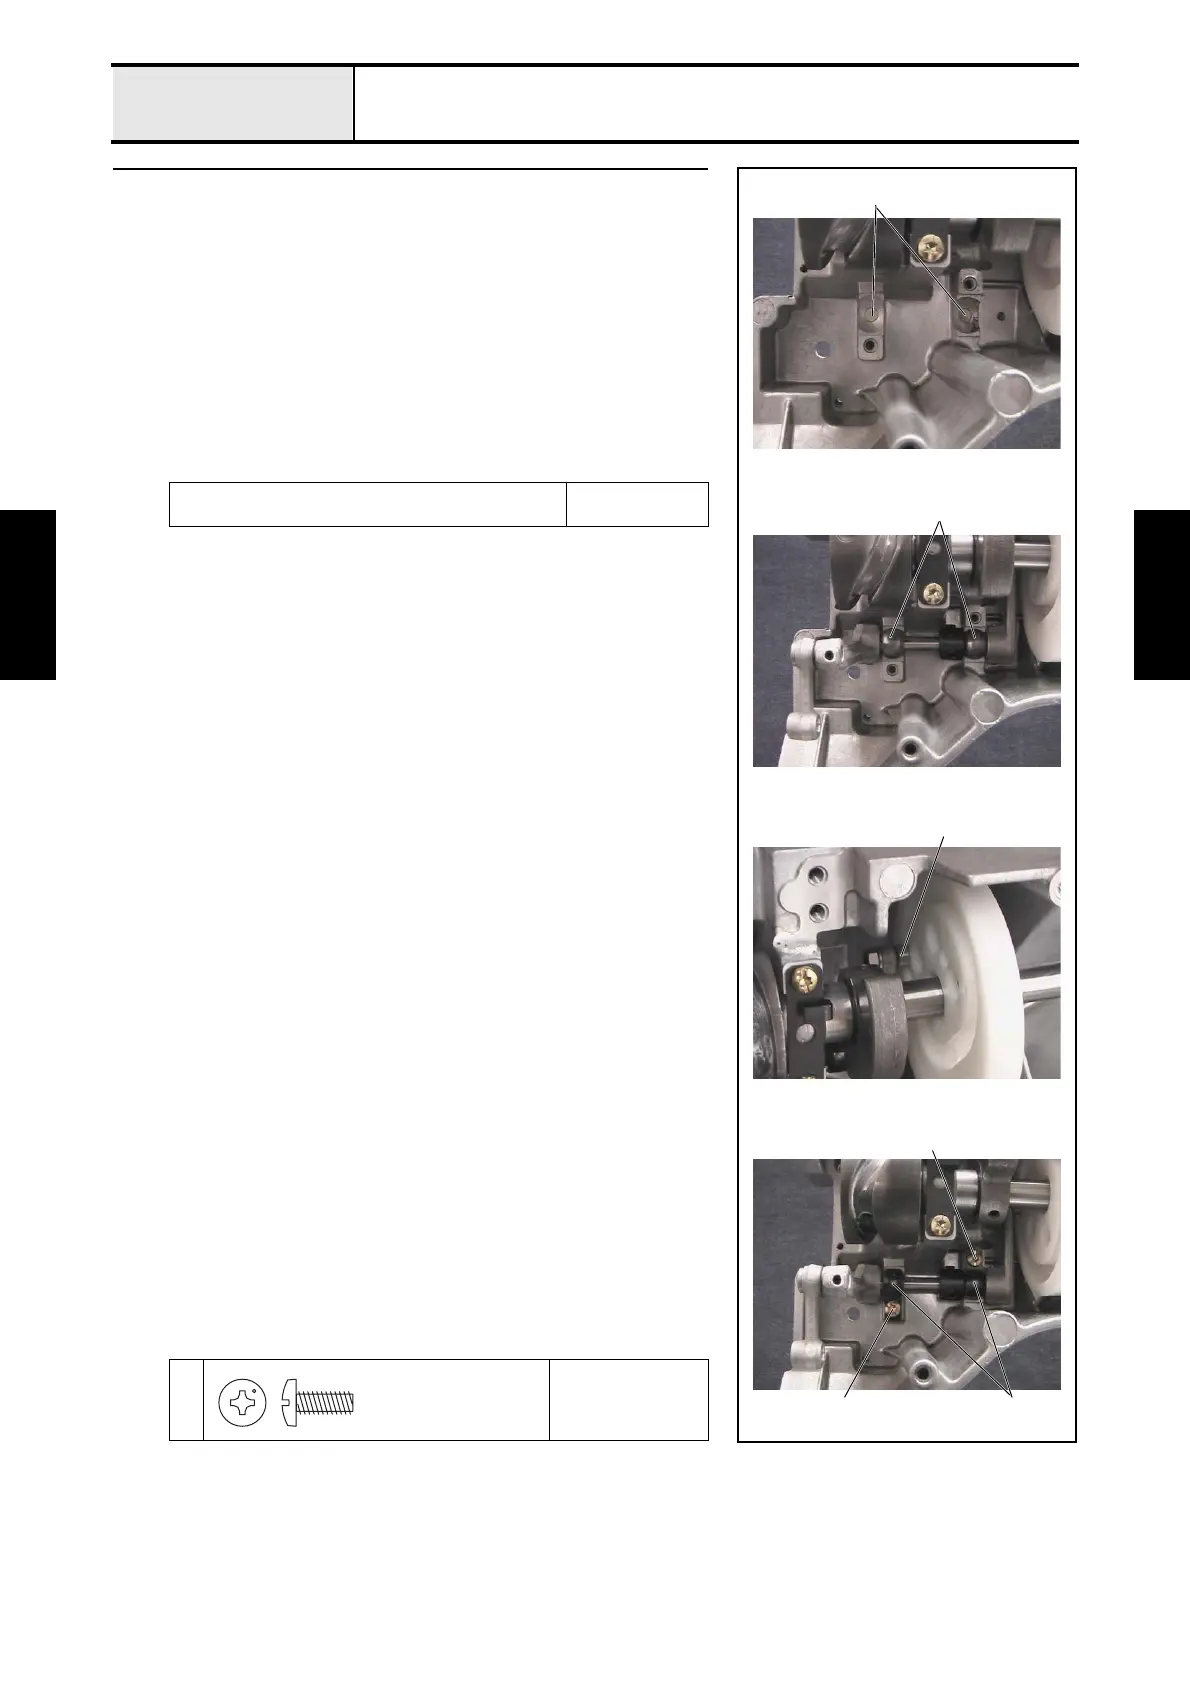
4 Presser foot driving shaft assembly attachment
1. Apply FBK OIL RO100 to the 2 felts 1.
2. Attach the felt 1 to the lower shaft metal collar on the arm bed. (2
locations)
3. Align the presser foot driving shaft assembly's 2 lower shaft metals 2 with
the lower shaft metal collars on the arm bed, and then attach the presser
foot driving shaft assembly to the arm bed.
*Key point
• Place the presser foot driving shaft assembly's roller 3 into
the groove on the presser foot cam.
4. Secure the 2 bushing pressers with the 2 screws 1.
5. Apply oiler to the presser foot driving shaft assembly's metal 4.
Apply oiler to the presser foot driving shaft assembly's
metal.
1 to 2 drops
1
Torque
1.47 — 1.96 N-m
1
2
1
3
1 4
Taptite, Bind S
M4X10

 Loading...


