3 - 64
Thread wiper unit
Main unit
Assembly
Assembly
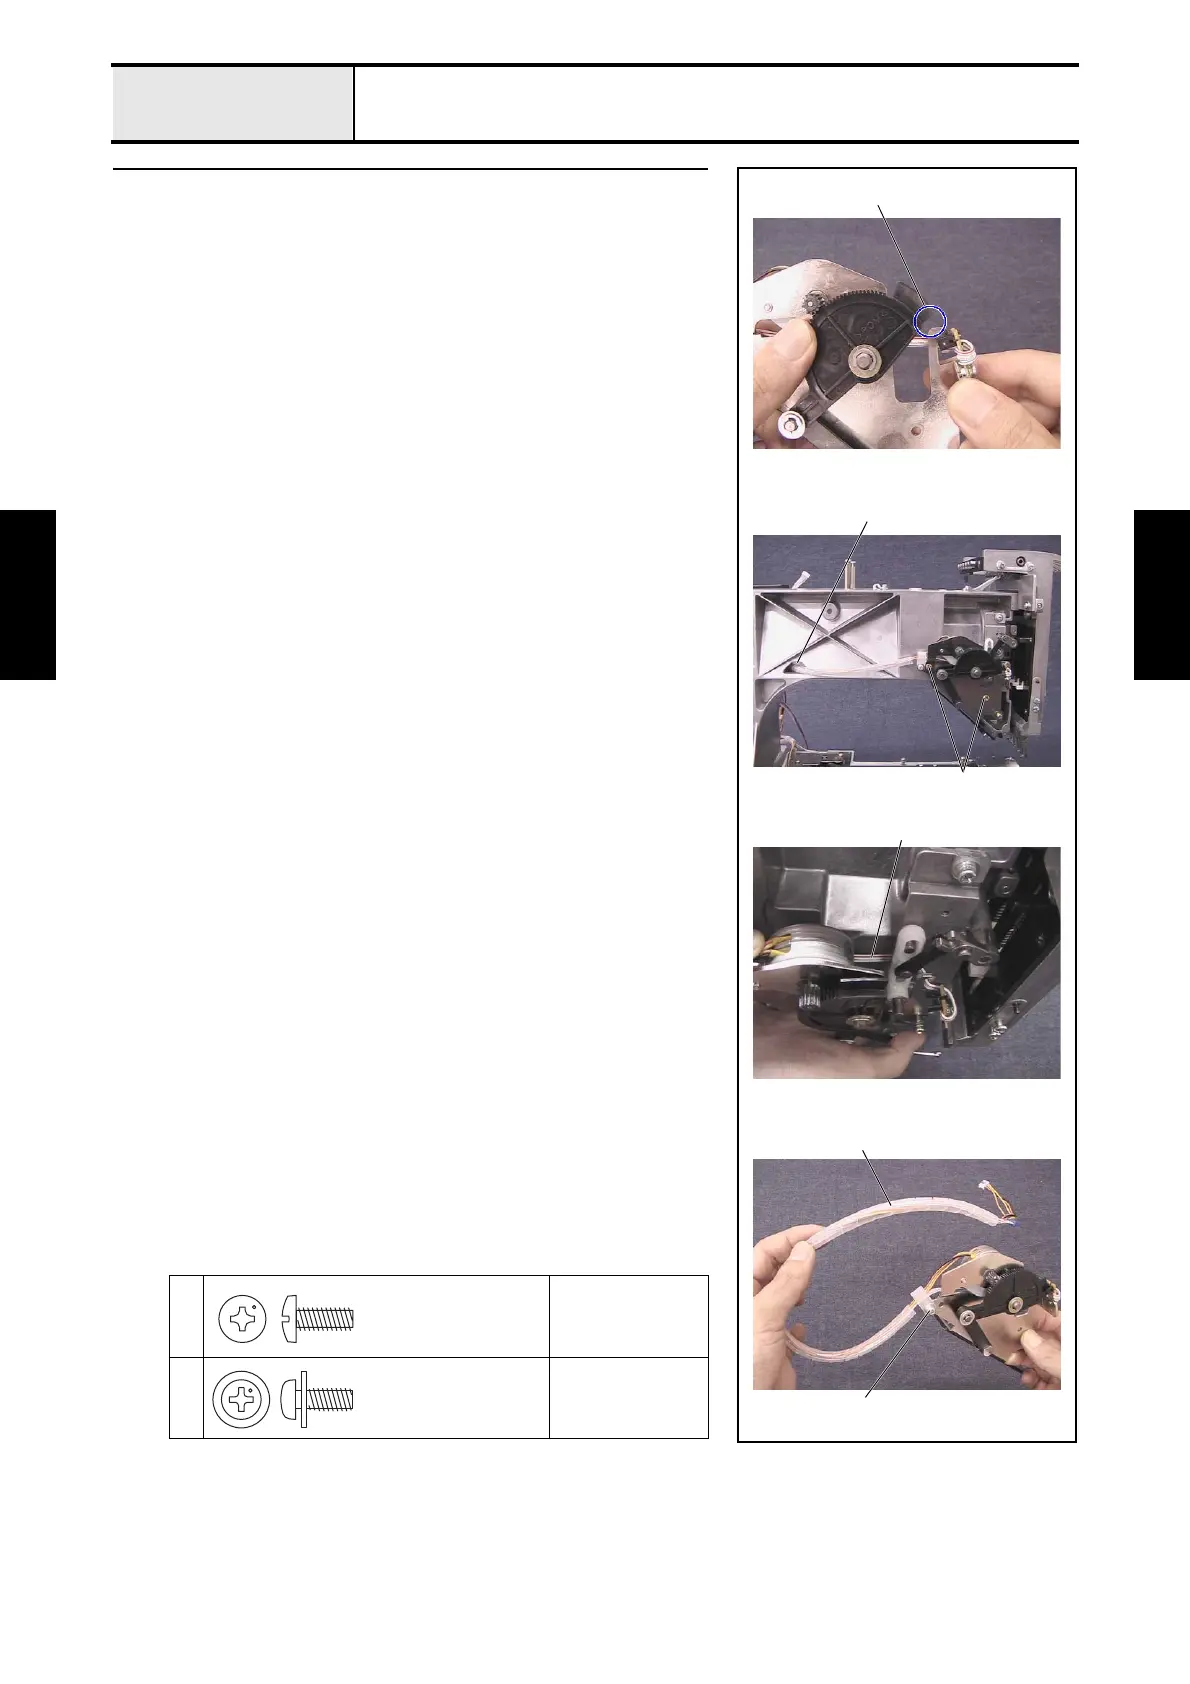
3 Wiper set assembly attachment
1. Slightly rotate the wiper lever counterclockwise to create a clearance
between the wiper lever dog and the wiper sensor assembly 1.
2. Attach the wiper set assembly to the arm bed with the 2 screws 1.
*Key point]
• Route the wiper sensor assembly's lead wire 2 behind the
driving jump assembly's J slide lever and the J base.
3. Thread the wiper sensor assembly's lead wire 2 and the wiper motor
assembly's lead wire through the spiral tube B 3, and then attach them to
the wiper base assembly with the screw 2 and the cord clamp NK-5N.
4. Thread the wiper sensor assembly's lead wire 2 and the wiper motor
assembly's lead wire 2 through the hole 4 on the arm bed until they come
out from the right side of the arm bed.
1
Torque
1.47 — 1.96 N-m
2
Torque
0.78 — 1.18 N-m
3
2
1
4
1
2
Taptite, Bind S
M4X10
Screw, Pan (S/P washer)
M4X10A

 Loading...


