2 - 69
Thread tension unit
Main unit
Disassembly
Disassembly
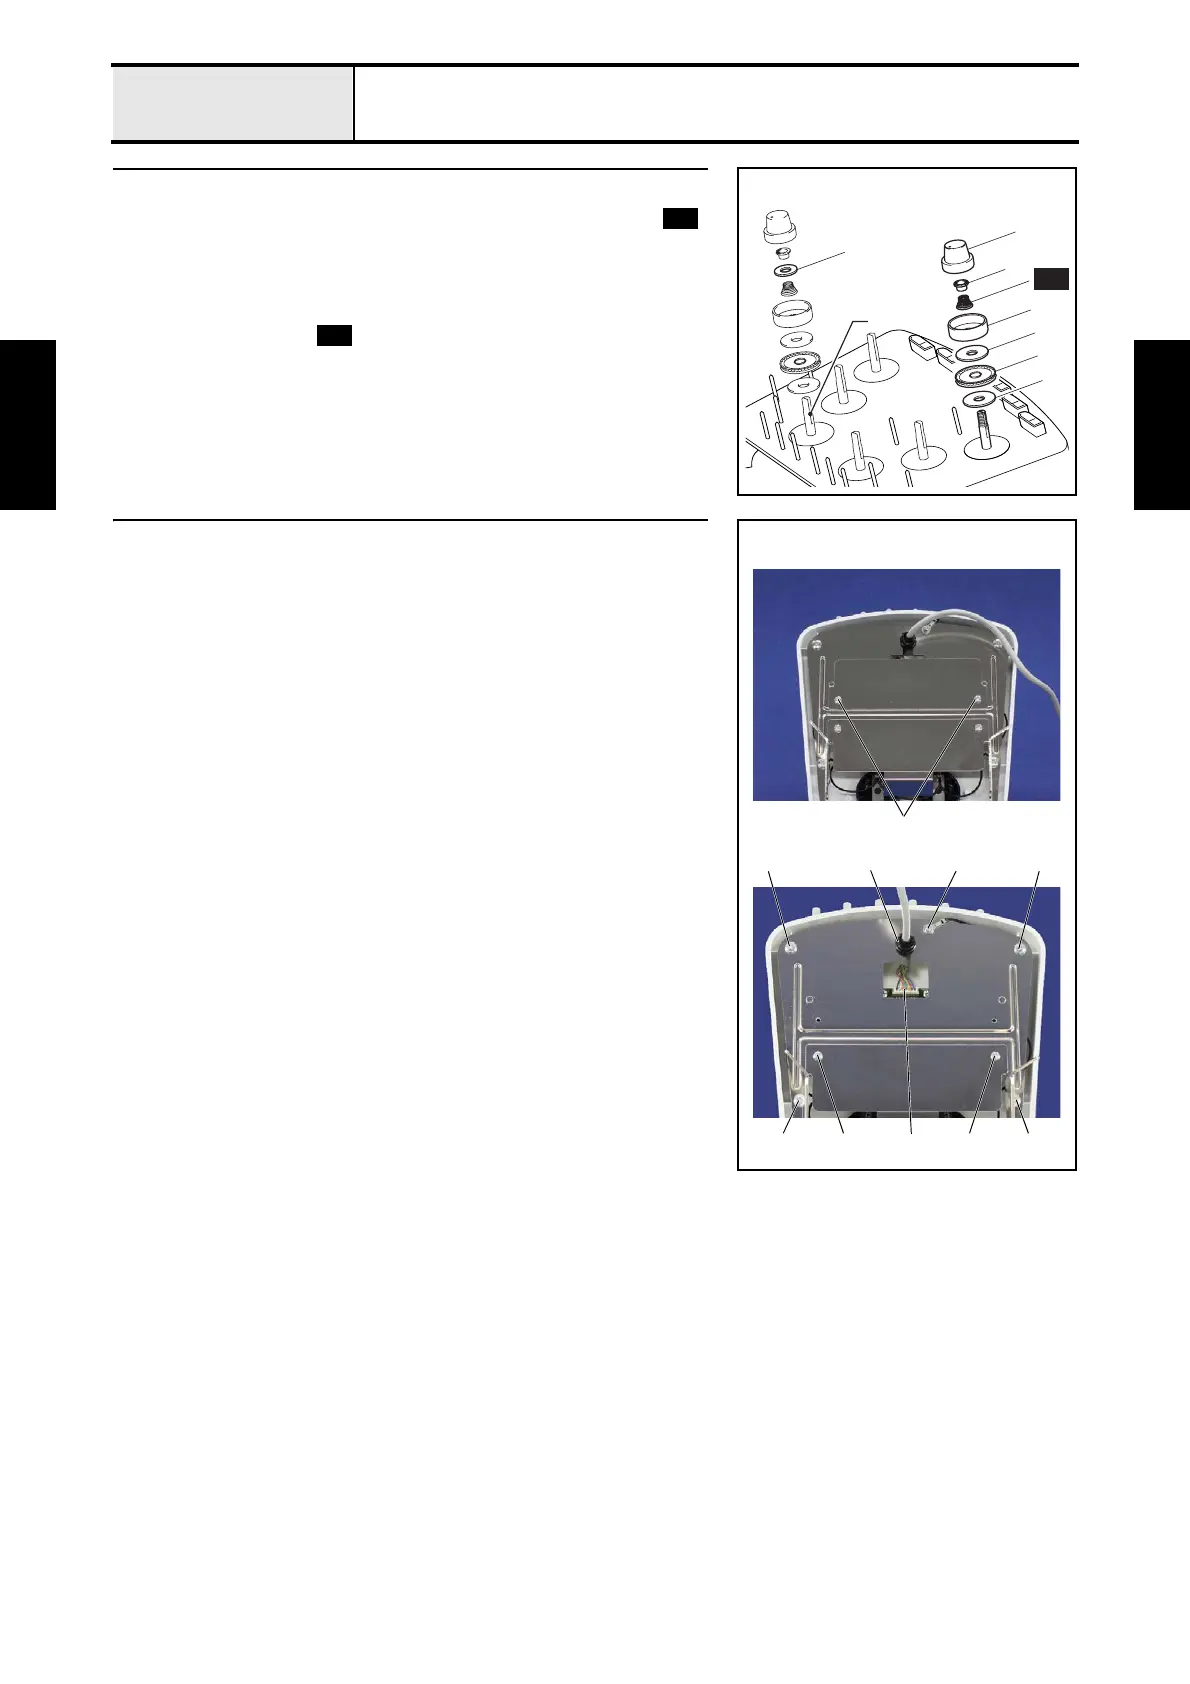
1 Loosen the tension nut removal
1. Loosen the tension nut 1, and then remove the washer 2, spring ,
tension disc presser 3, tension disc felt 4, rotary disc assembly 5, and
second tension disc felt 4. (6 locations)
NOTE
• The thread tension washer 6 is inserted between the washer 2
and the spring only for thread tension A.
A
1
6
2
3
4
5
4
S51
S51
S51
2 Tension base bracket removal
1. Remove the 2 screws 1, and then remove the bracket cover from the
tension base bracket.
2. Remove the cord bush (KR51) 1 from the tension base bracket, and then
remove the tension base lead wire assembly 2 from the head PCB
assembly on the tension base.
3. Remove the screw 2, and then remove the head grounding wire.
4. Remove the 4 screws 3, and then remove the tension base bracket.
5. Remove the 2 screws 4, and then remove the bracket cover from the
tension base bracket.
32
3
3
23 44
1
1

 Loading...


