3 - 76
Feed unit
Main unit
Assembly
Assembly
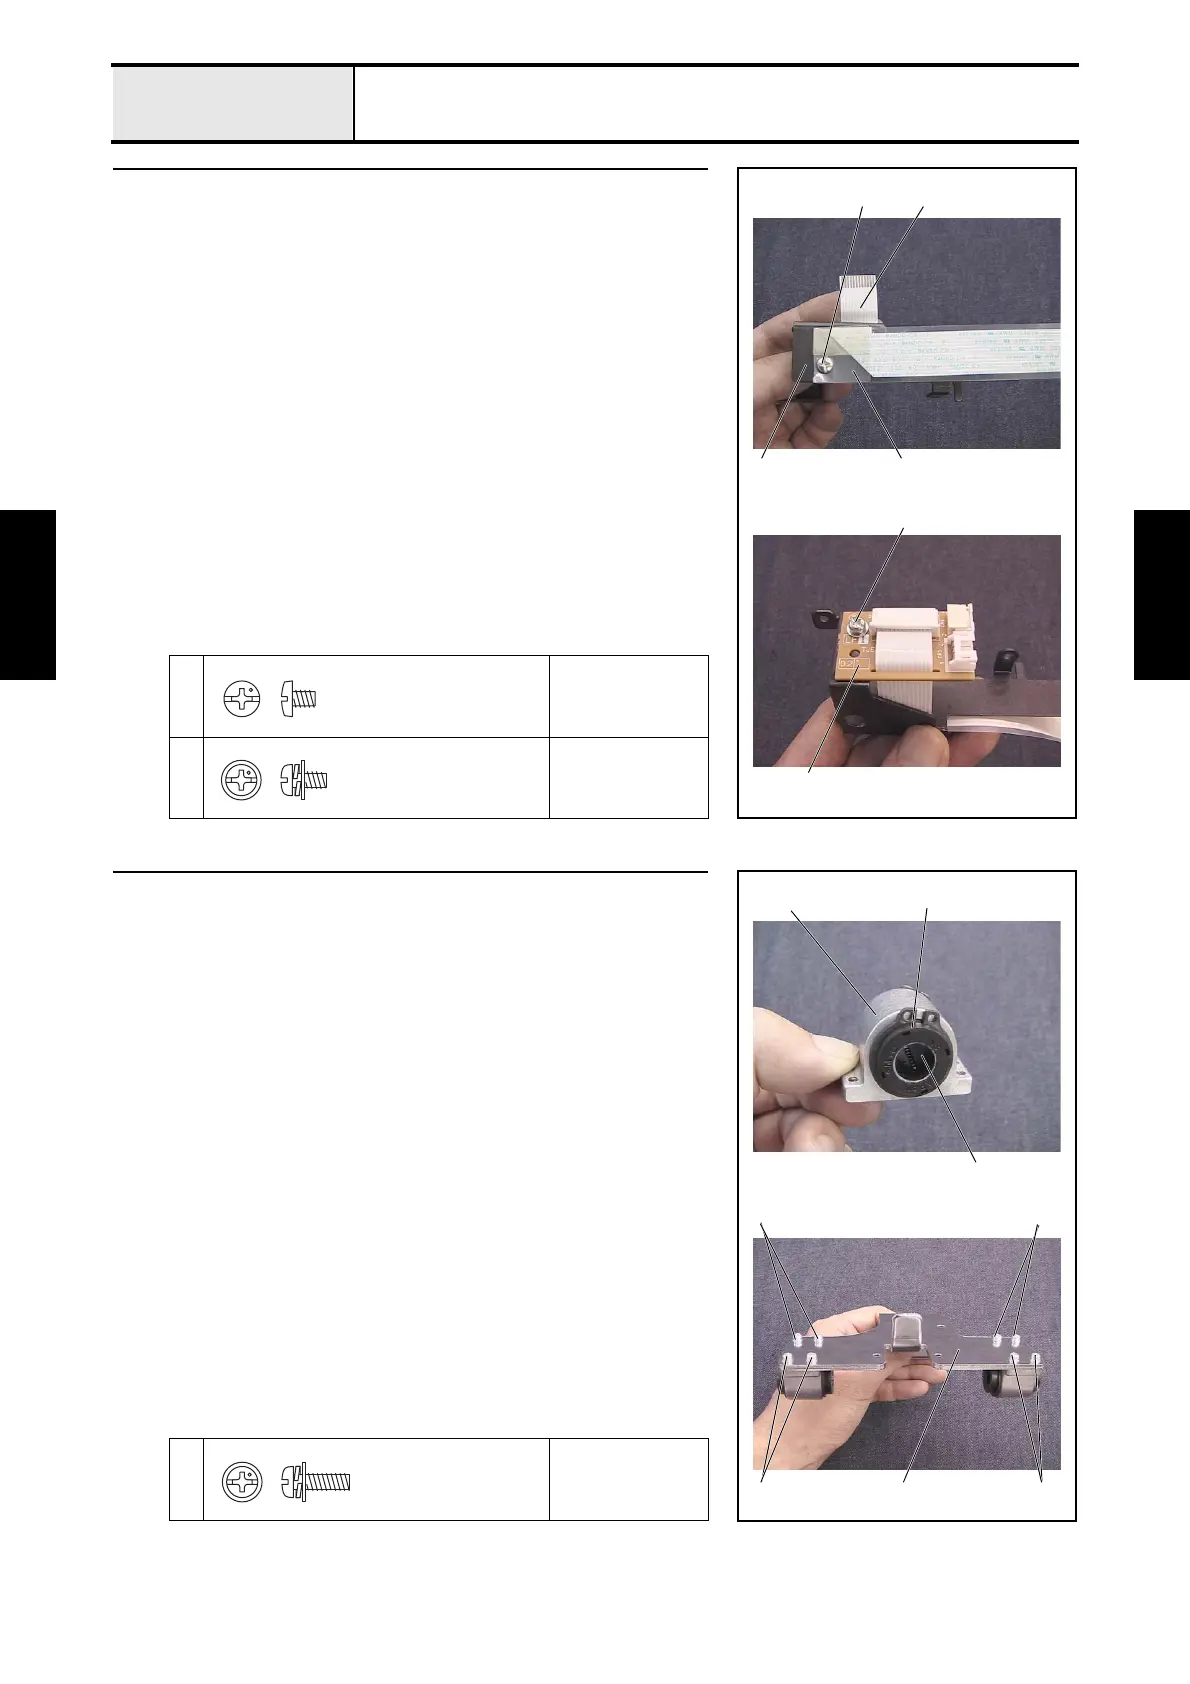
1 Connect PCB final assembly
1. Attach the sheet 2 and the FFC (SML2CD-Y) 3 to the PCB holder 1
with the screw 1.
2. Attach the connect PCB assembly 4 to the PCB holder assembly with the
screw 2.
3. Connect the FFC (SML2CD-Y) 3 to the connect PCB assembly 4, and
then lock the connector.
1
Torque
0.59 — 0.78 N-m
2
Torque
0.59 — 0.78 N-m
1
2
4
21
3
Screw, Bind
M3X4
Screw, Pan (S/P washer)
M3X6
2 Y-carriage R assembly
1. Attach the linear bearing 10 2 to bearing case Y 1, and then attach the 2
external retaining rings C19. (2 sets)
2. Attach the 2 bearing case Y assemblies to Y-carriage R 3 with the 8
screws 1.
1
Torque
0.78 — 1.18 N-m
External retaining ring C19
1 13
1
2
11
Screw, Pan (S/P washer)
M3X10

 Loading...


