3 - 81
Feed unit
Main unit
Assembly
Assembly
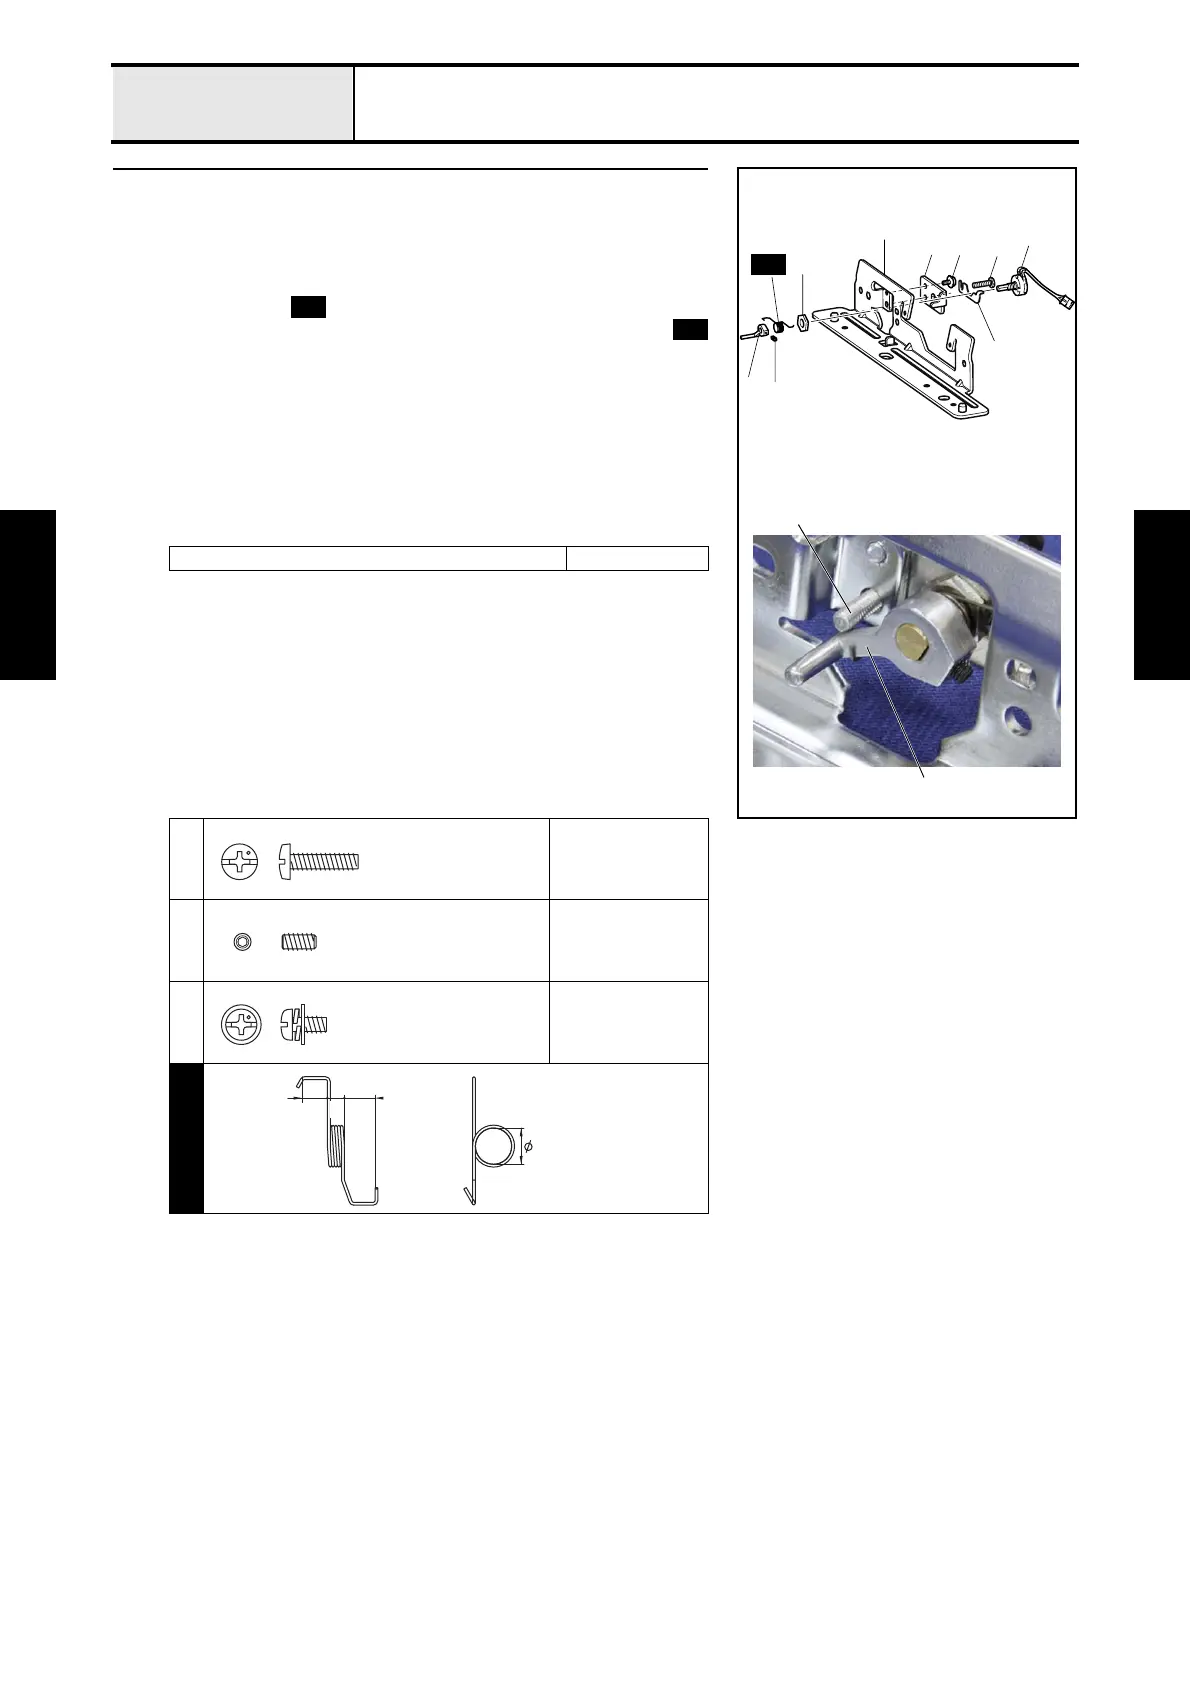
7 Hoop sensor attachment
1. Attach the hoop sensor assembly 1 to the X carriage CX 2, and then
tighten the nut 3 temporarily.
2. Attach the PT meter plate 4, and then fully tighten the nut 3 and screw
1.
3. Insert the spring into the shaft of the hoop sensor assembly 1.
4. Attach the hoop lever to the hoop sensor shaft, hanging the spring
over the hoop lever 5, and then tighten the screw 2.
5. Attach the X carriage CX 2 to the X-carriage A assembly 6 with the
screw 3.
*Key point
• Tighten the screw 2 with the hoop lever 5 pushed down so
that it contacts the screw 1 from the beneath after the screw
2 has been tightened.
• Check operation after attachment.
Tightening torque of nut: 0.78 - 0.98 N-m
1
Torque
0.59 — 0.78 N-m
2
Torque
0.59 — 0.78 N-m
3
Torque
0.59 — 0.78 N-m
S44
6
2
4
5
3
1
3
1
2
S44
5
1
S44
S44
Set Screw, Socket (FT)
M3X6
Screw, Bind
M3X12
Set Screw, Socket (FT)
M3X6
Screw, Pan (S/P washer)
M3X6
SPRING
XC5802***
6.4
4.5 5.43

 Loading...


