3 - 89
Feed unit
Main unit
Assembly
Assembly
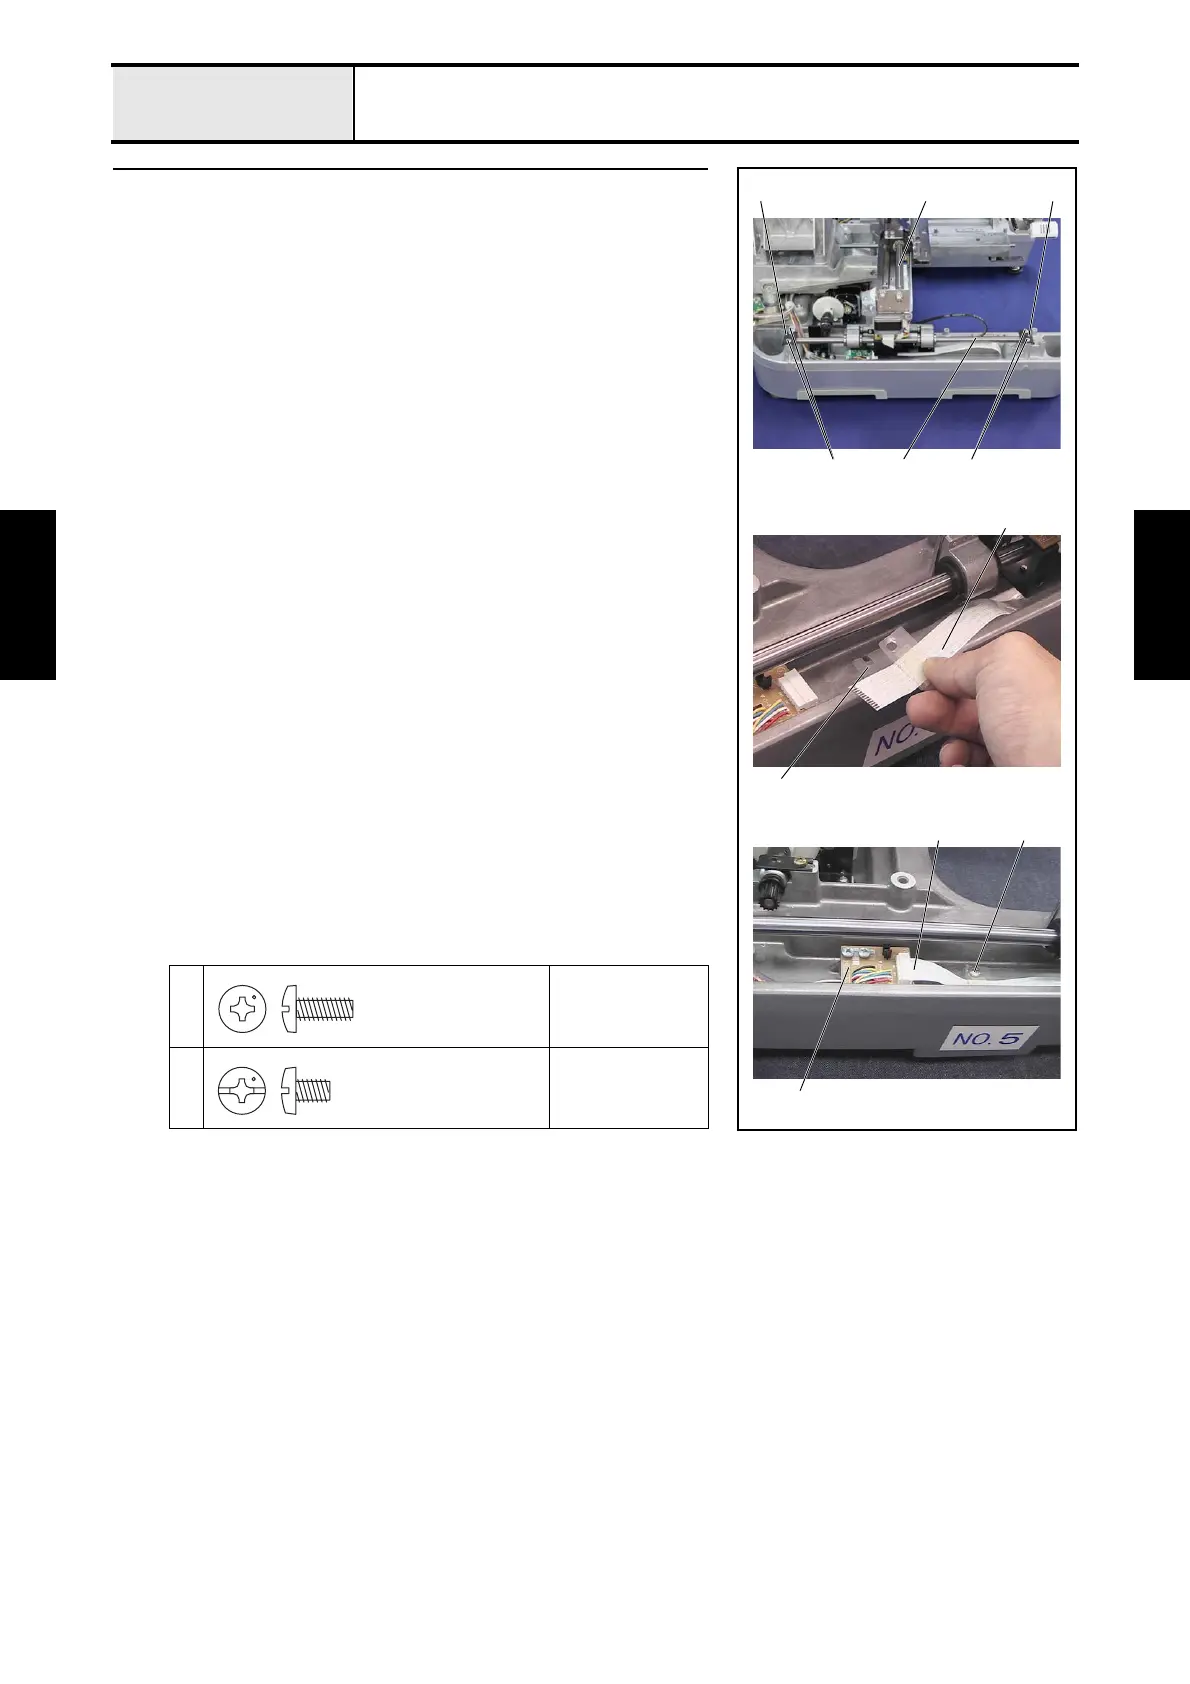
18 Feed final assembly attachment
1. Attach the 2 Y-guide shafts 1 to the feed final assembly 5, and then
attach the feed final assembly 5 to the base frame.
2. Secure the 2 fixed Y-shaft plates 6 with the 4 screws 1 (one each on left
and right).
3. Pull the feed final assembly toward you.
4. Connect the FFC (SML2CD-Y) 7 connected to the feed final assembly's
connect PCB to the Y-area sensor assembly 2, and lock the connector.
5. Attach the sheet 3, FFC (SML2CD-Y) 7, and sheet B 4 to the base
frame with the screw 2.
1
Torque
1.47 — 1.96 N-m
2
Torque
1.18 — 1.57 N-m
2
1
2
11
4
3
56
7
6
Taptite, Bind S
M4X10
Screw, Bind
M4X6

 Loading...


