2 - 41
Needle bar unit
Main unit
Disassembly
Disassembly
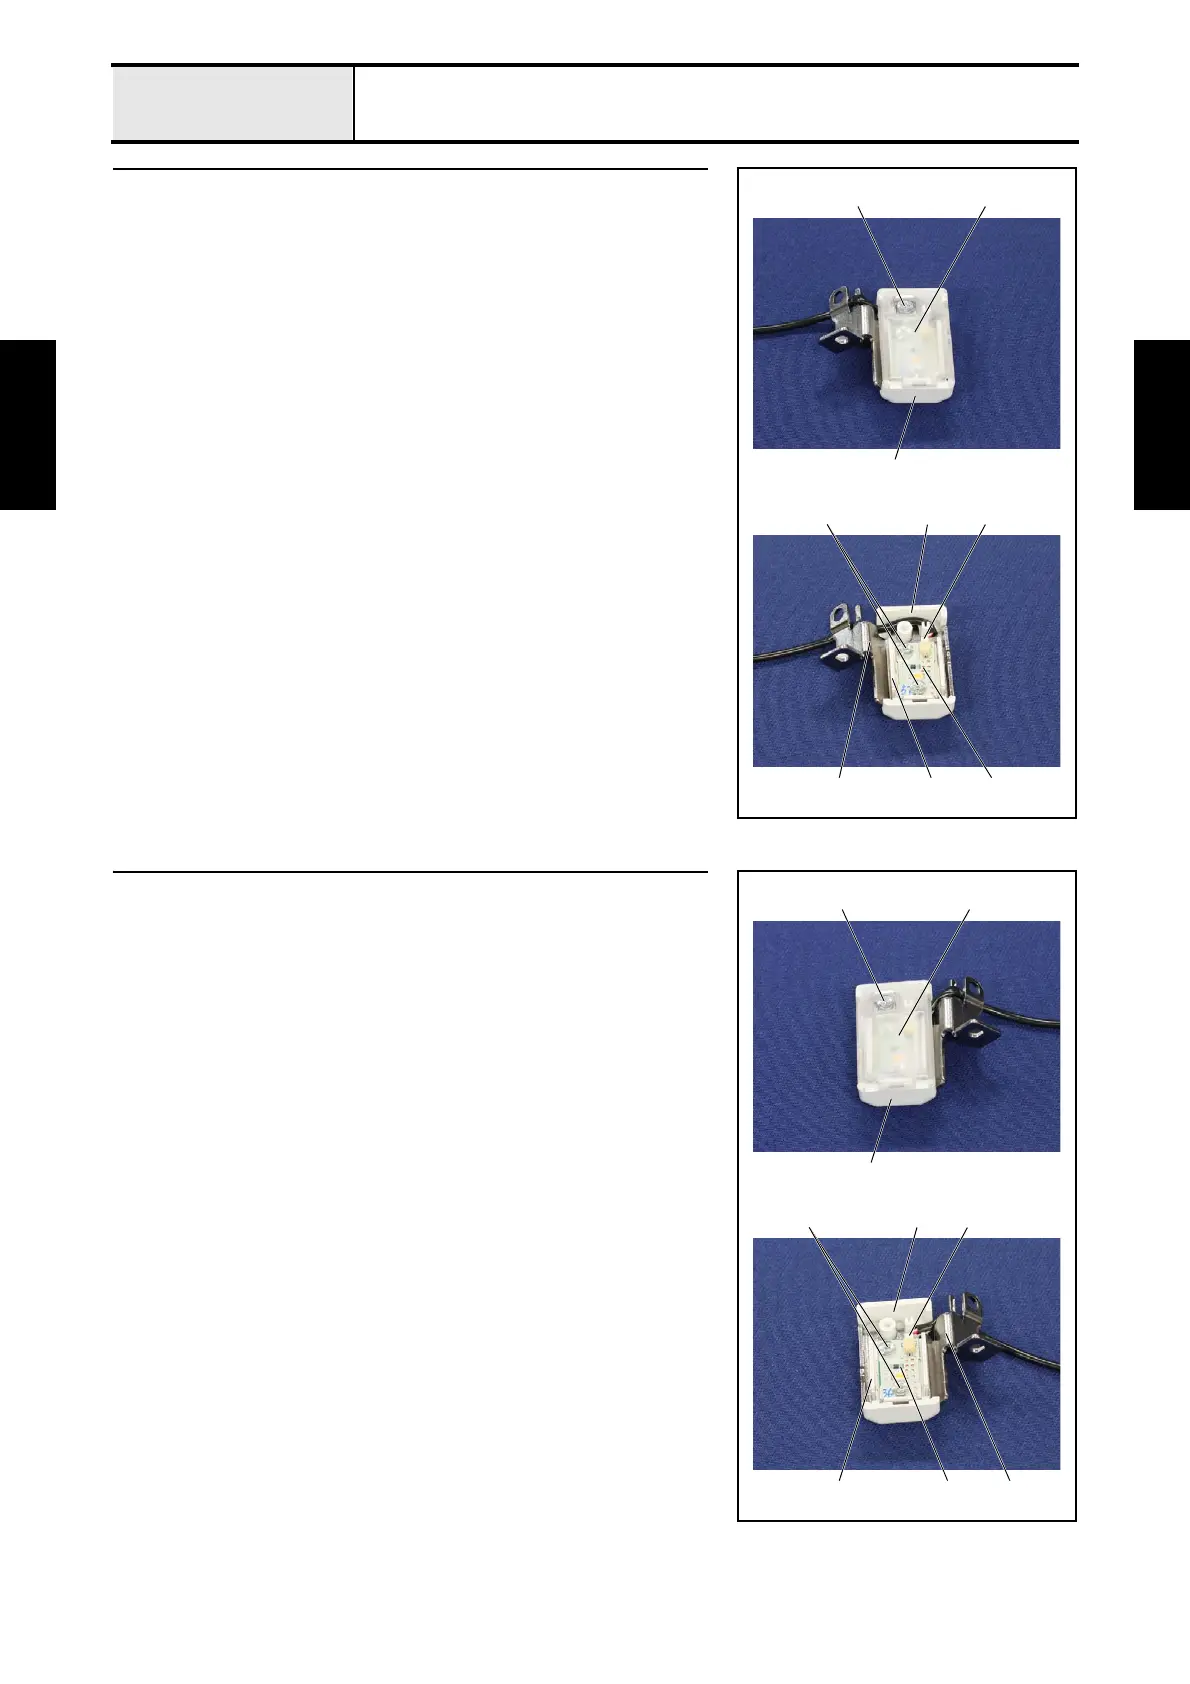
1 LED unit left assy disassembly
1. Remove the screw 1, and then remove the LED lower cover left 1 from
the LED upper cover 2.
2. Disconnect the connector of the LED wire assy LED 3 from the LED
PCB supply assy 4.
3. Remove the 2 screws 2, and then remove the LED PCB supply assy 4,
LED light base 5 and the LED base plate left 6 from the LED upper
cover 2.
1
2
1
4
2
3
56
2
2 LED unit right assy disassembly
1. Remove the screw 1, and then remove the LED lower cover right 1 from
the LED upper cover 2.
2. Disconnect the connector of the LED wire assy LED 3 from the LED
PCB supply assy 4.
3. Remove the 2 screws 2, and then remove the LED PCB supply assy 4,
LED light base 5 and the LED base plate right 6 from the LED upper
cover 2.
1
2
1
6
2
3
45
2

 Loading...


