3 - 12
Thread tension unit
Main unit
Assembly
Assembly
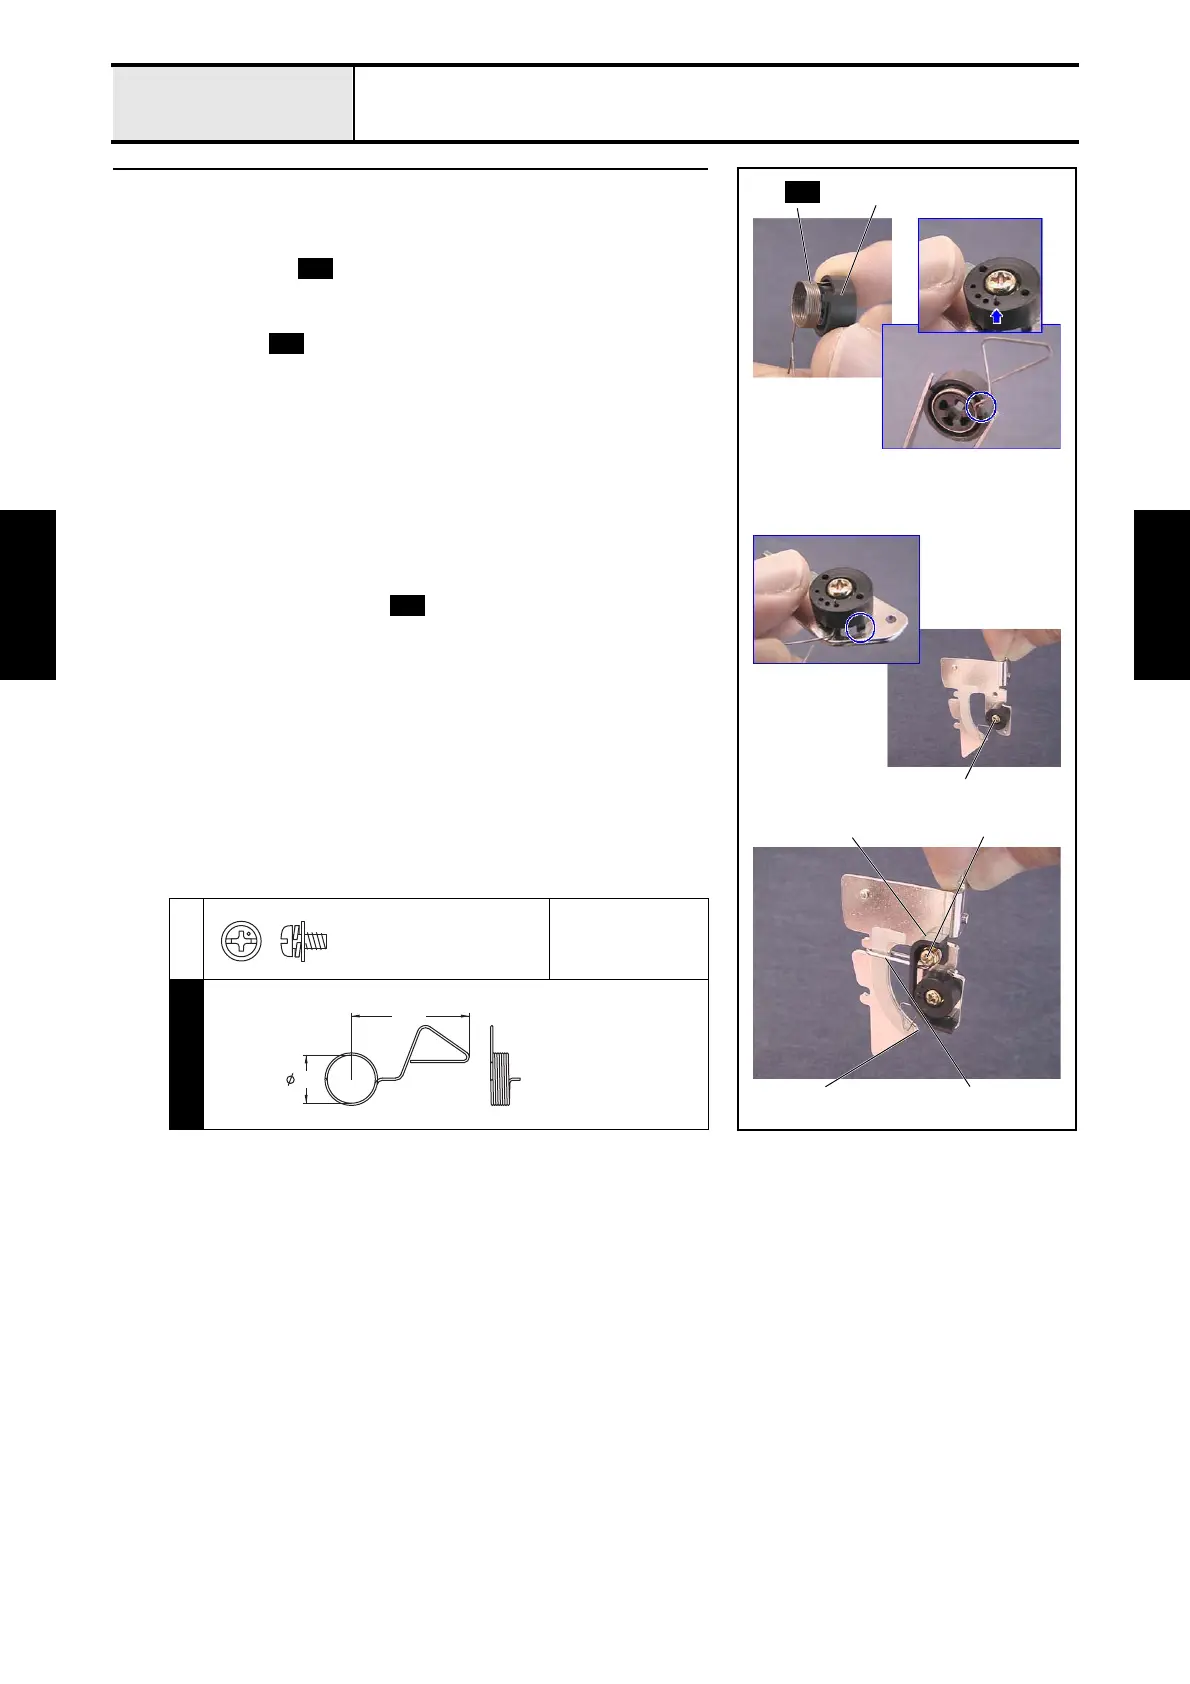
1 Thread take-up bracket assembly
*Key point
• Make 6 thread take-up bracket assemblies.
1. Attach the spring to the thread catching spring case 1.
*Key point
• There are 4 holes on the spring case. Insert the tip of the
spring into the hole indicated by the arrow in the figure.
2. Attach the thread catching spring case assembly to the thread take-up
bracket with the screw 1.
*Key point
• Align the protrusion on the thread catching spring case
assembly with the hole on the thread take-up bracket, and turn
them counterclockwise until they stop. Then tighten the screw
1.
3. Attach the thread guide wire 2 and the thread guard 3 to the thread take-
up bracket with the screw 2.
*Key point
• Check that the spring does not extend beyond line A.
1
2
Torque
0.59 — 0.78 N-m
S49
S49
1
1
3 2
2(A)
S49
S49
S49
Screw, Pan (S/P washer)
M3X6
THREAD TAKE-UP SPRING
XC5926***
20.8
8.5

 Loading...


