3 - 65
Thread wiper unit
Assembly
Assembly
Main unit
4 Thread presser base assembly
1. Attach the 2 thread presser spacers 2 and the thread presser cover
assembly 3 to the thread presser base assembly 1 with the 2 screws 1.
1
Torque
0.78 — 1.18 N-m
1
3
1
1
2
2
Screw, Pan
M3X7
5 Thread presser base attachment
1. Attach the thread presser base assembly 1 to the needle bar case 2 with
the 4 screws 1.
*Key point
• Temporarily tighten the 4 screws 1 first. Firmly tighten them
after completing 4 - 34 "Thread presser base up/down
position."
1
Torque
Hand start
2
1 11
Screw, Bind
M4X6
6 LED unit right assy removal
1. Attach the LED unit right assy 1 with the 2 screws 1.
2. Hold the cord with the 2 cord clamps 2, and secure it with the 2 screws
2.
*Key point
• Check that the boss of the cord clamp 2 engage with the
positioning hole.
3. Pass the cord through the guide parts of the LED cord guide 3.
1
2
Torque
0.78 — 1.18 N-m
1
2
1
23
Screw, Bind
M4X8
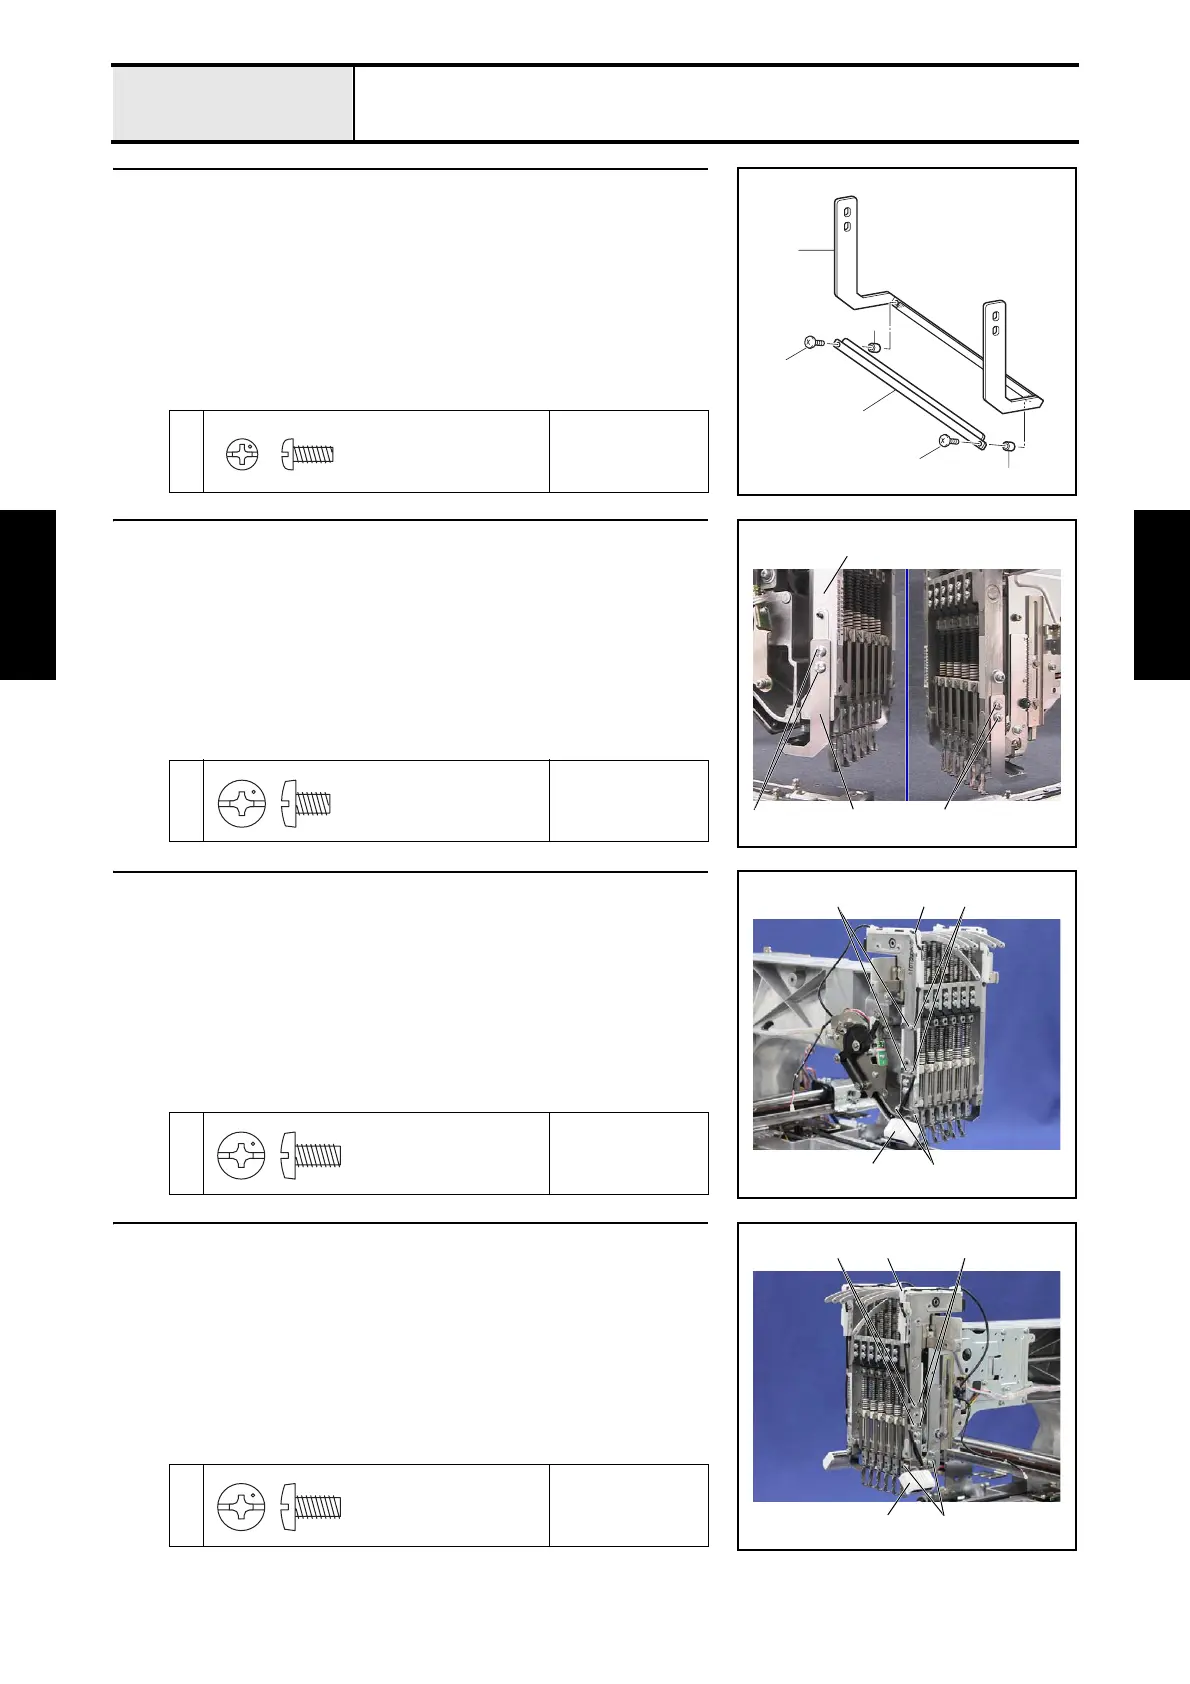
7 LED unit left assy removal
1. Attach the LED unit left assy 1 with the 2 screws 1.
2. Hold the cord with the 2 cord clamps 2, and secure it with the 2 screws
2.
*Key point
• Check that the boss of the cord clamp 2 engage with the
positioning hole.
3. Pass the cord through the guide parts of the LED cord guide 3.
1
2
Torque
0.78 — 1.18 N-m
1
2
1
23
Screw, Bind
M4X8

 Loading...


