2 - 29
Needle thread unit
Main unit
Disassembly
Disassembly
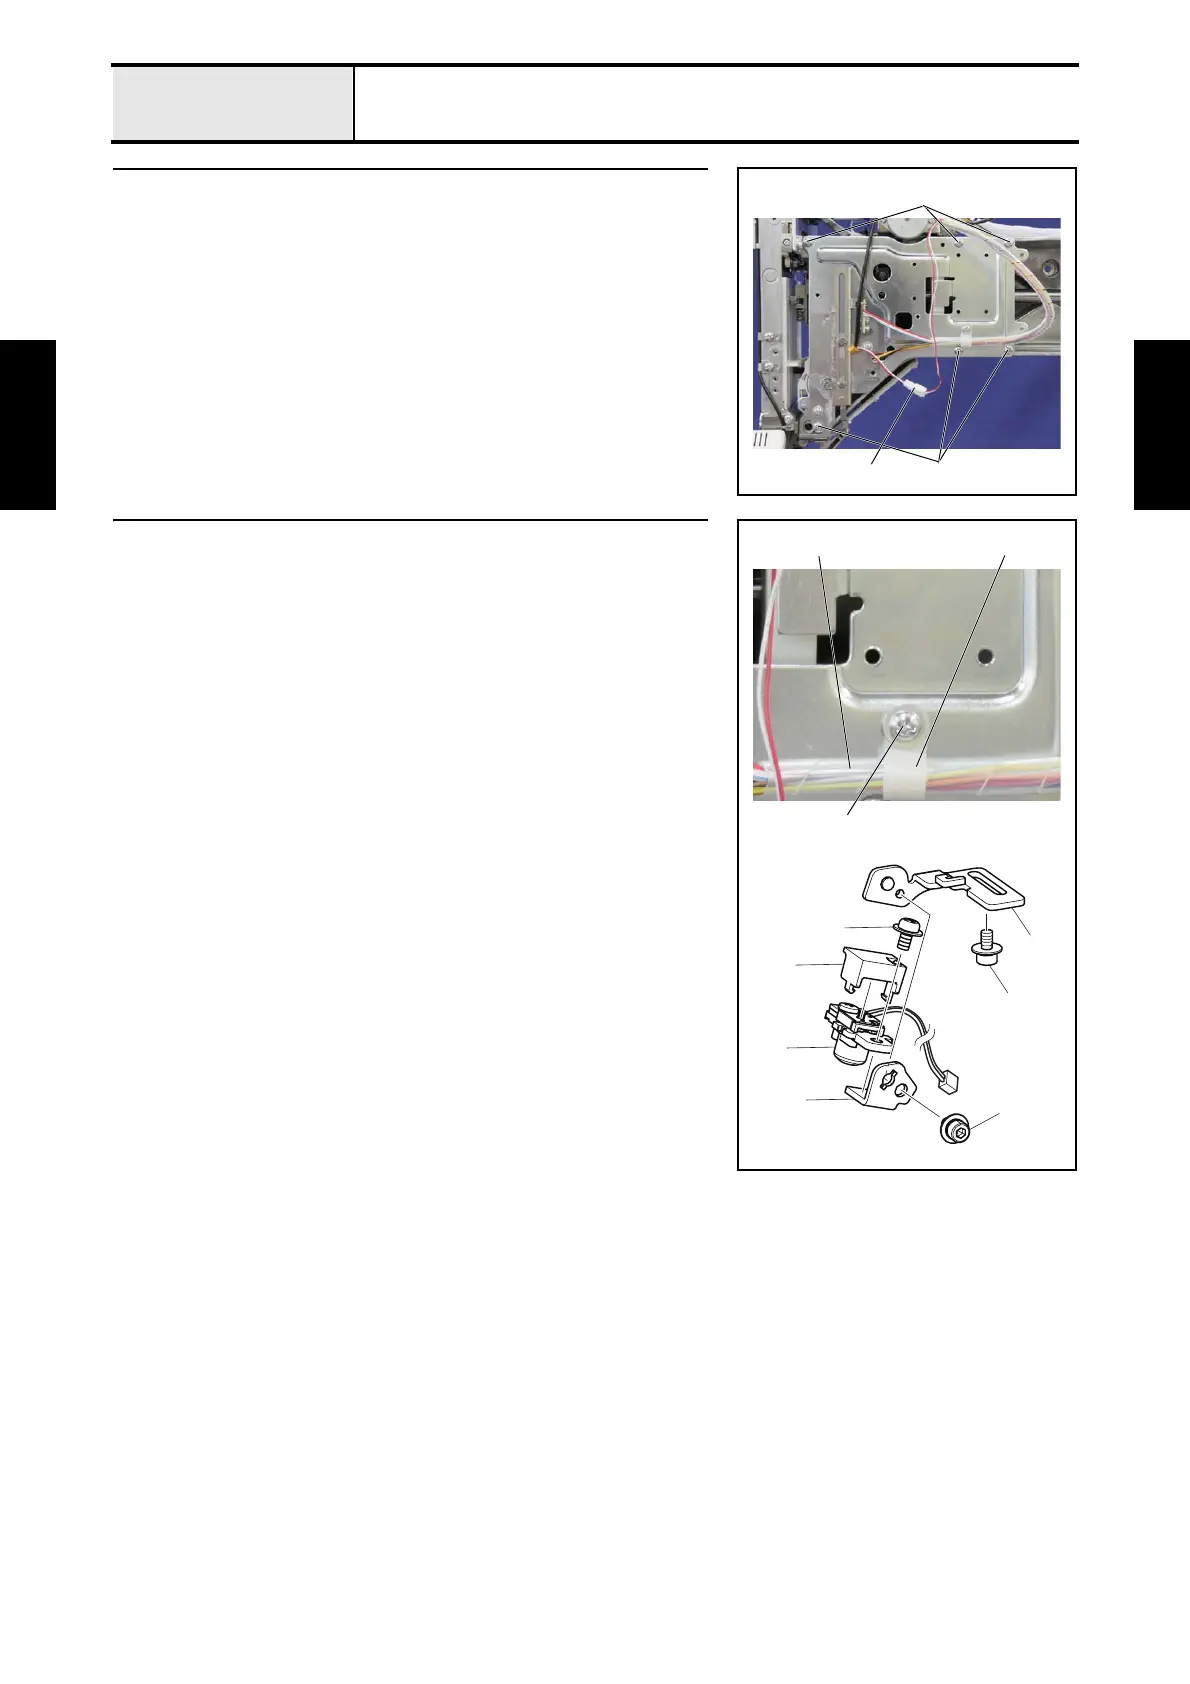
1 Needle thread assembly removal
1. Unlock the lock of the connector 1, and then disconnect the LED wire
assy LED.
2. Remove the 6 screws 1, and then remove the needle thread assembly.
1
1
1
2 LED pointer removal
1. Remove the screw 1, and then remove the cord clamp 1.
2. Remove the spiral tube 2 from the lead wires.
3. Remove the light source assy's lead wire from the lead wire guide.
4. Remove the screw 2, and then remove the LED PT base plate 3 from the
base plate assembly.
5. Remove the screw 3, and then remove the LED lens holder plate 4.
6. Remove the screw 4, and then remove the light source assy 5 and PT
guard cover 6.
2
3
4
6
5
4
3
21
1

 Loading...


