4 - 17
Inspection and
Adjustment
Inspection and
Adjustment
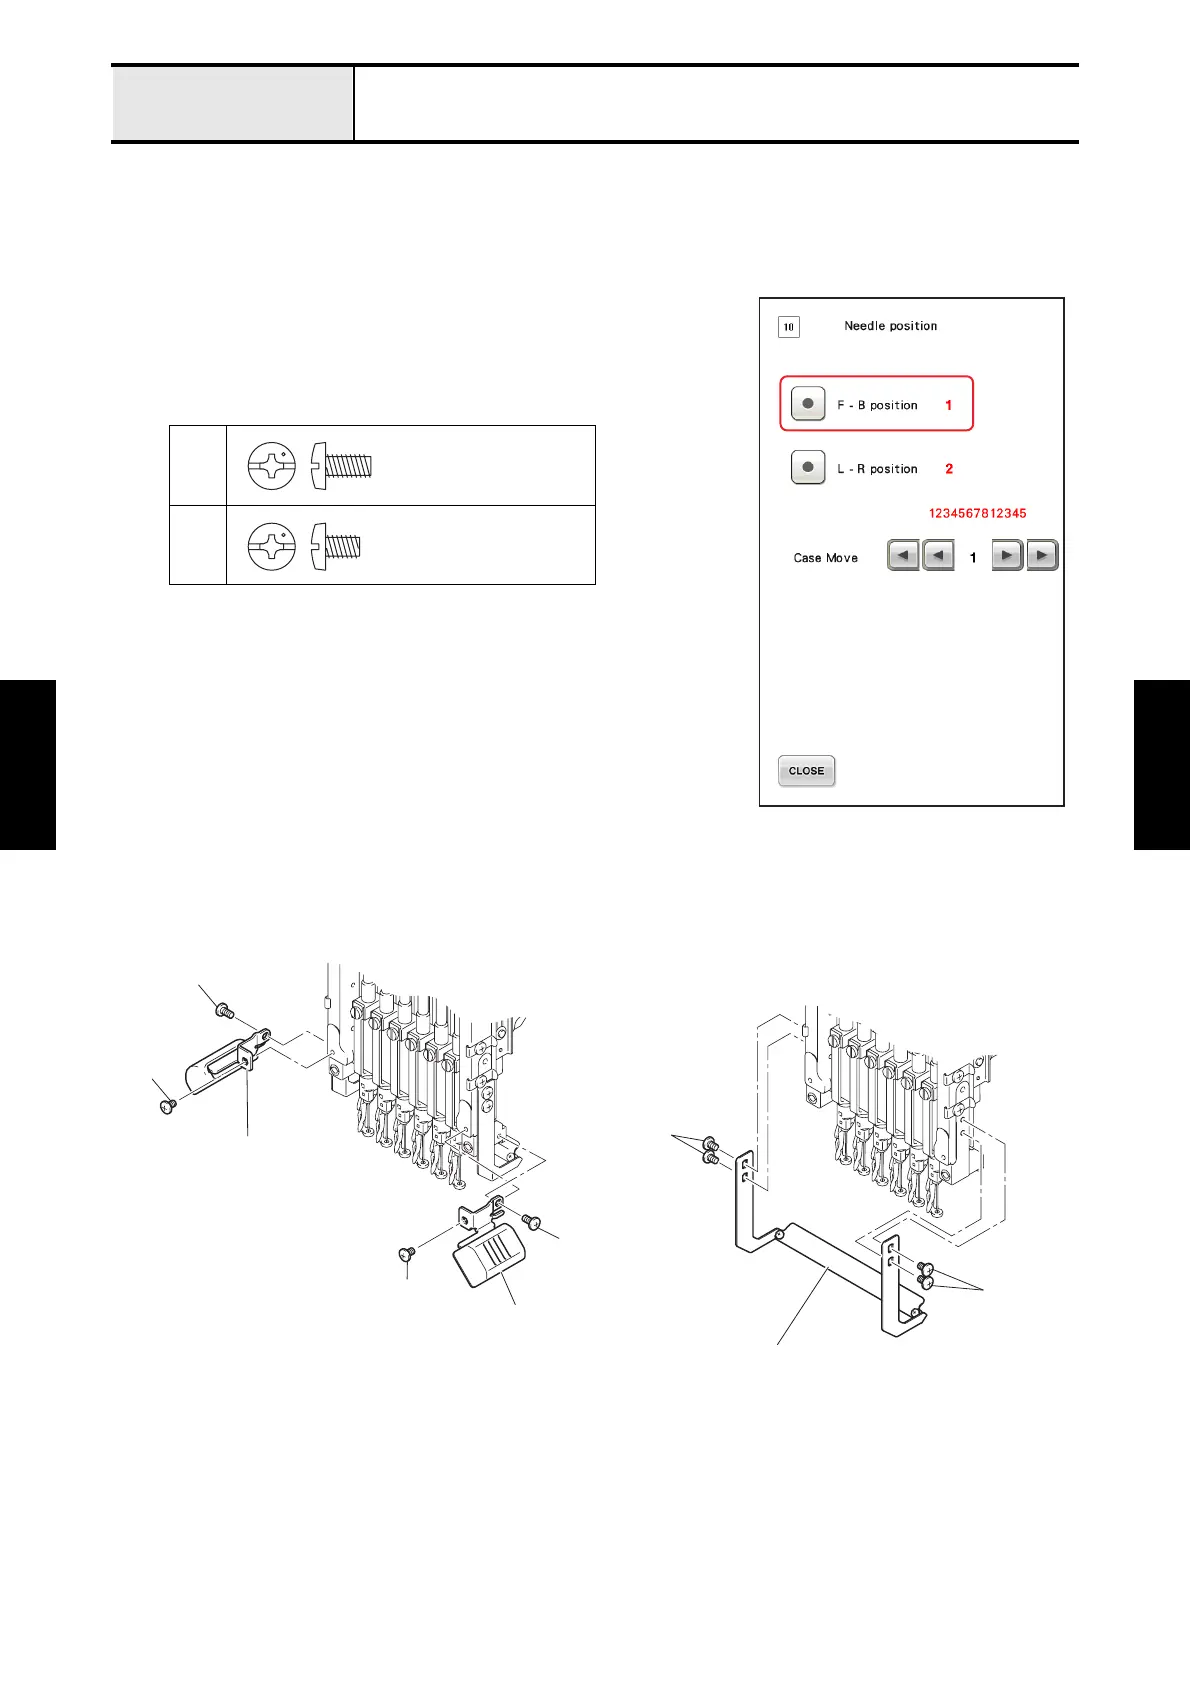
Adjustment Needle drop (front/back)
[Standard]
The clearance between the needle and the needle plate hole in the front/back direction should be more than 0.3 mm.
[Adjustment]
1. Remove the 4 screws 1 of the LED unit right assy and the LED unit
left assy to remove the LED unit right assy and the LED unit left
assy.
2. Remove the 4 screws 2 of the thread presser base assembly to
remove the thread presser base assembly.
3. Start the test mode and select [#10: Needle position] under [MAIN
BOARD TEST MODE].
4. Press the [F-B position] and the standard needle bar for adjustment
will be selected automatically. The needle bar case unit will move to
the left and right.
5. Turn the pulley by hand and lower the needle bar until the needle tip
enters the needle eye of the needle plate.
To next page
1
2
Screw, Bind
M4X8
Screw, Bind
M4X6
2
2
Thread presser base assembly
LED unit left assy
LED unit right assy
1
1
1
1

 Loading...


