/· FUEL SYSTEM
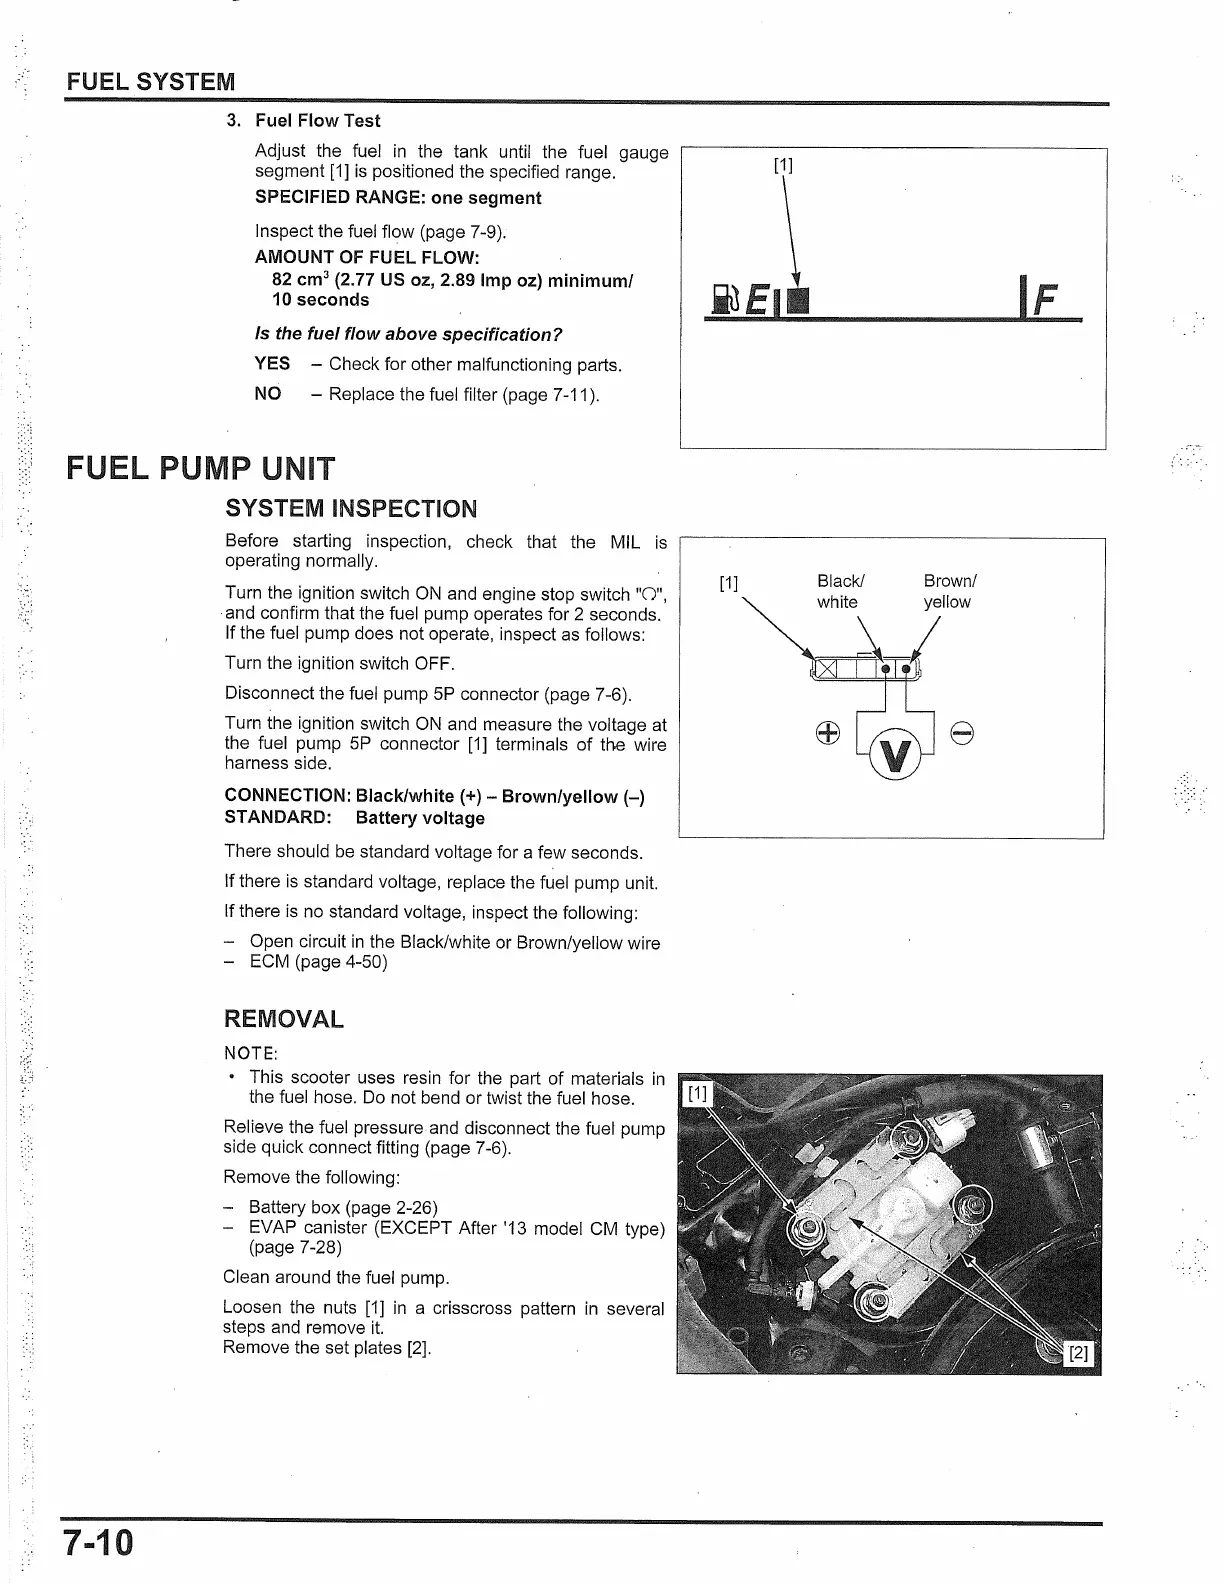
3. Fuel Flow Test
Adjust the fuel
in
the tank until the fuel gauge
segment [1]
is
positioned the specified range.
SPECIFIED RANGE: one segment
Inspect the fuel flow (page 7-9).
AMOUNT OF FUEL FLOW:
82
cm
3
(2.77 US oz, 2.89 Imp oz) minimum/
10
seconds
Is the fuel flow above specification?
YES -
Check for other malfunctioning parts.
NO -
Replace the fuel filter (page
7-11
).
FU
L PUMP UNIT
7-10
SYSTEM INSPECTION
Before starting inspection, check that the MIL
is
operating normally.
Turn the ignition switch
ON
and engine stop switch
"0",
· and confirm that the fuel pump operates for 2 seconds.
If the fuel pump does not operate, inspect
as
follows:
Turn the ignition switch OFF.
Disconnect the fuel pump
5P
connector (page 7-6).
Turn the ignition switch
ON
and measure the voltage at
the fuel pump
5P
connector
[1]
terminals of the wire
harness side.
CONNECTION: Black/white(+) -
Brown/yellow(-)
STANDARD: Battery voltage
There should
be
standard voltage for a few seconds.
If there
is
standard voltage, replace the fuel pump unit.
If there
is
no
standard voltage, inspect the following:
Open circuit
in
the Black/white or Brown/yellow wire
- ECM (page 4-50)
REMOVAL
NOTE:
• This scooter uses resin for the part of materials
in
the fuel hose.
Do
not bend or twist the fuel hose.
Relieve the fuel pressure and disconnect the fuet pump
side quick connect fitting (page 7-6).
Remove the following:
Battery box (page 2-26)
- EVAP canister (EXCEPT After '13 model CM type)
(page 7-28)
Clean around the fuel pump.
Loosen the nuts
[1]
in
a crisscross pattern
in
several
steps and remove
it.
Remove the set plates
[2].
[1]
[1]
 Loading...