EasyManuals Logo

Honda PCX150 2016 User Manual

Honda PCX150 2016
436 pages
To Next Page IconTo Next Page
To Previous Page IconTo Previous Page
Page #316 background imageLoading...
Page #316 background image
ENGINE REMOVAL/INSTALLATION
Remove the engine hanger link nut
[1]
and
pull out the
bolt
[2].
Slightly pull the engine straight back
to
release it from
the frame
and
remove the engine, being careful not
to
damage the rear fender.
NGINE HANG R LINK
REMOVAL/INSTALLATION
Remove the following:
- Engine (page
16-4)
- Exhaust pipe/muffler (page 2-28)
Remove the engine hanger link nut
[1],
bolt
[2]
and
engine hanger link [3].
Install the engine hanger link, bolt
and
nut,
then
temporarily tighten the nut.
Install the removed parts
in
the revers order of removal.
NOTE:
[1]
[2]
• After installing the engine
to
the frame, tighten the
engine hanger link nut to the specified torque (page
16-7). I
r111r21
[3]
16-6
INSPECTION
Check the hanger link bushings
[1]
and
stopper rubbers
[2] for wear or damage.
Check the engine mount bushings
[1]
for wear or
damage.
=··
_..___
______________
___J
[1] - - -
----------
---
[2]

Table of Contents

Questions and Answers:

Question and Answer IconNeed help?

Do you have a question about the Honda PCX150 2016 and is the answer not in the manual?
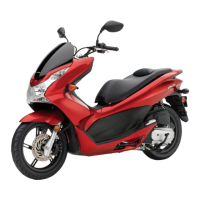
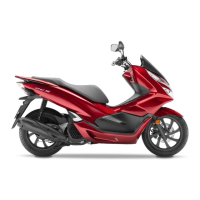
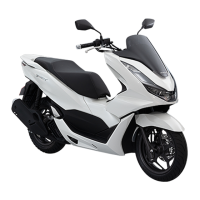
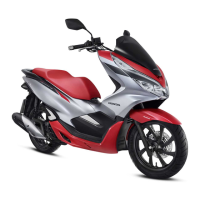
Honda PCX150 2016 Specifications

General IconGeneral
Displacement153cc
Bore x Stroke58.0mm x 57.9mm
Compression Ratio10.6:1
Fuel SystemPGM-FI electronic fuel injection
TransmissionAutomatic V-Matic belt drive
Front Tire90/90-14
Rear Tire100/90-14
Wheelbase51.8 inches
Seat Height29.9 inches
Fuel Capacity2.1 gallons
IgnitionFull Transistorized
Front Suspension31mm telescopic fork
Rear SuspensionTwin shock
Front BrakeHydraulic disc
Rear BrakeDrum
Engine TypeLiquid-cooled, 4-stroke, SOHC

Related product manuals