LIGHTS/METERS/SWITCHES
HEADLIG
21-6
L)
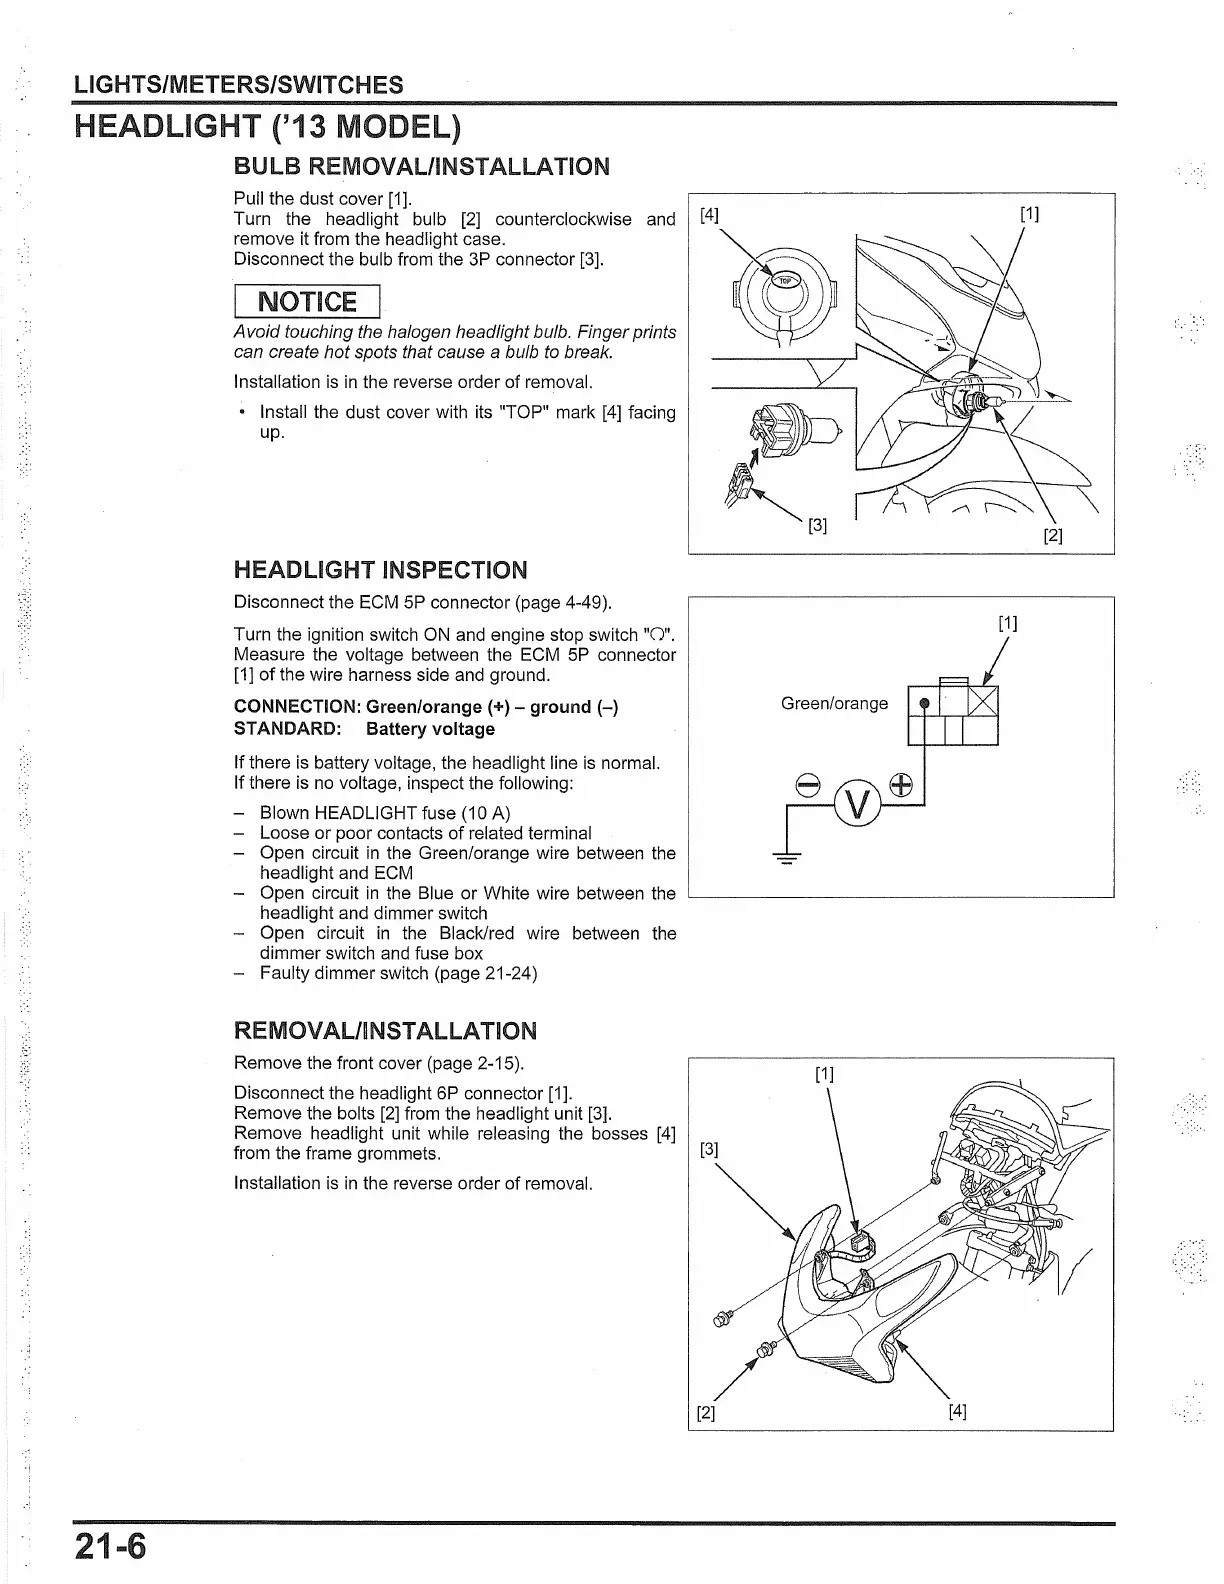
BULB
REMOVAL/INSTALLATION
Pull the dust cover [1].
Turn the headlight bulb
[2]
counterclockwise and
remove it from the headlight case.
Disconnect the bulb from the
3P
connector [3].
I NOTICE I
Avoid
touching the halogen headlight bulb. Finger prints
can create hot spots that cause a bulb
to
break.
Installation
is
in
the reverse order of removal.
• Install the dust cover with its "TOP" mark [4] facing
up.
HEADLIGHT INSPECTION
Disconnect the ECM
SP
connector (page 4-49).
Turn the ignition switch
ON
and engine stop switch "O".
Measure the voltage between the ECM
SP
connector
[1]
of
the wire harness side and ground.
CONNECTION: Green/orange(+) -
ground(-)
STANDARD: Battery voltage
If there is battery voltage, the headlight line
is
normal.
If there
is
no
voltage, inspect the following:
- Blown HEADLIGHT fuse (10 A)
Loose or poor contacts of related terminal
Open circuit
in
the Green/orange wire between the
headlight and
ECM
Open circuit
in
the Blue or White wire between the
headlight and dimmer switch
Open circuit
in
the Black/red wire between the
dimmer switch and fuse box
Faulty dimmer switch (page 21-24)
REMOVAL/INSTALLATION
Remove the front cover (page 2-15).
Disconnect the headlight
6P
connector
[1
].
Remove the bolts
[2]
from the headlight unit [3].
Remove headlight unit while releasing the bosses
[4]
from the frame grommets.
Installation
is
in
the reverse order of removal.
[1]
[1]
Green/orange
[2]
 Loading...