1 ENGINE
82410 • 82710 • 82910
WSM,
12271
OOOOOF10100
OOOOOF10090
Correcting
Valve
and
Valve Seat
• NOTE
•
Before
correcting
the
valve
and
seat,
check
the
valve
stem
and
the
1.0.
of
the
valve
guide
section,
and
repair
them
if
necessary.
•
After
correcting
the
valve seat, be
sure
to
check
the
valve
recessing.
1)
Correcting
Valve
1.
Correct the valve with a valve refacer.
2)
Correcting
Valve Seat
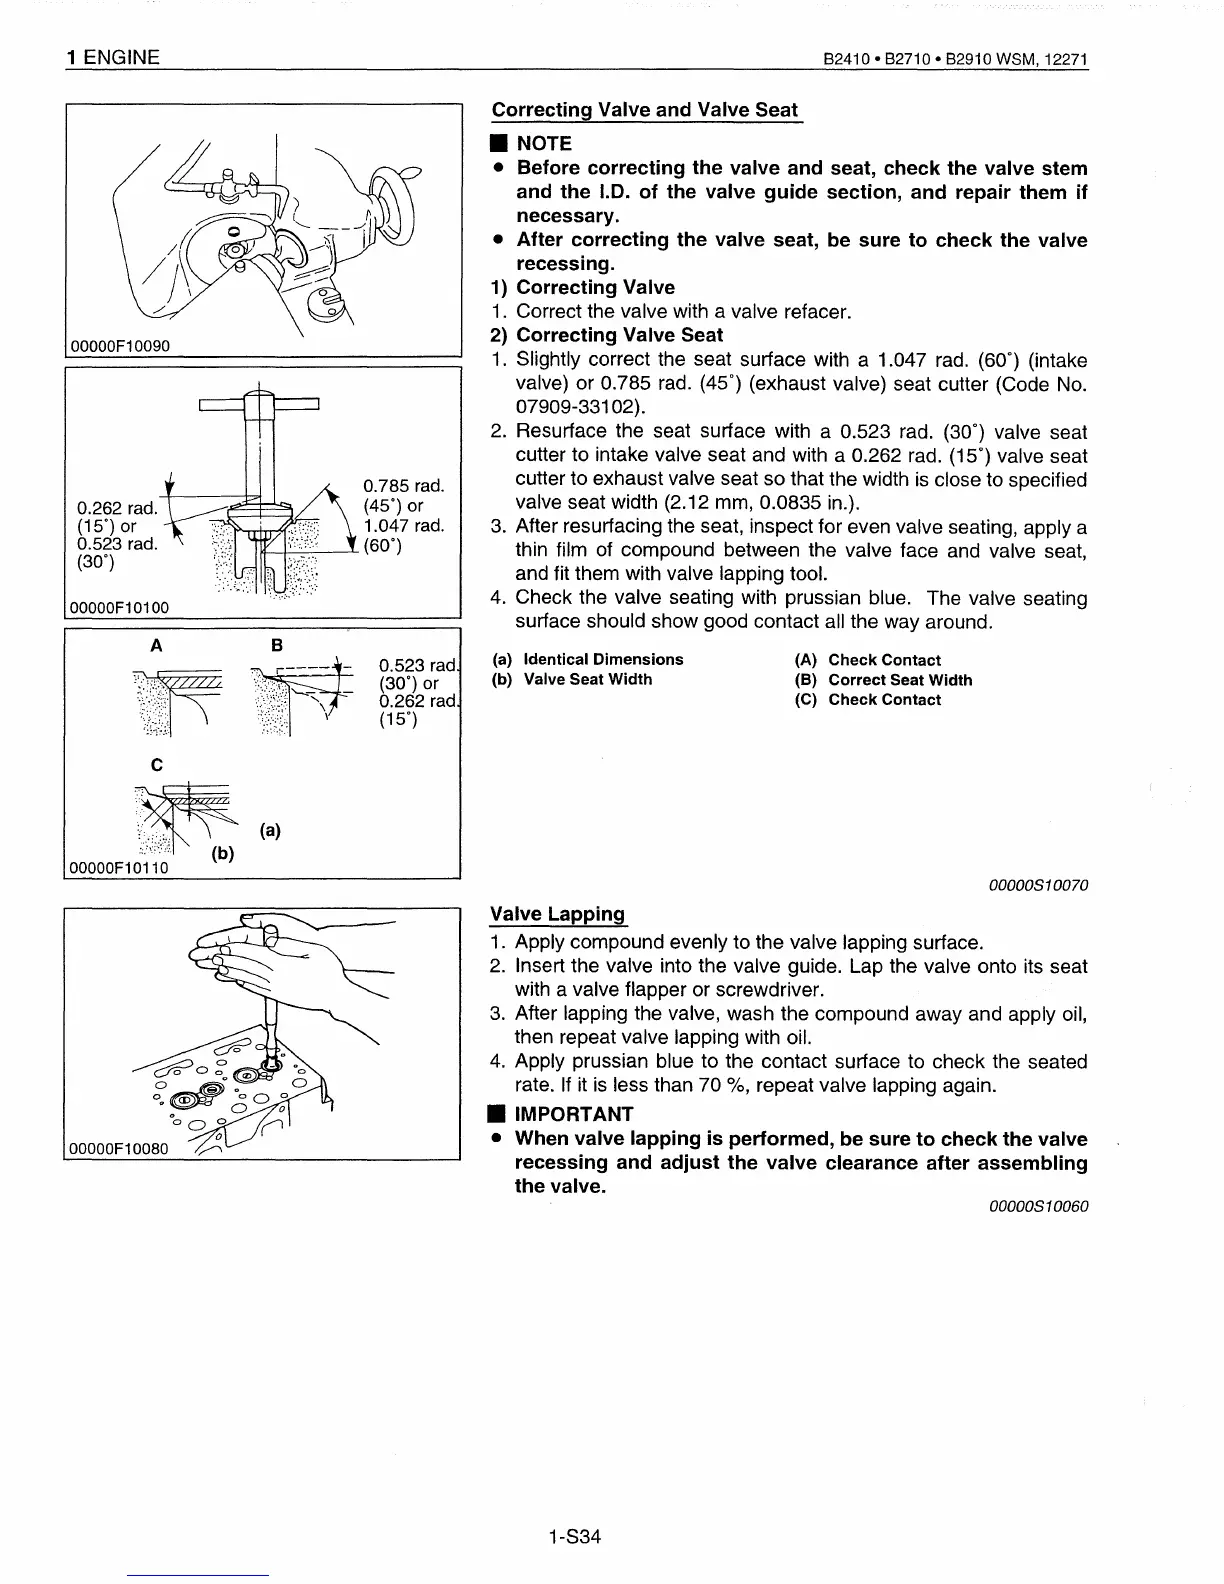
1.
Slightly correct the seat surface with a 1.047
rad.
(60°) (intake
valve) or 0.785 rad. (45°) (exhaust valve) seat cutter (Code
No.
07909-33102).
2.
Resurface the seat surface with a 0.523 rad. (30°) valve seat
cutter to intake valve seat and with a 0.262 rad. (15°) valve seat
cutter to exhaust valve seat so that the width
is
close to specified
valve seat width (2.12 mm, 0.0835 in.).
3.
After resurfacing the seat, inspect for even valve seating, apply a
thin film of compound between the valve face and valve seat,
and fit them with valve lapping tool.
4.
Check the valve seating with prussian blue. The valve seating
surface should show good contact all the way around.
0.785 rad.
(45°)
or
1.047 rad.
114--~--'-
(60°)
0.262 rad.
(15°)
or
0.523 rad.
(30°)
A B
~p
0.523 rad
(30°) or
0.262 rad
(15°)
(a) Identical
Dimensions
(b) Valve Seat
Width
(A)
Check
Contact
(B)
Correct
Seat
Width
(C)
Check
Contact
00000810070
OOOOOF10080
Valve
Lapping
1.
Apply compound evenly to the valve lapping surface.
2.
Insert the valve into the valve guide. Lap the valve onto its seat
with a valve flapper or screwdriver.
3.
After lapping the valve, wash the compound away and apply oil,
then repeat valve lapping with oil.
4.
Apply prussian blue to the contact surface to check the seated
rate. If it
is
less than 70
0/0,
repeat valve lapping again.
• IMPORTANT
• When
valve
lapping
is
performed,
be
sure
to
check
the
valve
recessing
and
adjust
the
valve
clearance
after
assembling
the
valve.
00000810060
1-S34
 Loading...