Routing
205
M4100 Series Managed Switch
Configure Advanced Routes
To configure advanced routes:
1. Prepare your computer with a static IP address in the 169.254.100.0 subnet, for
example, 169.254.100.201.
2. Connect an Ethernet cable from an Ethernet port on your computer to an Ethernet port on
the switch.
3. Launch a web browser
.
4. Enter the IP address of the switch in the web browser address field.
The default IP address of the switch is 169.254.100.100.
The Login screen displays.
5. Enter the user name and password.
The default admin user name is admin and the default admin password is blank, that is,
do not enter a password.
6. Click the Login button.
The web management interface menu displays.
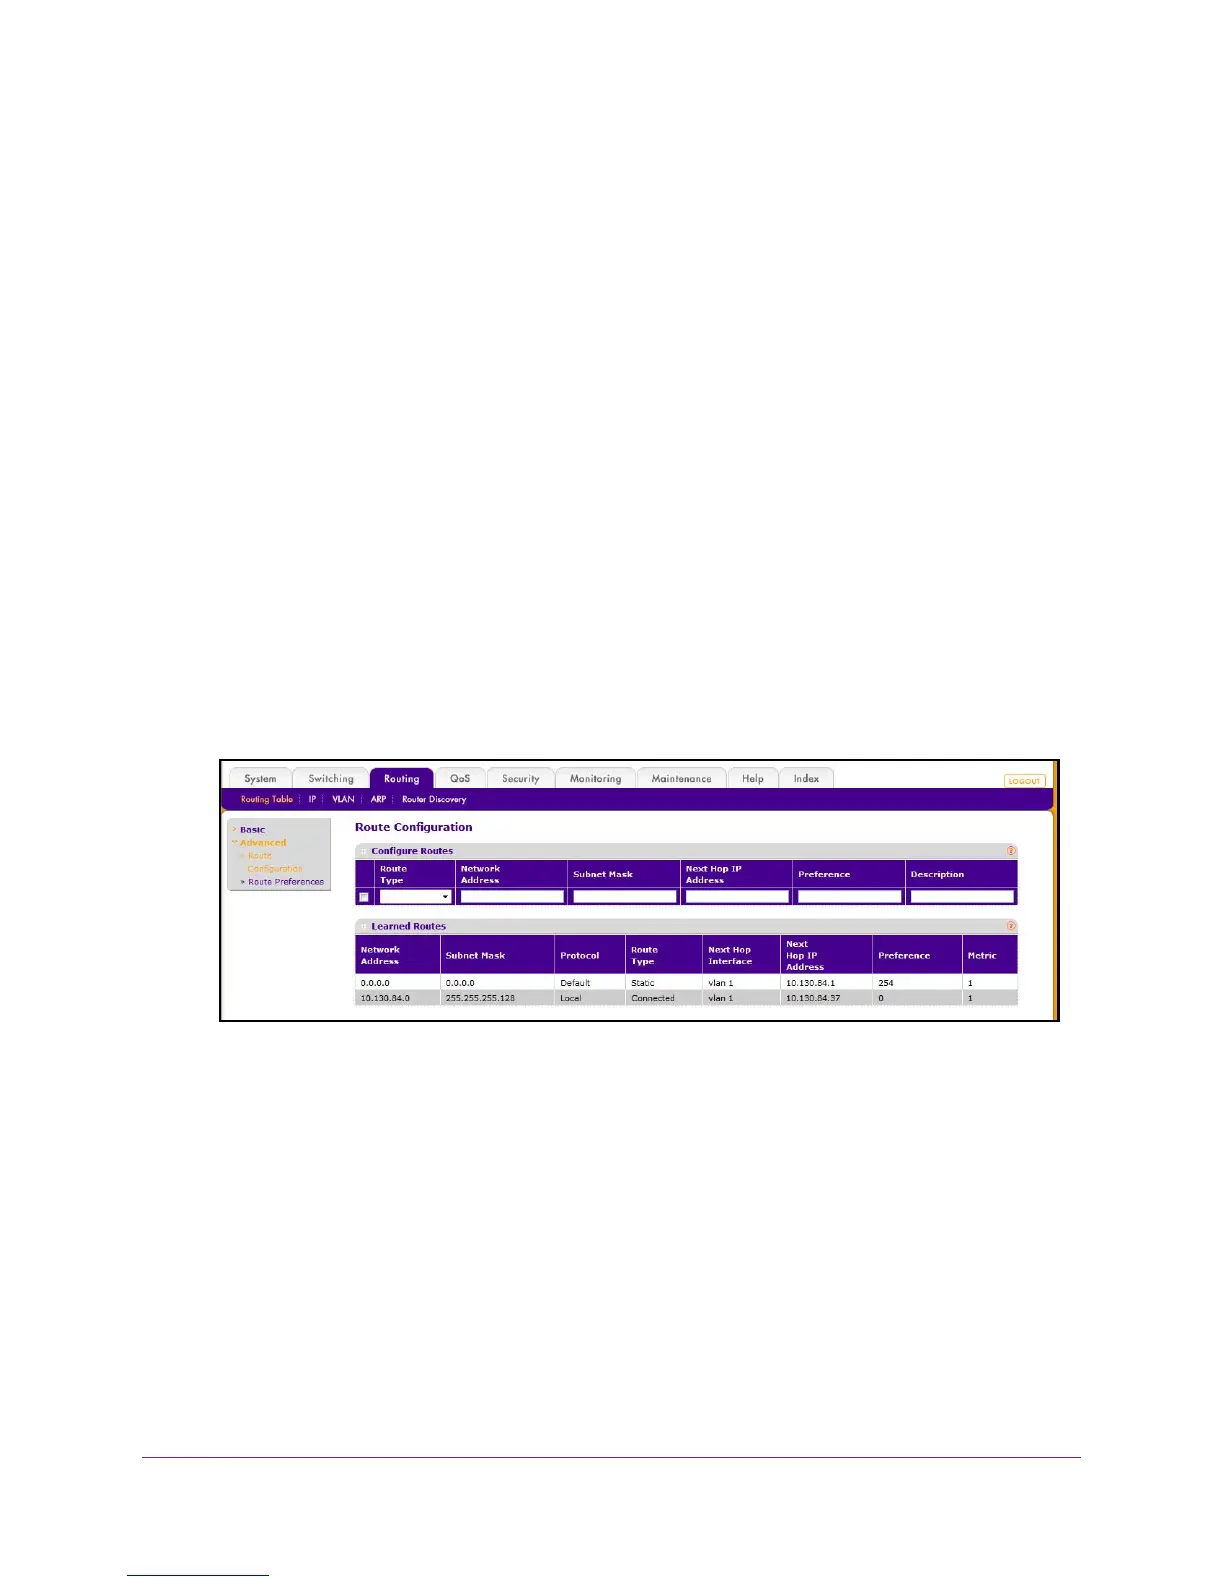
7. Select Routing
Routing Table Advanced Route Configuration.
8. In the Route Type field, select default or static reject.
If you are creating a default route, all that must be specified is the next hop IP address;
otherwise, each field must be specified.
The fields that you must specify depend on your
selections in this screen.
• Network Address displays the IP route prefix for the destination.
• Subnet Mask indicates the portion of the IP interface address that identifies the
attached network.
This is also referred to as the subnet/network mask.
• Next Hop IP
Address displays the outgoing router IP address to use when
forwarding traffic to the next router (if any) in the path toward the destination.The next
router is always one of the adjacent neighbors or the IP address of the local interface
for a directly attached network.
 Loading...