13
OTHER FUNCTIONS
13-3
D Transmittingtherecordedvoiceaudio
NOTE: Be sure to first insert an SD card that has the
recorded audio memory into the transceiver.
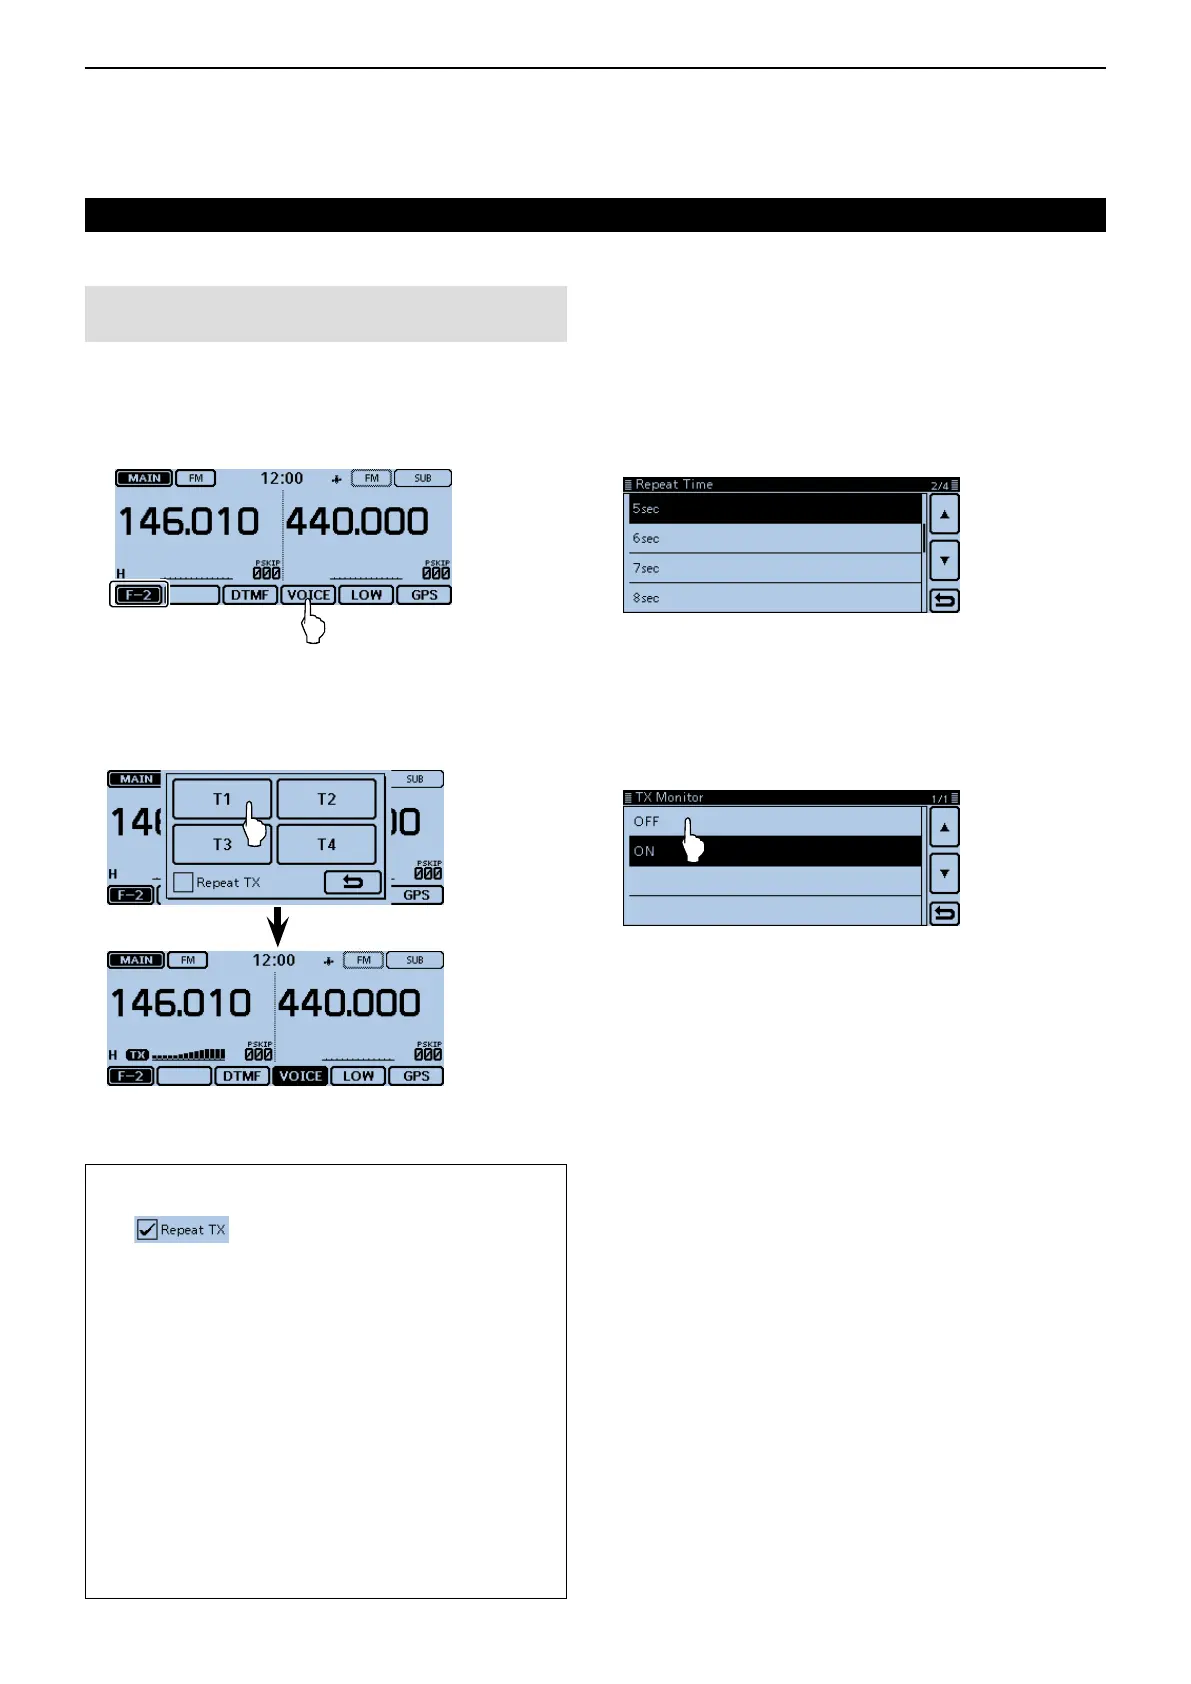
Touch the Function group icon one or more times. q
• Selects the F-2 menu.
Touch [VOICE]. w
• Opens the voice memory window.
Touch a desired memory, [T1] through [T4] to trans- e
mit the recorded voice audio once.
• If you touch [VOICE] again, the voice transmission will be
canceled.
• Push [PTT] to cancel a recorded voice transmission.
Voice TX function (Continued)
Foryourreference:
• If you touch “Repeat TX” to insert a check in step
e ( ),
the transceiver repeatedly transmits
the recorded voice audio for up to 10 minutes at the
interval specified in “Repeat Time.”
- Once the repeat transmission has been made, the trans-
ceiver pauses until the end of the “Repeat Time,” then
transmits again. After the second transmission, the Re-
peat TX function continues pausing, if receiving a signal,
even if the Busy Lockout is ON.
But if the squelch is manually opened in the FM mode,
the voice audio is repeatedly transmitted, according to
the repeat time setting.
• You can send
recorded voice audio
in the Menu
screen.
In the “VOICE TX” screen, touch “<<TX>>” to display
the voice memory window.
(Voice TX > <<TX>>)
D ChangingthevoiceTXsettings
You can change the voice TX settings in the “TX SET”
item of the Menu screen.
See page 12-19 for details.
•SettingtheRepeatTime
Set the repeat interval for the voice repeat transmis-
sion.
[MENU] > Voice TX > TX Set> RepeatTime
The transceiver repeatedly transmits the recorded voice
audio at 5 second intervals as the default.
•UsingtheTXMonitorfunction
Turn the TX Monitor function ON or OFF. (Default: ON)
[MENU] > Voice TX > TX Set> TXMonitor
The TX voice audio is output from the speaker as the
default.

 Loading...