Checking/Selecting Scan & Other Documents
217
Check Mailbox
5
Checking/Selecting Scan & Other Documents
You can check or select box documents.
The functions working for the printed documents are [Delete], [Show Document Details]
and [Change Document Name].
Note • Copied documents are not displayed.
• Printed documents displayed on Scan & Other Jobs screen and printed documents
displayed on Copy & Print Jobs screen are same. When selecting [Delete] or [Document
Details] for documents displayed on Scan & Other Jobs screen, documents displayed on
Copy & Print Jobs screen are also reflected.
• When selecting printed documents, [Job Flow Settings] cannot be selected.
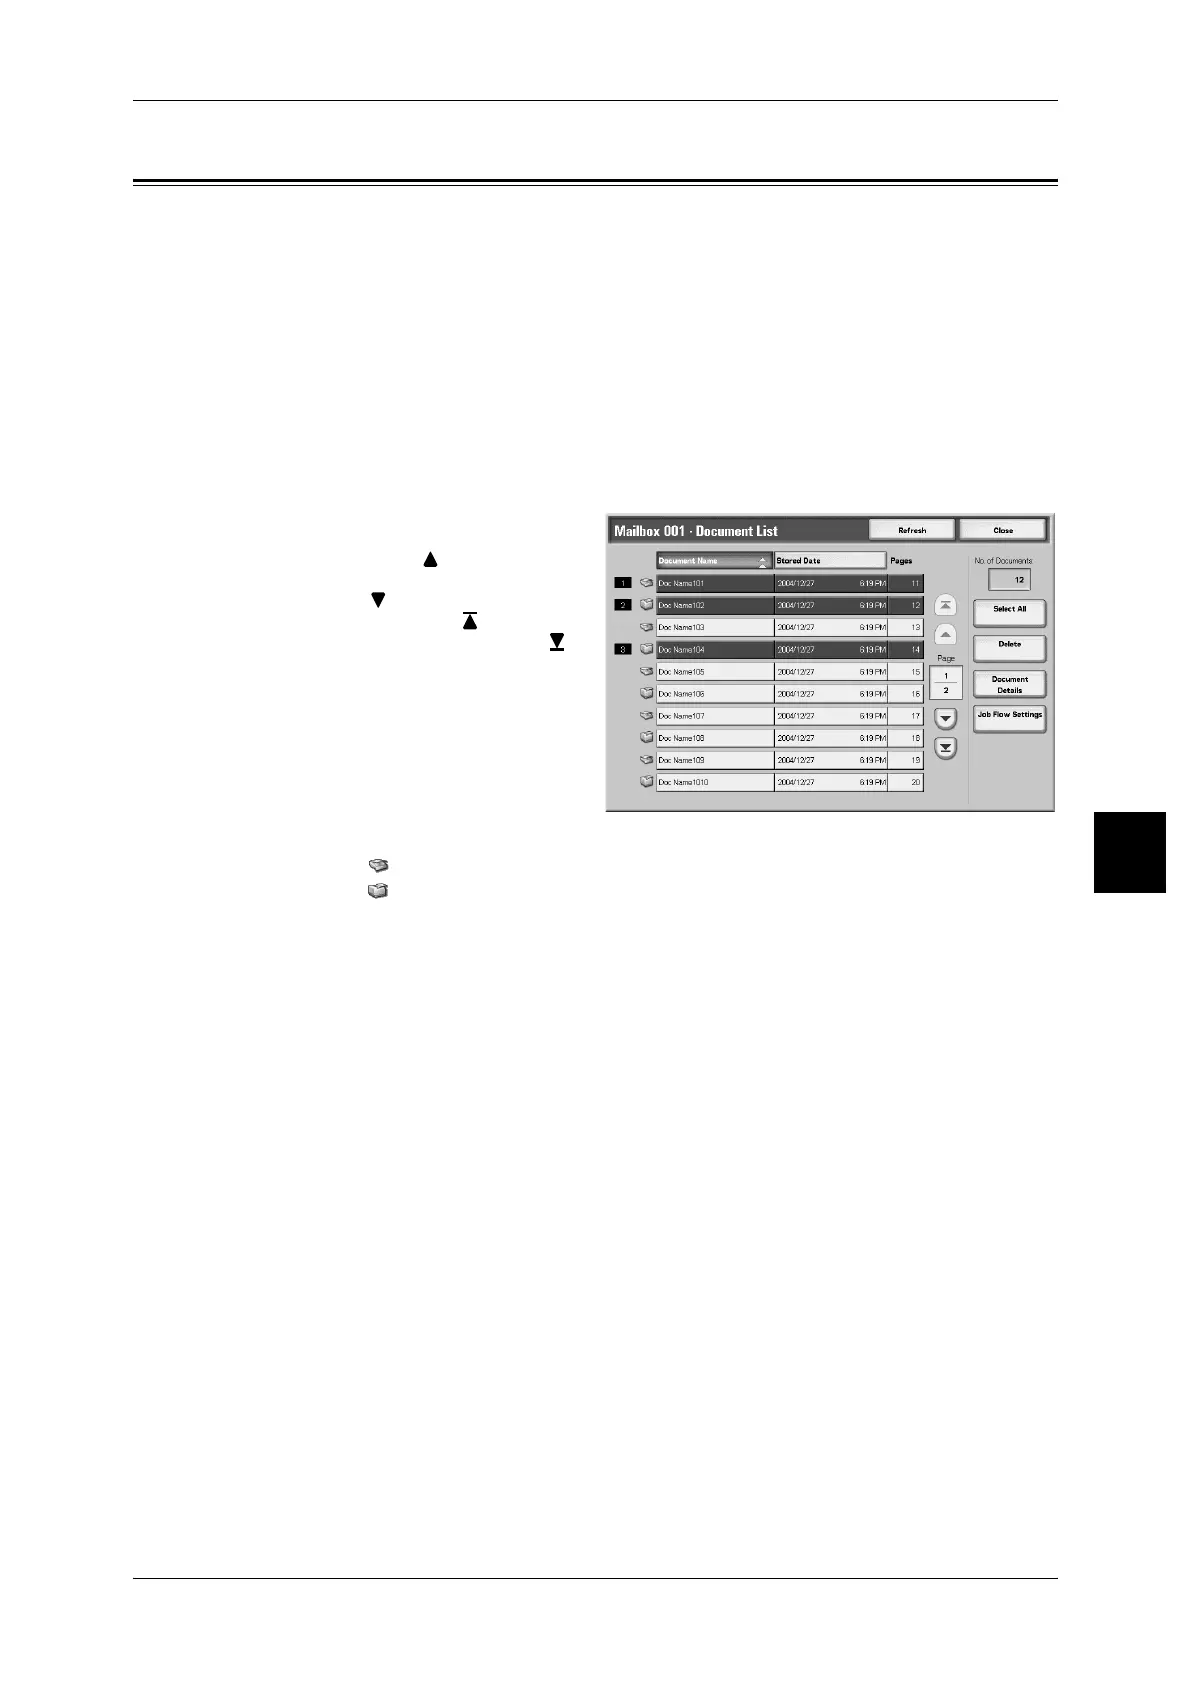
1 Select a mailbox in the [Check Mailbox] screen.
2 Select a document.
Note • Select [ ] to display the
previous screen and select
[ ] to display the next screen.
Also, select [ ] to display the
head screen and select [ ] to
display the last screen.
• You can sort documents in
ascending or descending
order by pressing either [Doc.
Name] or [Stored Date].
• To the left of the document
name is displayed an icon
showing the document
contents.
: Scanned Document
: Printed Document
• Up to 100 documents can be selected separately. You can also select all documents. When
selecting individual documents, a number appears to the left of the document icon indicating
the order in which it was selected. Documents are processed in this order.
Refresh
Updated information is displayed.
No. of Documents
The number of documents saved is displayed.
Select All
All documents in the box are selected. Selection will be canceled if the button is
selected again.
Delete
Box documents are deleted.
Refer to "Deleting Scan & Other Documents" (P.218).
Document Details
You can check box documents and change a document name.
Refer to "Checking Scan & Other Documents" (P.219).
Job Flow Settings
The [Job Flow Settings] screen is displayed. You can create and execute Job Flow.
Refer to "Configuring/Starting Job Flow" (P.220).
 Loading...