11 Job Status
406
Job Status
11
Sample Print
This section describes how to print and delete documents stored by the sample print
feature. When printing multiple copies from a client, specifying a sample print means
that the job terminates after printing just one copy. After checking the print results, to
print the remaining copies, indicate the printing of the sample print from the screen of
the machine.
This section describes how to print and delete documents stored by the sample print
feature.
For information about the method of sample printing, refer to the print driver help information.
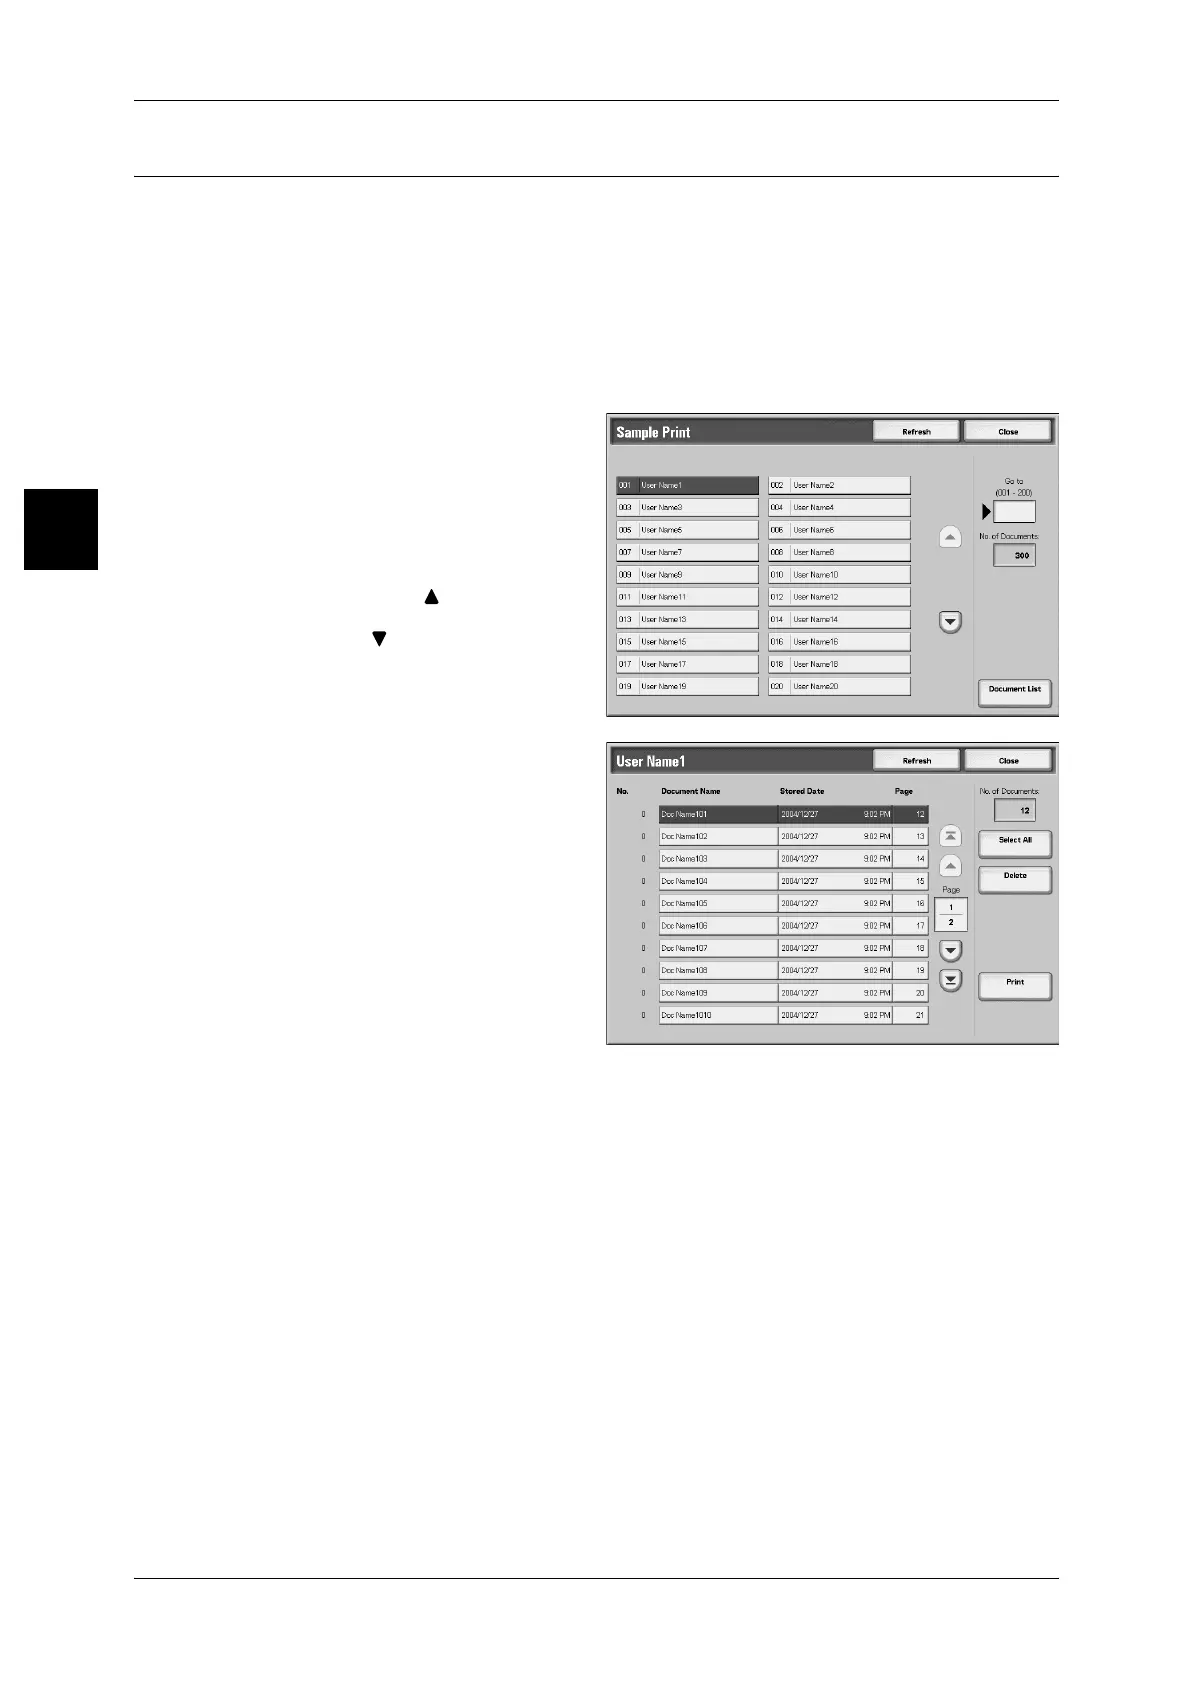
1 Select [Sample Print].
2 Select the user whose ID number
you want to check, and select
[Document List].
Note • Select [Refresh] to display the
updated information.
• Select [ ] to display the
previous screen and select
[ ] to display the next screen.
• You can also enter a three-
digit UserID number directly
with the numeric keypad.
3 Select the document you want to
print or delete.
Note • Select [Select All] to select all
documents. Press this button
once more to deselect all
documents.
4 Select any item.
Select All
Select all documents. Press this button once more to deselect all documents.
Delete
Deletes sample print documents.
Note • If you delete all documents of a UserID, the UserID itself is deleted.
Refer to "When You Selected [Delete]" (P.407).
Print
Prints sample print documents.
Refer to "When You Selected [Print]" (P.407).
 Loading...