10 Setups
326
Setups
10
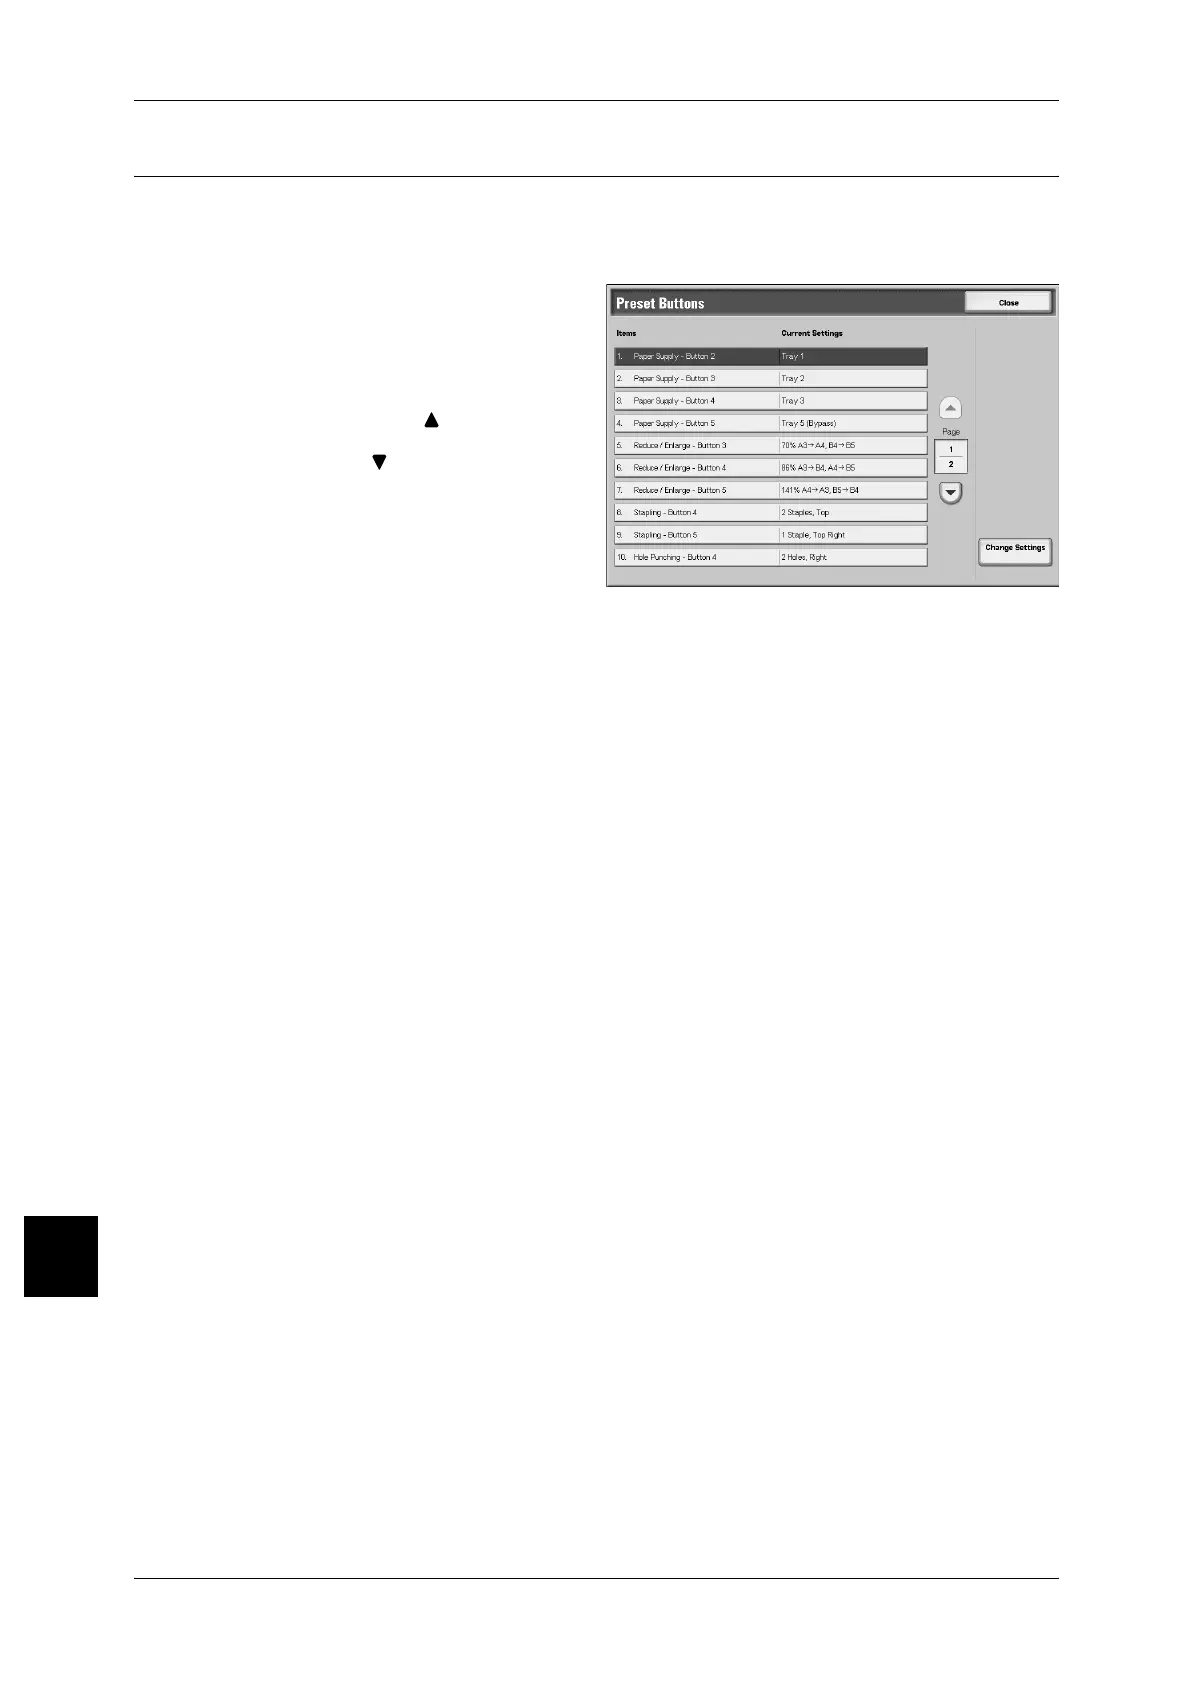
Preset Buttons
Items assigned to the Preset Buttons can be changed. By setting most commonly used
tray and magnification settings, you can reduce the number of selection operations for
making a copy.
1 Select [Preset Buttons].
2 Select the item to be set or
changed, and select [Change
Settings].
Note • Select [ ] to display the
previous screen and select
[ ] to display the next screen.
3 Select the setting value.
4 Press [Save].
Paper Supply - Button 2
For the five feature buttons appearing in [Paper Supply] in the [Basic Copying Tab]
screen, you can set the second paper tray from the top.
Paper Supply - Button 3
For the five feature buttons appearing in [Paper Supply] in the [Basic Copying Tab]
screen, you can set the third paper tray from the top.
Paper Supply - Button 4
For the five feature buttons appearing in [Paper Supply] in the [Basic Copying Tab]
screen, you can set the fourth paper tray from the top.
Paper Supply - Button 5
For the five feature buttons appearing in [Paper Selection] in the [Basic Copying Tab]
screen, you can set the fifth paper tray from the top.
Reduce/Enlarge - Button 3
For the five feature buttons appearing in [Reduce/Enlarge] in the [Basic Copying Tab]
screen, you can set the magnification for the third row from the top.
You can select the magnification from the registered R/E Preset buttons.
For information about R/E Preset buttons, refer to "Reduce/Enlarge Presets" (P.337).
Reduce/Enlarge - Button 4
For the five feature buttons appearing in [Reduce/Enlarge] in the [Basic Copying Tab]
screen, you can set the magnification for the fourth row from the top.
You can select the magnification from the registered R/E Preset buttons.
For information about R/E Preset buttons, refer to "Reduce/Enlarge Presets" (P.337).
 Loading...