April 2017
4-51
Xerox® VersaLink® B7025/B7030/B7035 Multifunction Printer
REP 10.2
Repairs and Adjustments
Launch Issue
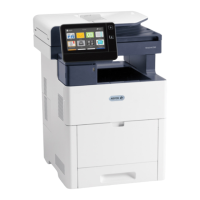
10. Disengage two hooks (1), then remove the rear cover (2), Figure 4.
Figure 4 Rear cover removal
11. Remove the rear bracket and exit 2 motor, Figure 5:
a. Release the clamp, then remove the harness (1).
b. Disconnect the connector (2).
c. Remove four screws (3).
d. Disengage the hook (4),
e. Remove the rear bracket and exit 2 motor (5).
Figure 5 Motor removal
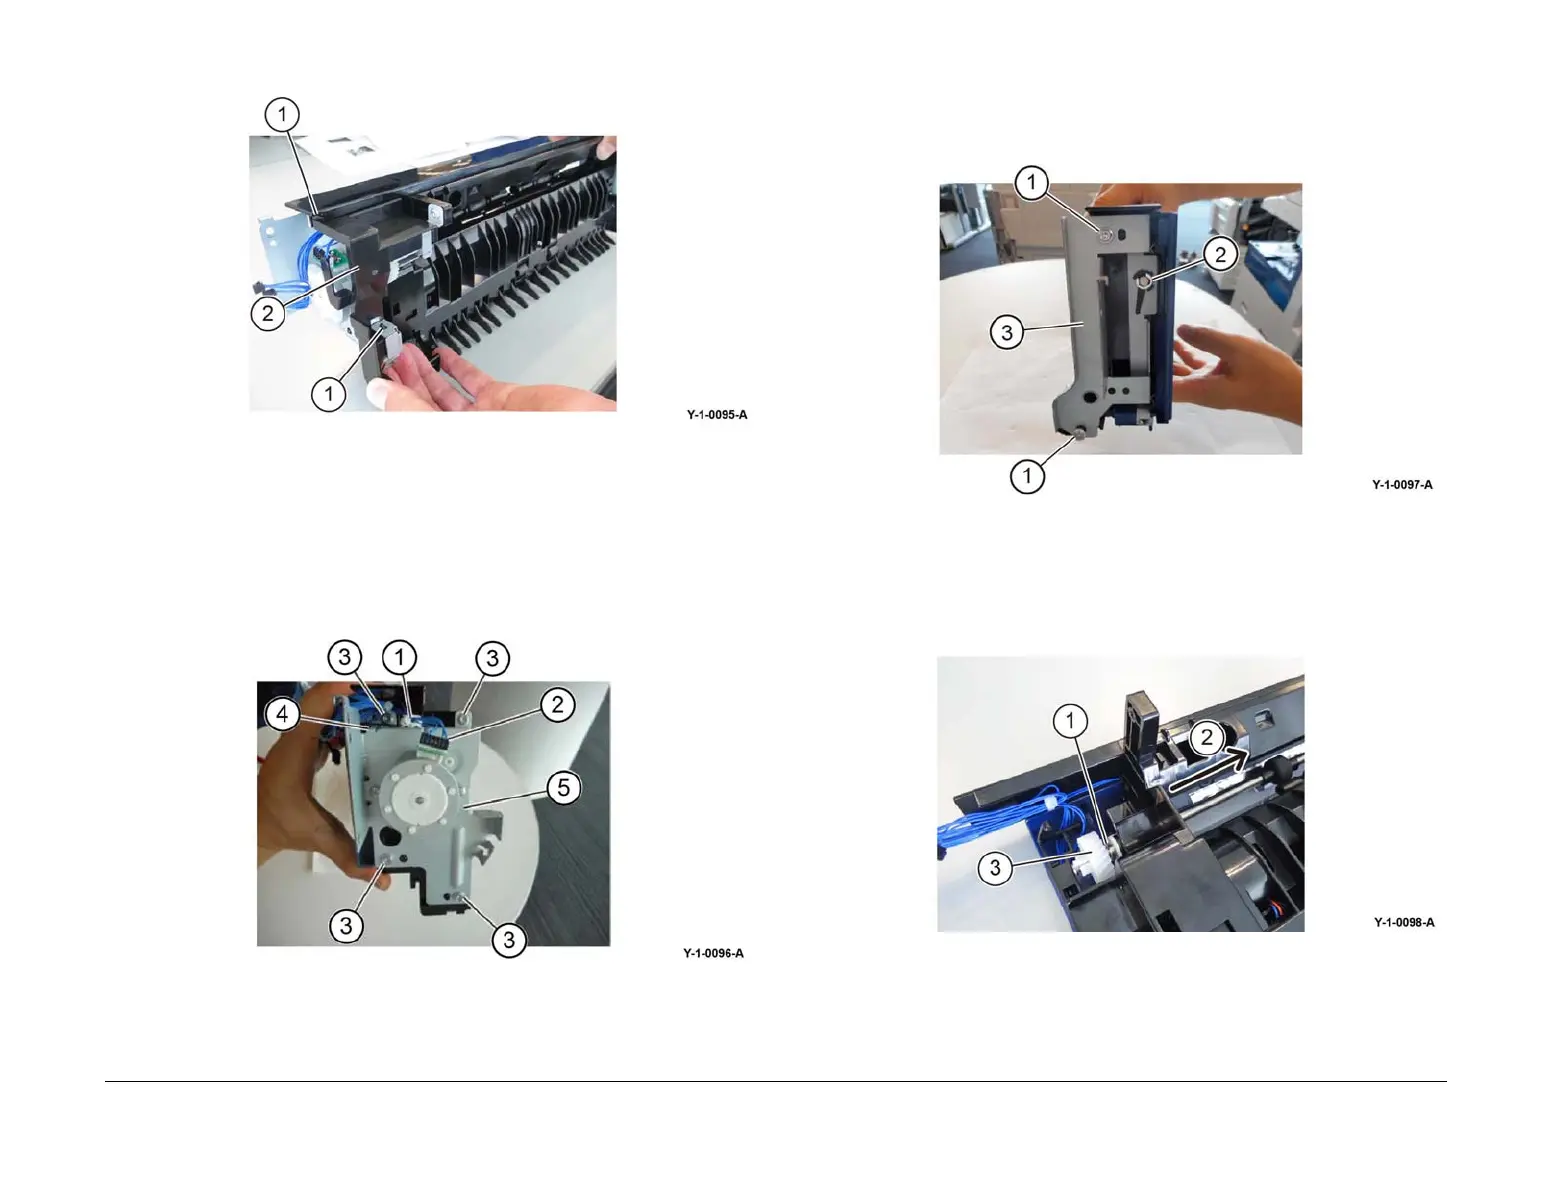
12. Remove the front bracket, Figure 6:
a. Remove two screws (1).
b. Remove the E-clip (2).
c. Remove the front bracket (3).
Figure 6 Front bracket removal
13. Remove the helical gear, Figure 7:
a. Remove the E-clip (1).
b. Move the exit roll in the direction of the arrow (2).
c. Disengage the hook to remove the helical gear (3).
Figure 7 Helical gear removal
 Loading...