April 2017
4-147
Xerox® VersaLink® B7025/B7030/B7035 Multifunction Printer
REP 60.3
Repairs and Adjustments
Launch Issue
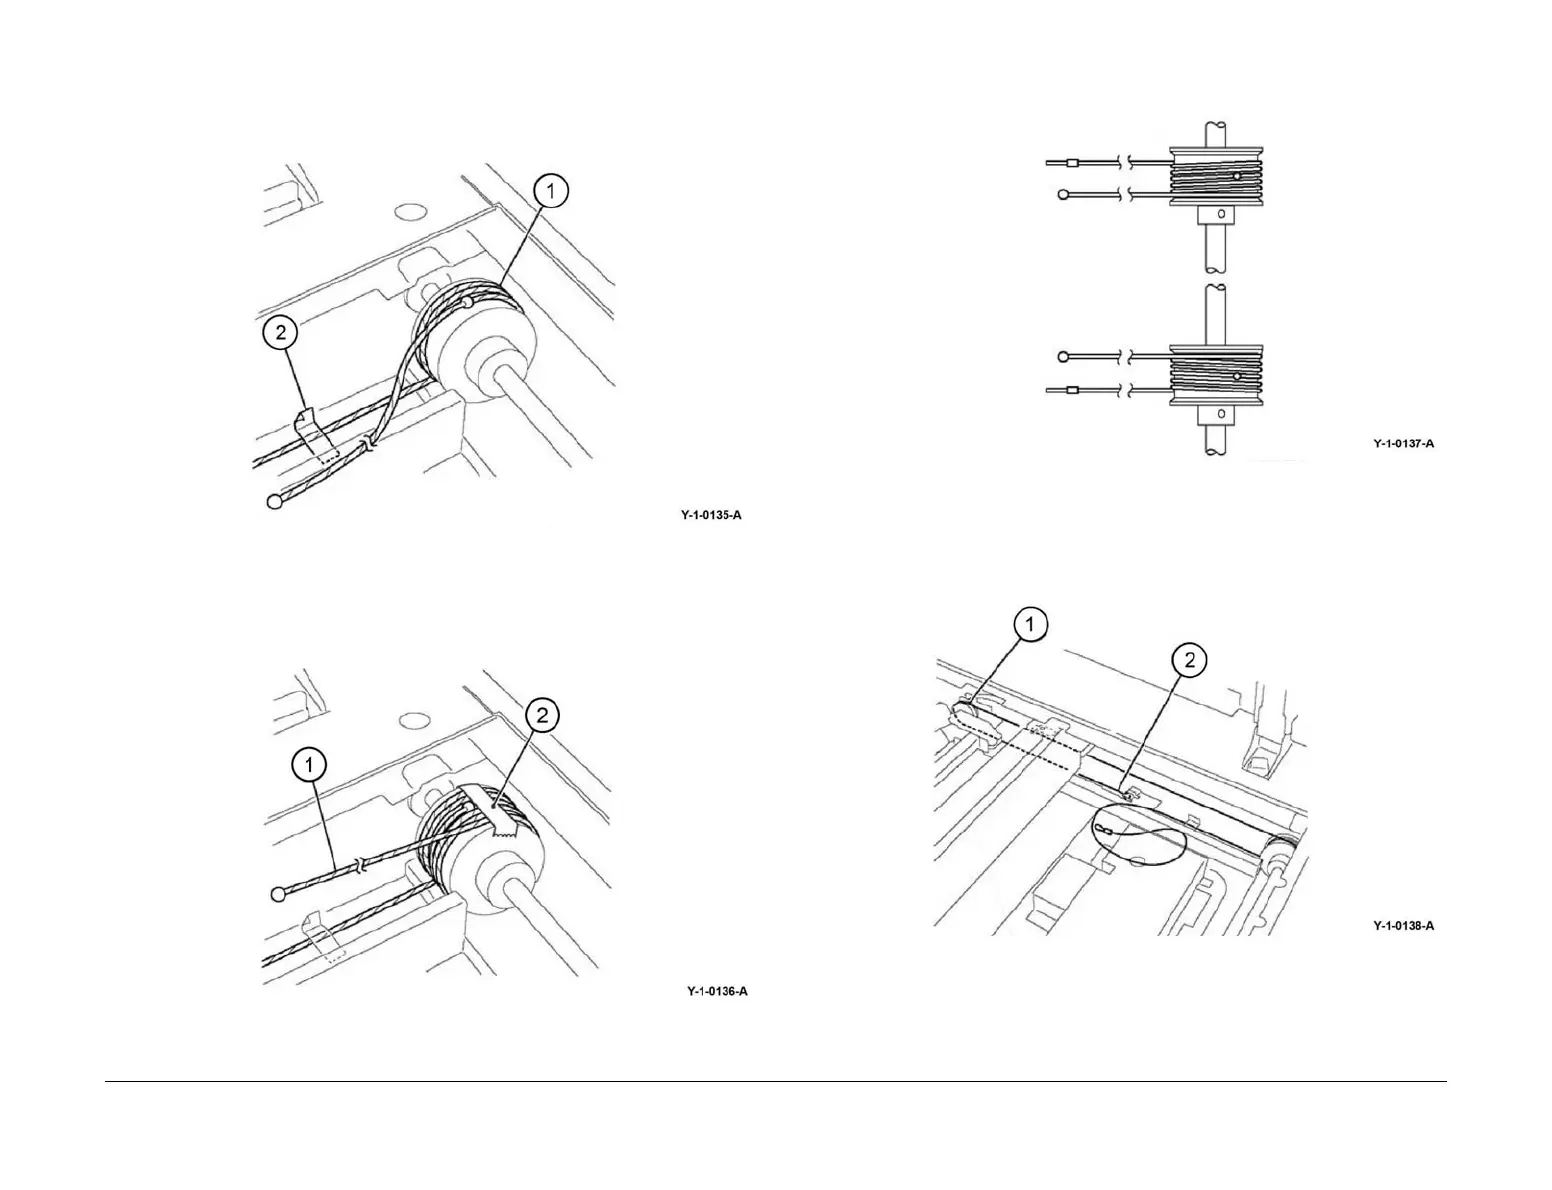
2. Wind the extension spring loop end of the carriage cable around the capstan, Figure 7:
a. Wind the cable (1) 2.5 turns.
b. Use adhesive tape (2) to affix the extension spring loop end of the cable to the
frame.
Figure 7 Capstan winding (1)
3. Wind the end-ball end of the carriage cable around the capstan, Figure 8:
a. Wind the cable (1) 3 turns.
b. Use adhesive tape (2) to affix the cable to the capstan.
Figure 8 Capstan winding (2)
4. Figure 9 shows the correct arrangement of the cables, front and rear.
Figure 9 Cable arrangement
5. Install the end-ball end of the carriage cable, Figure 10:
a. Wrap the cable on the pulley at the front of the half rate carriage (1).
b. Put the end-ball in the notch in the frame (2).
Figure 10 End-ball end installation
Front
Rear
Color: Silver
2.5 Turns
3 Turns
Color: Black
2.5 Turns
3 Turns
 Loading...