April 2017
4-20
Xerox® VersaLink® B7025/B7030/B7035 Multifunction Printer
REP 3.2
Launch Issue
Repairs and Adjustments
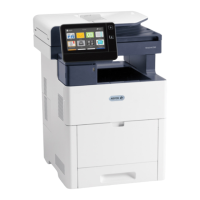
11. Disconnect the connectors, Figure 8:
a. Disconnect the three connectors (1), then release the associated harness clamps.
b. Pull the harness through the hole in the chassis (2).
Figure 8 Connectors
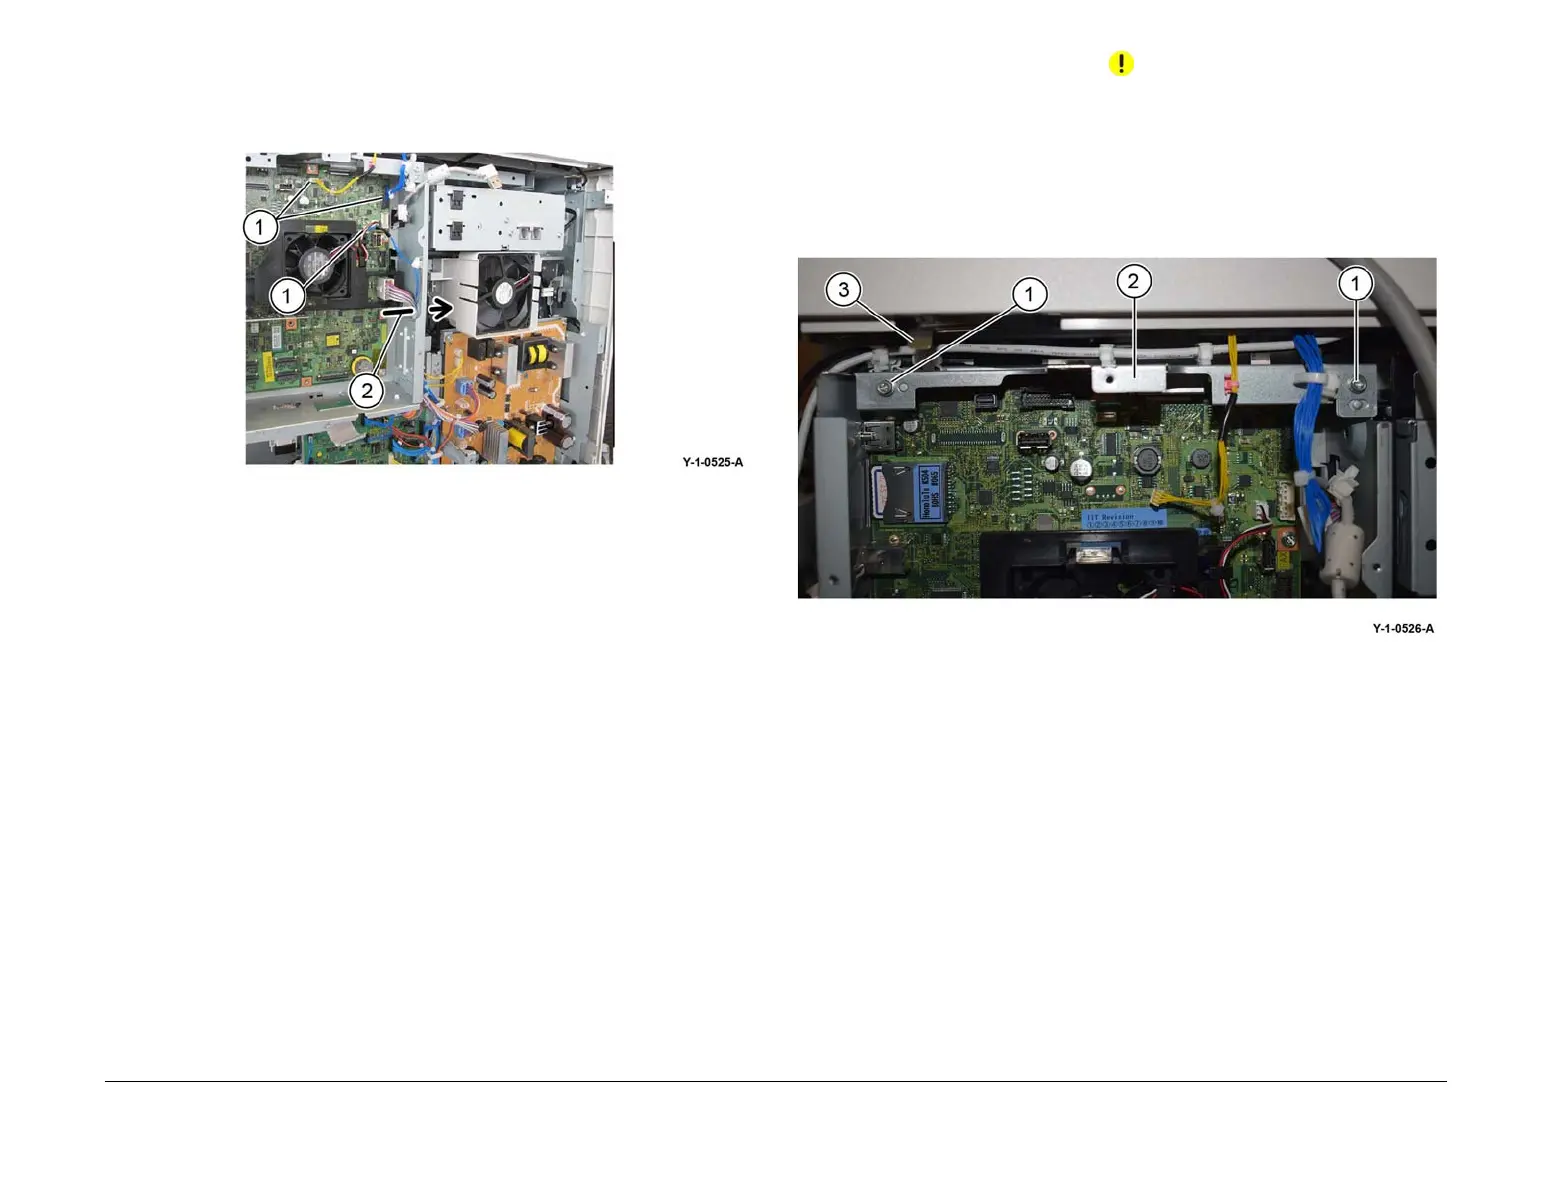
CAUTION
Take not to damage or dislodge the rear cover ground clip (3) when removing the ESS upper
panel.
12. Remove the ESS upper panel, Figure 9:
a. Remove both screws (1).
b. Remove the ESS upper panel (2).
c. Release all remaining harness clamps from the ESS upper panel.
Figure 9 ESS upper panel removal
 Loading...