EasyManuals Logo

Lexmark MS825 Service Manual

Lexmark MS825
970 pages
To Next Page IconTo Next Page
To Previous Page IconTo Previous Page
Page #726 background imageLoading...
Page #726 background image
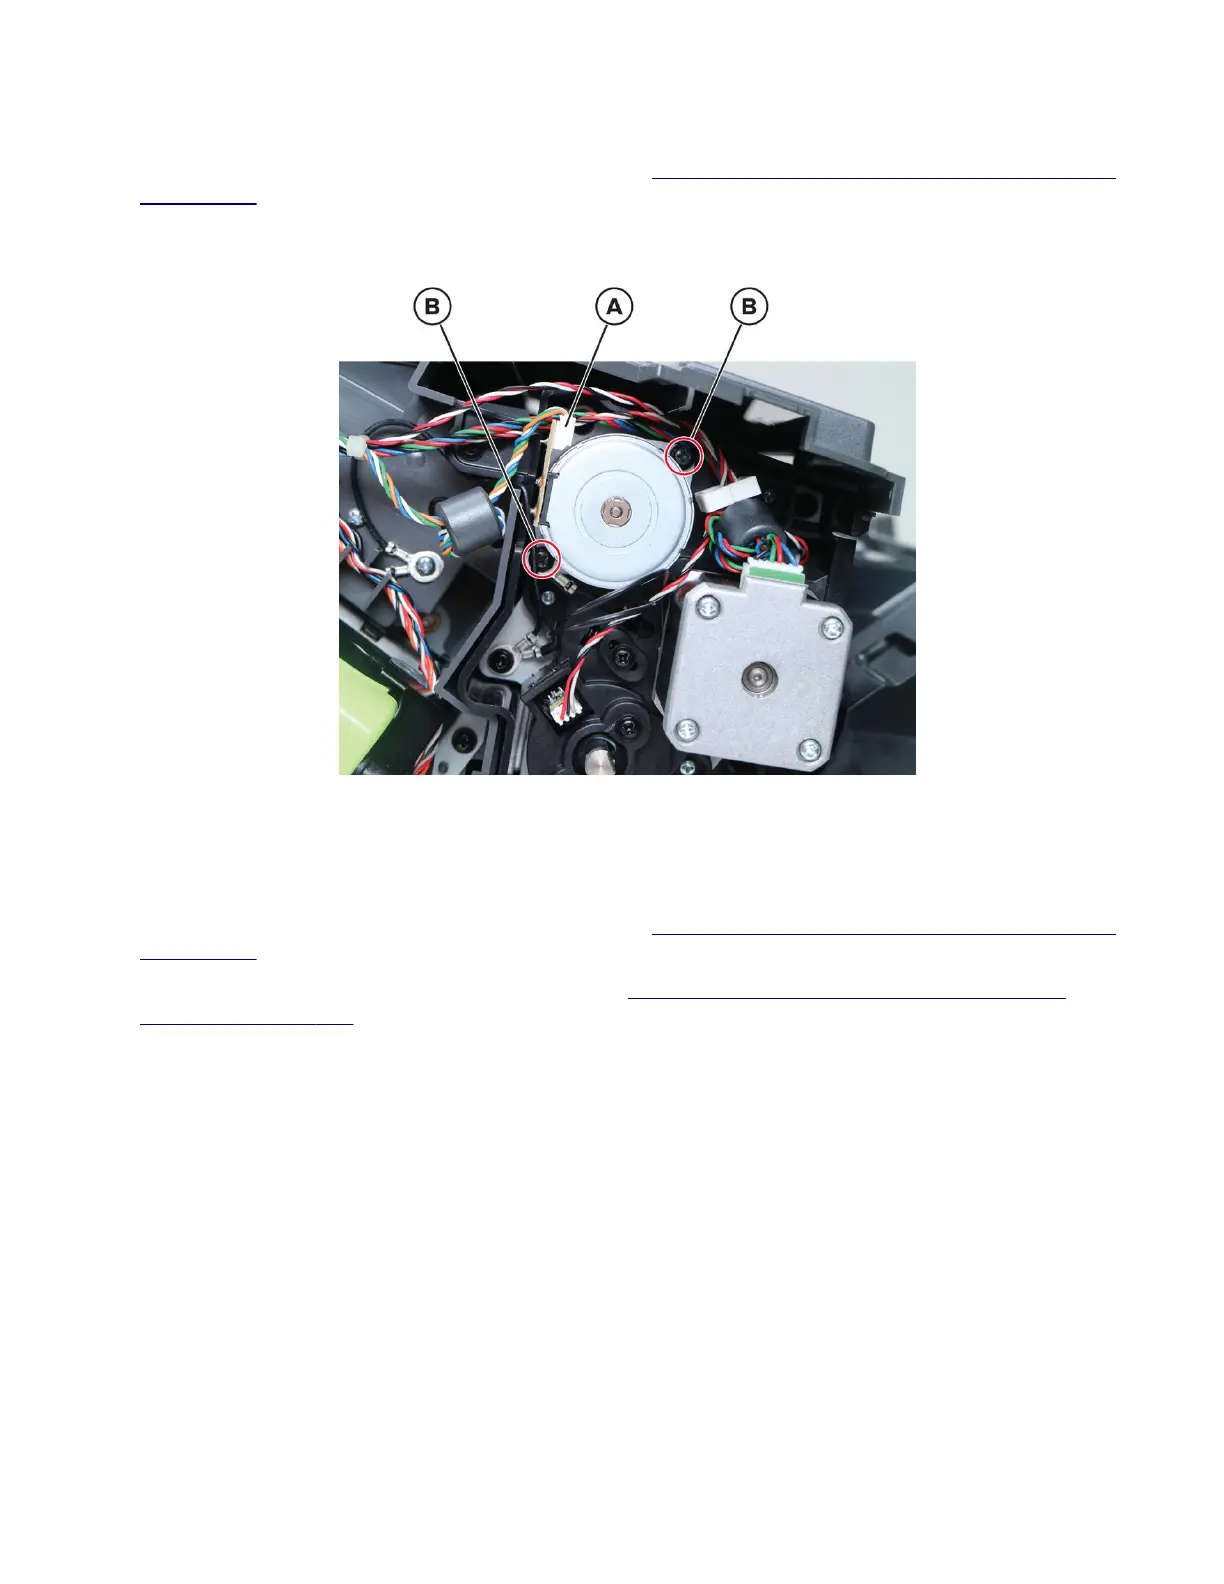
Motor (HPU carriage) removal
1 Remove the staple, hole punch
finisher
right cover. See “Staple, hole punch
finisher
right cover removal”
on page 701.
2 Disconnect the cable (A), and then remove the two screws (B).
3 Remove the motor.
Right staple unit removal
1 Remove the staple, hole punch finisher right cover. See “Staple, hole punch finisher right cover removal”
on page 701.
2 Release the right stapler door close limit switch. See “SHPF staple cartridge door close limit switch
removal” on page 706.
4064
Parts removal
726

Table of Contents

Other manuals for Lexmark MS825

Questions and Answers:

Question and Answer IconNeed help?

Do you have a question about the Lexmark MS825 and is the answer not in the manual?

Lexmark MS825 Specifications

General IconGeneral
BrandLexmark
ModelMS825
CategoryPrinter
LanguageEnglish

Related product manuals