PROCEDURE
1 Make sure that the pressure in the fuel rail is zero.
2 Remove the fuel leakage pipe.
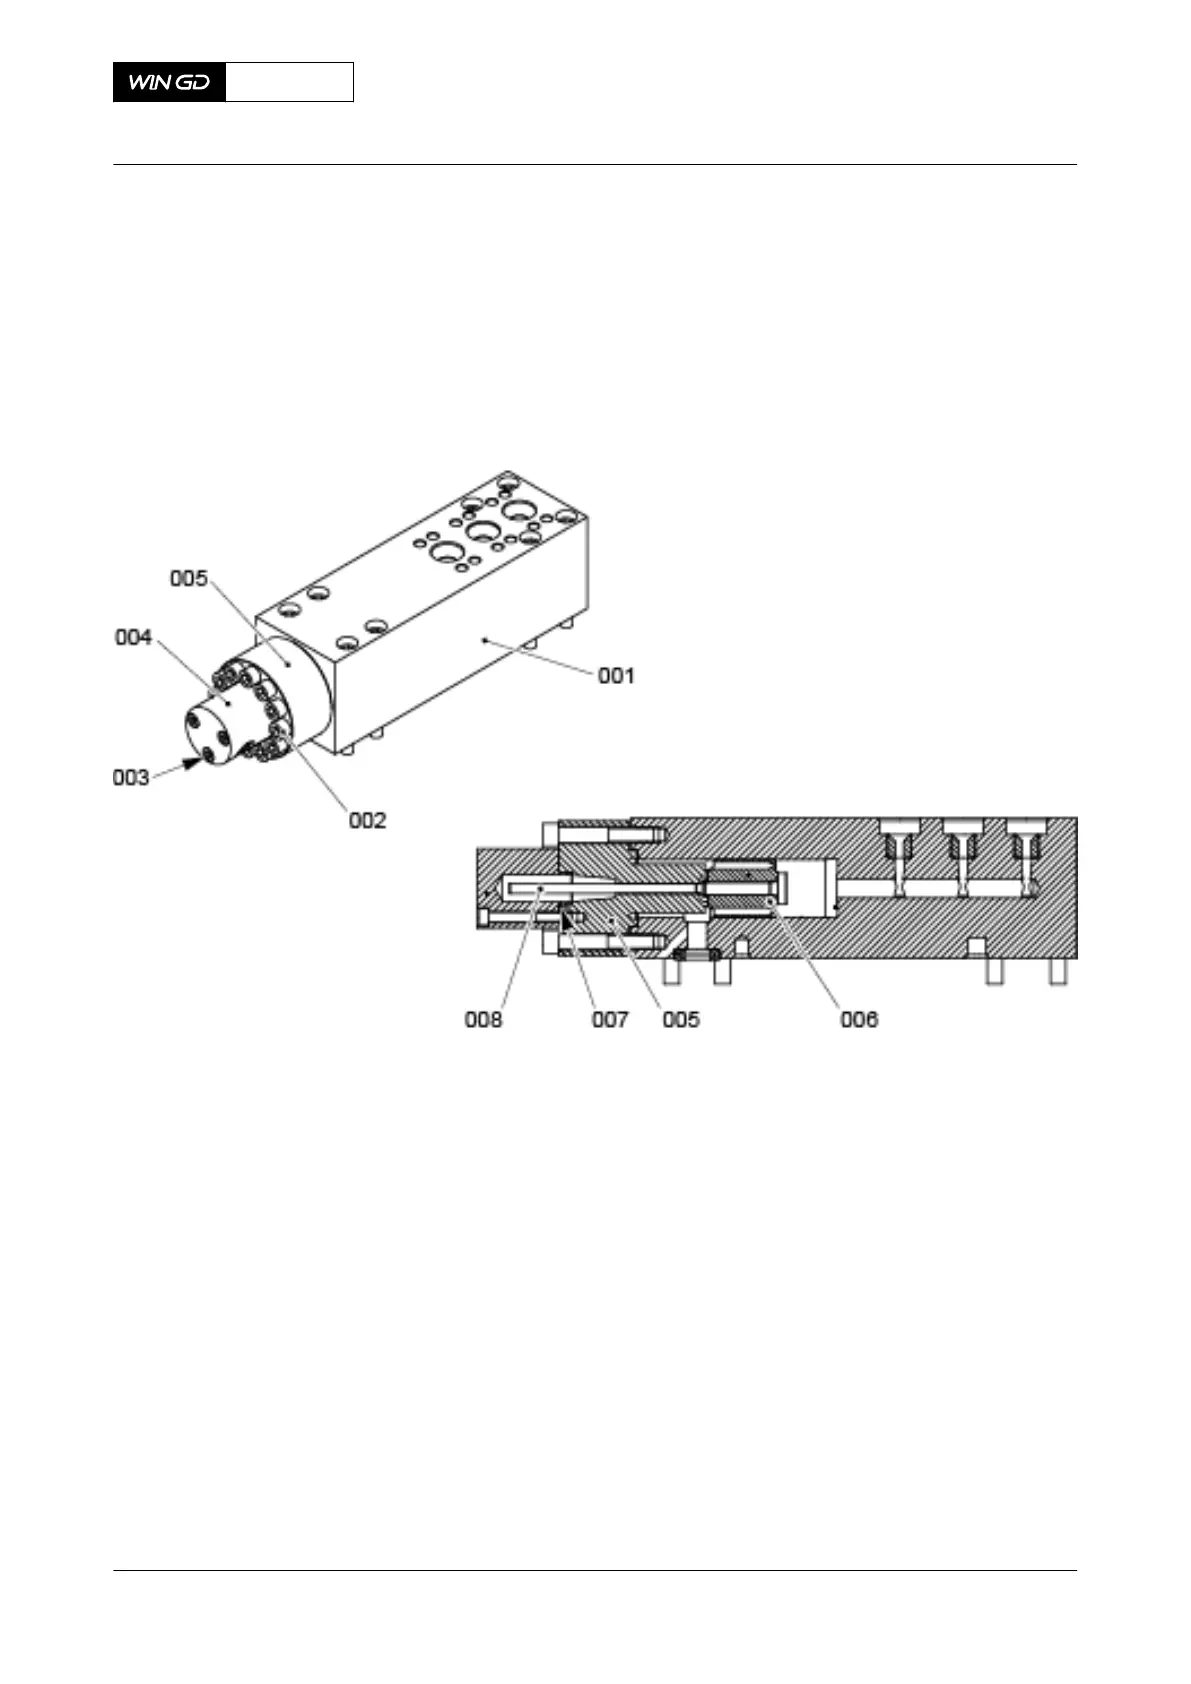
3 Remove the Allen screws (003) and the cover (004) from the flange (005).
4 Remove and discard the O-ring (007).
Fig 10-29 Flow limiting valve - inspection
5 Use Scotchbrite and WD40 or similar to clean the part of the piston rod (008) that you
have access to.
NOTE: You can use an applicable screw at the thread of the hole to hold or move the
piston rod (008).
6 Move the piston rod (008) into the flow limiting valve (001).
7 If you feel resistance because of contamination, pull the piston rod (008) back and clean
it again.
8 If you again feel resistance because of contamination, replace the flange (005) and the
piston rod (008) or the complete flow limiting valve (001), refer to section 10.7.2 Flow
limiting valve - remove.
9 Clean all remaining parts of the flow limiting valve.
10 Put oil on the new O-ring (007).
11 Attach the new O-ring (007) to the cover (004).
12 Attach the cover (004) to the flange (005) with the Allen screws (003).
13 Tighten the Allen screws (003).
14 Install the fuel leakage pipe.
X72DF
AA00-5565-00AAA-281A-A
Maintenance Manual Flow limiting valve - do an inspection
Winterthur Gas & Diesel Ltd.
- 601 - Issue 002 2020-10