PROCEDURE
1 Remove and discard the O-ring (003, Figure 13-2).
2 Loosen the claw (004).
3 Put an applicable piece of material (for example a cloth) into the opening of the HP
servo oil pipe (001).
4 Grind the sealing surface (006) of the HP servo oil pipe (001):
4.1 Use the grinding tool (005) and compound grade No. 200 to grind the sealing
surface of the HP servo oil pipe (001).
4.2 Use the grinding tool (005) and compound grade No. 500 to get a smooth finish
on the sealing surface (006) of the HP servo oil pipe (001).
5 Clean the HP servo oil pipe (001).
6 Attach a new O-ring (003) to the flange (002).
7 Remove the cloth from the opening in the HP servo oil pipe (001).
8 Remove the cloth from the opening in the HP servo oil pipe (001).
9 Make sure that the claw (004) is correctly attached to the HP servo oil pipe (001).
10 Make sure that the distance X between the end of the HP servo oil pipe (001) and the
claw (004) is related to Table 13-1 - Distance X for HP servo oil pipe.
NOTE: You can adjust the claw with an open-ended wrench.
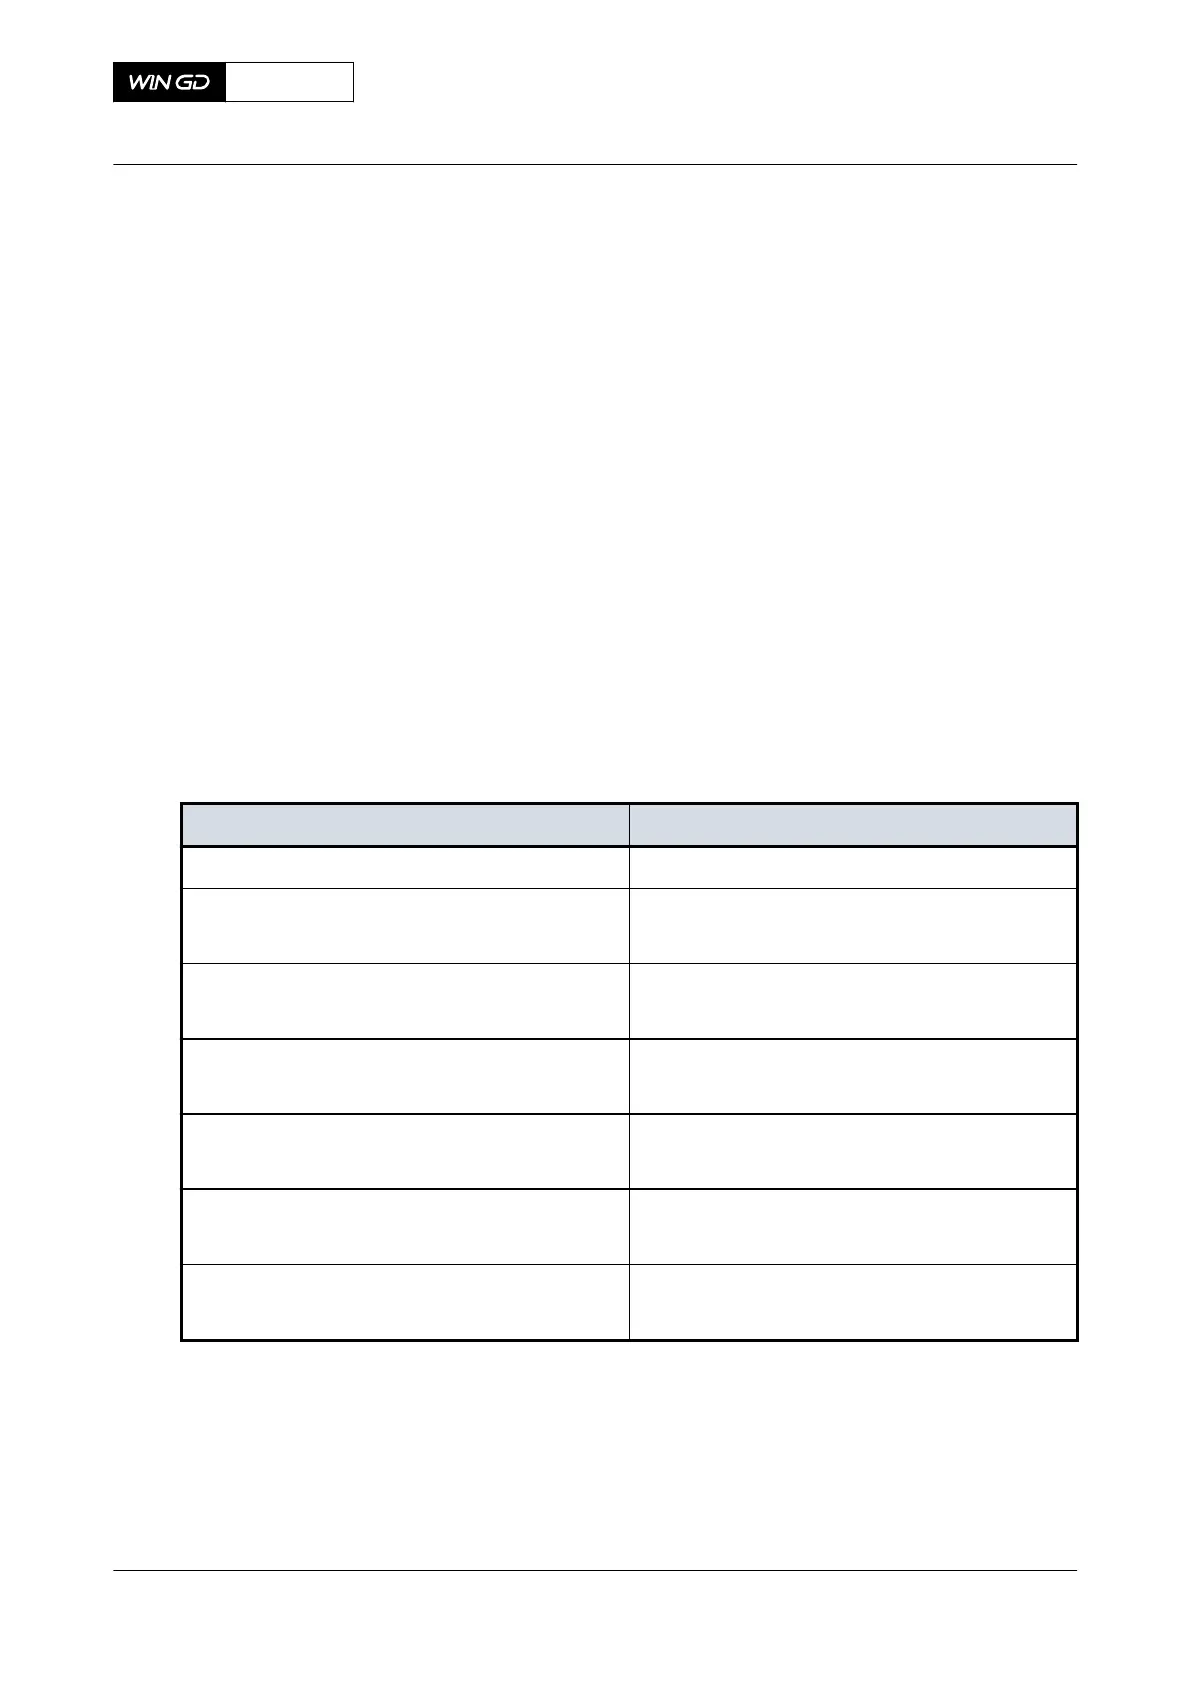
Tab 13-1 Distance X for HP servo oil pipe
Engine type Distance X [mm]
X35, X35-B 5.0
X40, X40-B
X40DF
5.0
X52
X52DF
xxx
X62, X62-B
X62DF
5.5
X72, X72-B
X72DF
5.5
X82, X82-B
X82DF
6.0
X92, X92-B
X92DF
6.0
X72DF
AA00-8447-00AAA-655A-A
Maintenance Manual HP servo oil pipe - grind the sealing face
Winterthur Gas & Diesel Ltd.
- 725 - Issue 002 2020-10