10/00
4-10
Phaser 790/DocuColor 2006
REP 1.9
Initial Issue
Repairs and Adjustments
REP 1.9 ESS PWB
Parts List on PL 12.1
Removal
WARNING
To avoid personal injury or shock, do not perform repair activities with the power switch
on or electrical power applied to the machine.
2. Switch off the machine power and disconnect the machine Power Cord.
3. Remove the Right Cover (REP 14.9).
4. If the machine is equipped with a Scanner, remove the 1394 PWB (PL 12.1).
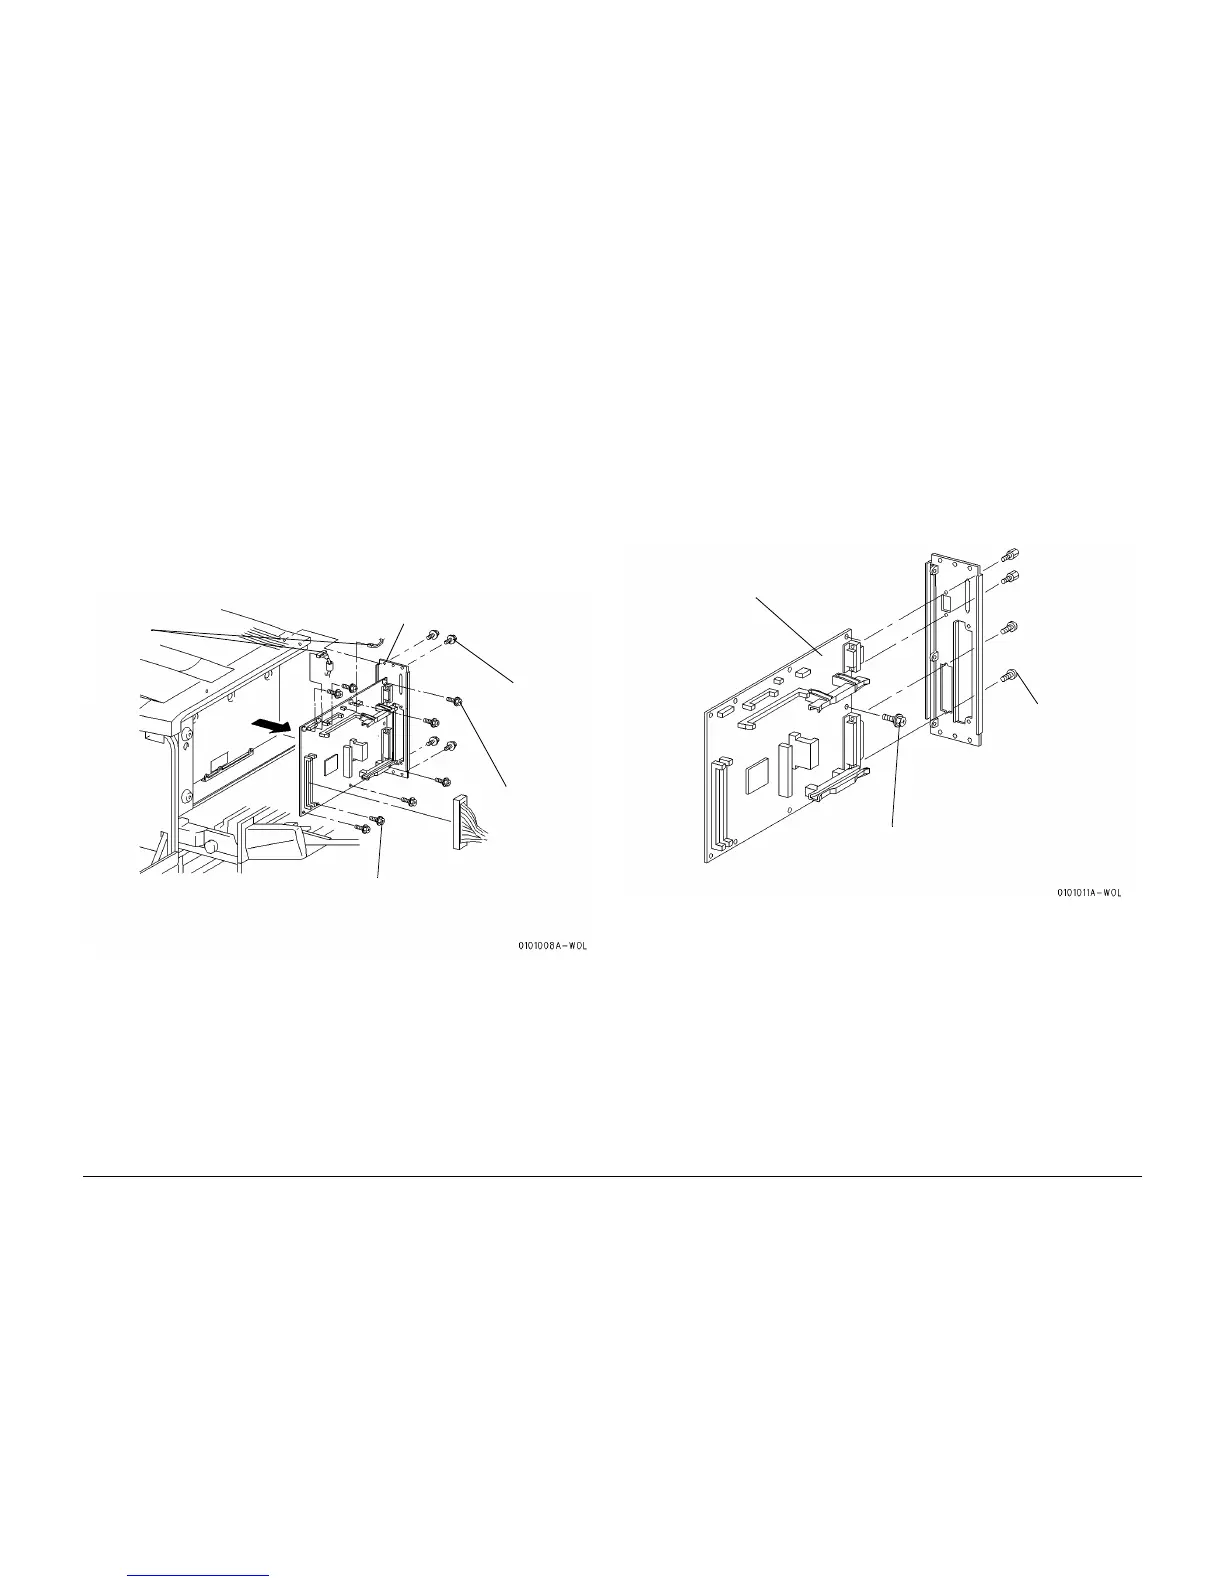
5. Prepare to remove the ESS PWB (Figure 1).
Figure 1 Preparing to Remove the ESS PWB
CAUTION
Observe the ESD Procedures when removing the ESS PWB.
6. Remove the ESS PWB (Figure 2).
Replacement
CAUTION
The EPROMs at location U39 and U40 on the new ESS PWB will not be used. The EPROMs
from the ESS PWB removed from the machine will be installed on the new ESS PWB to main-
tain proper machine operation. The following steps direct you to remove and replace one
EPROM at a time, in order to avoid a mixup of the EPROMs and possible machine malfunc-
tion.
1. Remove the EPROM at location U39 from the old ESS PWB and install it onto the new
ESS PWB at location U39.
2. Remove the EPROM at location U40 from the old ESS PWB and install it onto the new
ESS PWB at location U40.
3. Reinstall the ESS PWB and the remaining components.
Figure 2 Removing the ESS PWB
1
Disconnect the three
connectors
2
Remove the four lower
screws
3
Remove the
four upper
screws
4
Remove the
four screws
securing the
plate
5
Remove the ESS PWB and Plate
1
Remove the screw
2
Remove the four
screws
3
Remove the ESS PWB
from the plate
 Loading...


