10/00
4-123
Phaser 790/DocuColor 2006
REP 10.14, REP 10.15
Repairs and Adjustments
Initial Issue
REP 10.14 Exchange Solenoid
Parts List on PL 8.5
Removal
WARNING
To avoid personal injury or shock, do not perform repair activities with the power switch
on or electrical power applied to the machine.
1. Switch off the machine power and disconnect the machine Power Cord.
2. Remove the Exit Tray Assembly (REP 8.30).
3. Remove the Fuser Assembly (REP 10.1).
4. Remove the Main Fuser Assembly (REP 10.2).
5. Remove the Exchange Chute (REP 10.13).
CAUTION
The Fuser Rear Rail and Fuser Tray Assembly are connected by a harness. Be careful not to
pull too far apart while disassembling the components.
The gear is no longer secured when the EXCHANGE BRACKET is removed. Be careful not to
allow the gear to fall out while disassembling the components.
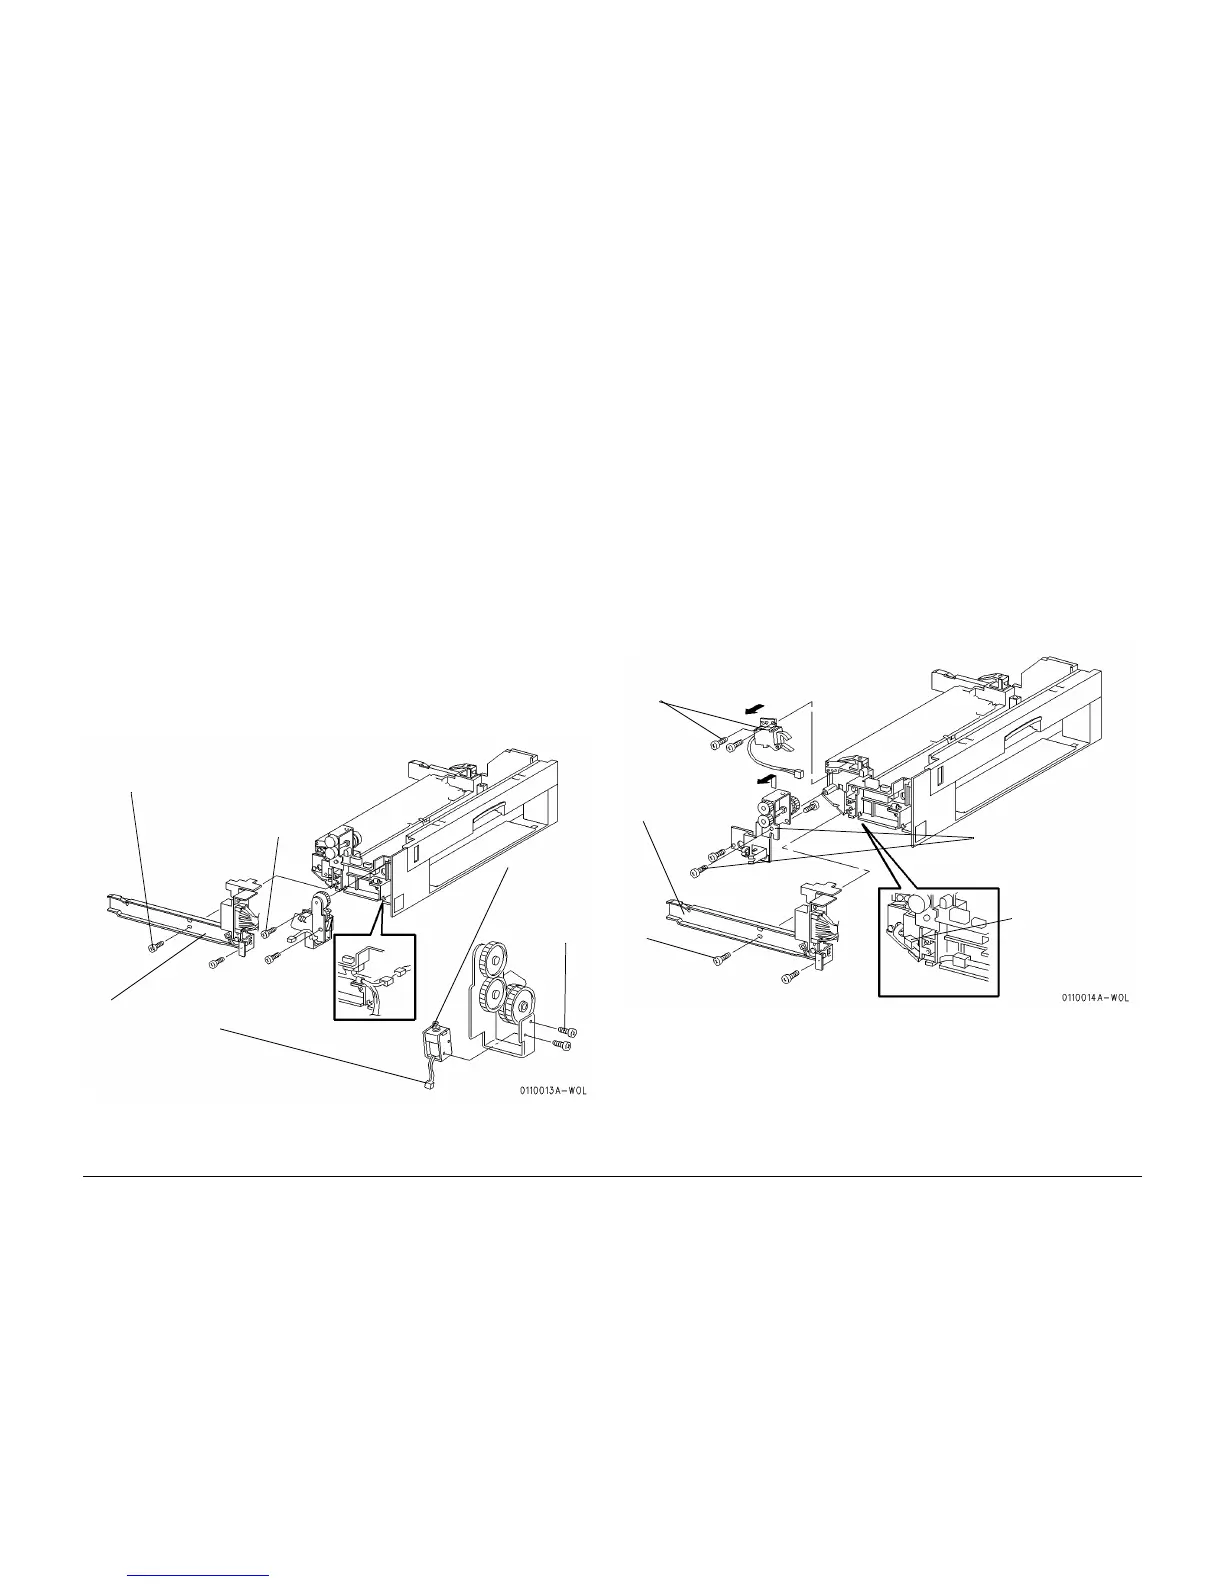
6. Remove the Exchange Solenoid (Figure 1).
Replacement
1. Reinstall the Exchange Solenoid in the reverse order of removal.
Figure 1 Removing the Exchange Solenoid
REP 10.15 Cleaner Cam Solenoid
Parts List on PL 8.7
Removal
WARNING
To avoid personal injury or shock, do not perform repair activities with the power switch
on or electrical power applied to the machine.
1. Switch off the machine power and disconnect the machine Power Cord.
2. Remove the Exit Tray Assembly (REP 8.30).
3. Remove the Fuser Assembly (REP 10.1).
4. Remove the Main Fuser Assembly (REP 10.2).
CAUTION
The Fuser Rear Rail and Fuser Tray Assembly are connected by a harness. Be careful not to
pull too far apart while disassembling the components.
5. Remove the Cleaner Cam Solenoid (Figure 1).
Figure 1 Removing the Cleaner Cam Solenoid
1
Remove the
screws
2
Remove the
Fuser Rear Rail
together with
the Gear Cover
3
Disconnect the
connector
4
Remove the
screws to remove
the Exchange
Solenoid Assem-
bly
5
Remove the
screws to
remove the
Exchange
Solenoid
1
Remove the
screws
2
Remove the
Fuser Rear
Rail with the
Gear Cover
3
Disconnect the
connector
4
Remove the screws.
Then, remove the Input
Bracket Assembly
5
Remove the screws to remove the
Cleaner Cam Solenoid
 Loading...


