03/01
6-3
Phaser 790/DocuColor 2006
GP 1
General Procedures and Information
GP 1 Diagnostic Mode (IOT)
CAUTION
This machine is capable of executing a print job while in Diagnostic Mode. Be alert for sudden
automatic start up while servicing the machine.
Entering the Diagnostic Mode
1. Switch off the power.
2. Press and hold the Up arrow and the Down arrow on the IOT Control Panel
3. While pressing the two buttons, switch on the power. Do not release the buttons.
4. Release the buttons when the display flashes the following:
##################
##################
The machine will execute a series of initialization and self-test routines. When the machine is
ready to accept diagnostic commands, the following will be displayed:
INPUT PASSWORD
Navigation
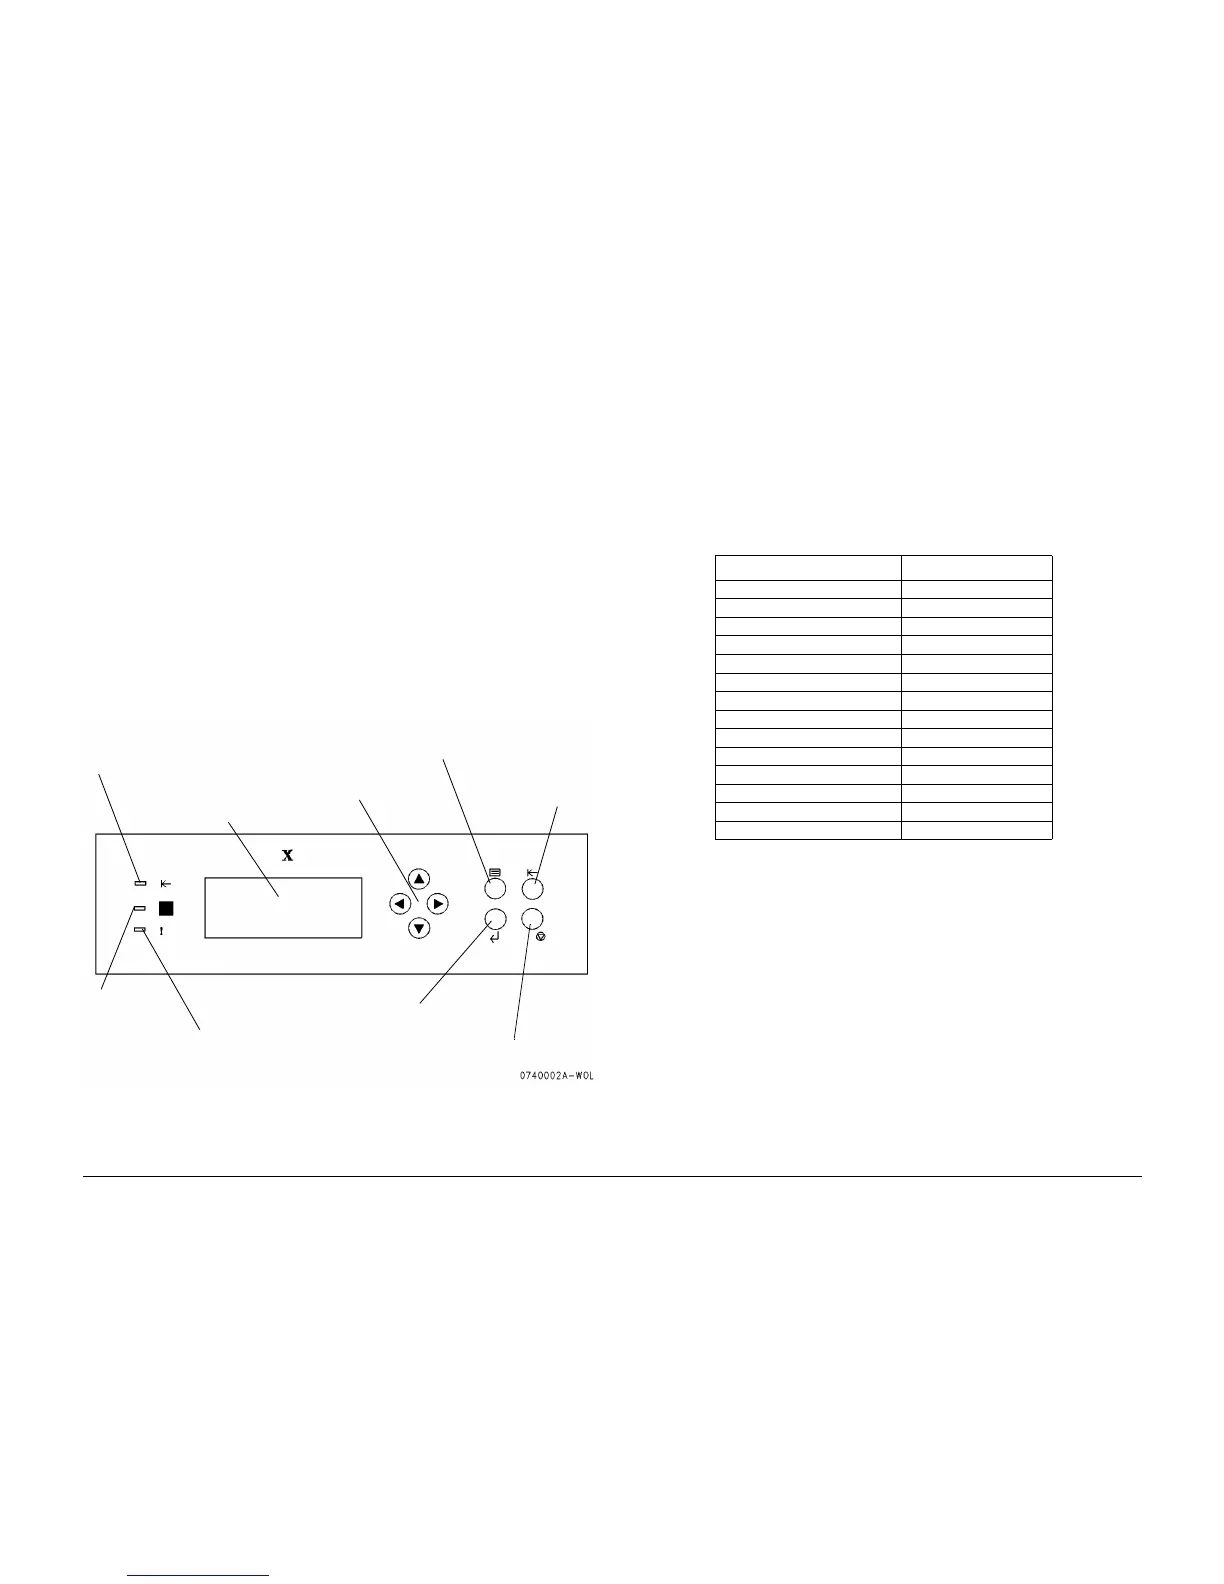
Figure 1 below shows and describes the Control Panel.
Figure 1 The Control Panel
Use the Up and Down arrow buttons to enter data onto the display. Use the Right and Left
arrow buttons to move the cursor right or left.
For example, to enter the password (default password is 9999):
1. The cursor should be under the far left position. Use the Up or Down arrow to scroll until
the numeral 9 is displayed.
2. Use the Right arrow to move the cursor one place to the right.
3. Repeat step 1 and step 2 until 9999 is displayed.
4. Press the Item Enter button to input the password.
Menu Options
When the correct password has been entered, the first menu item is displayed. Press the
Menu button to scroll through the menu choices. Table 1 lists the available menu items
Exiting the Diagnostic Mode
To exit from IOT diagnostics, perform the following:
1. Scroll through the menu until DIAG EXIT is displayed.
2. Press the Item/Enter button. The following message will appear:
WRITING DATA
PLEASE WAIT
3. The machine will update any changes that were made in diagnostics. When the update is
complete, the following message will appear:
PLEASE POWER OFF
4. Switch off the power.
Arrow Buttons
Menu Button
Clear/Stop Button
Off-Line Button
Item Enter Button
Processing
Indicator
Error
Indicator
On-Line
Indicator
Control Panel
Screen
Table 1 Menu Items
Menu Item Explanation
DI TEST see GP 2
DO TEST see GP 2
STOP DO TEST see GP 2
IOT PARAM SET see GP 3
IOT NVM R/W see GP 4
PATTERN PRINTING see GP 15
INSTALL MCU F/W see GP 8
INSTALL 1394 F/W see GP 8
METER see GP 5
METER SETUP see GP 5
INITIALIZING DATA see GP 6
CHANGE PASSWORD see GP 7
RESET ADMIN PASSWORD see GP 7
DIAG EXIT see GP 1 (Exit)
 Loading...


