10/00
4-124
Phaser 790/DocuColor 2006
REP 10.15, REP 10.16
Initial Issue
Repairs and Adjustments
Replacement
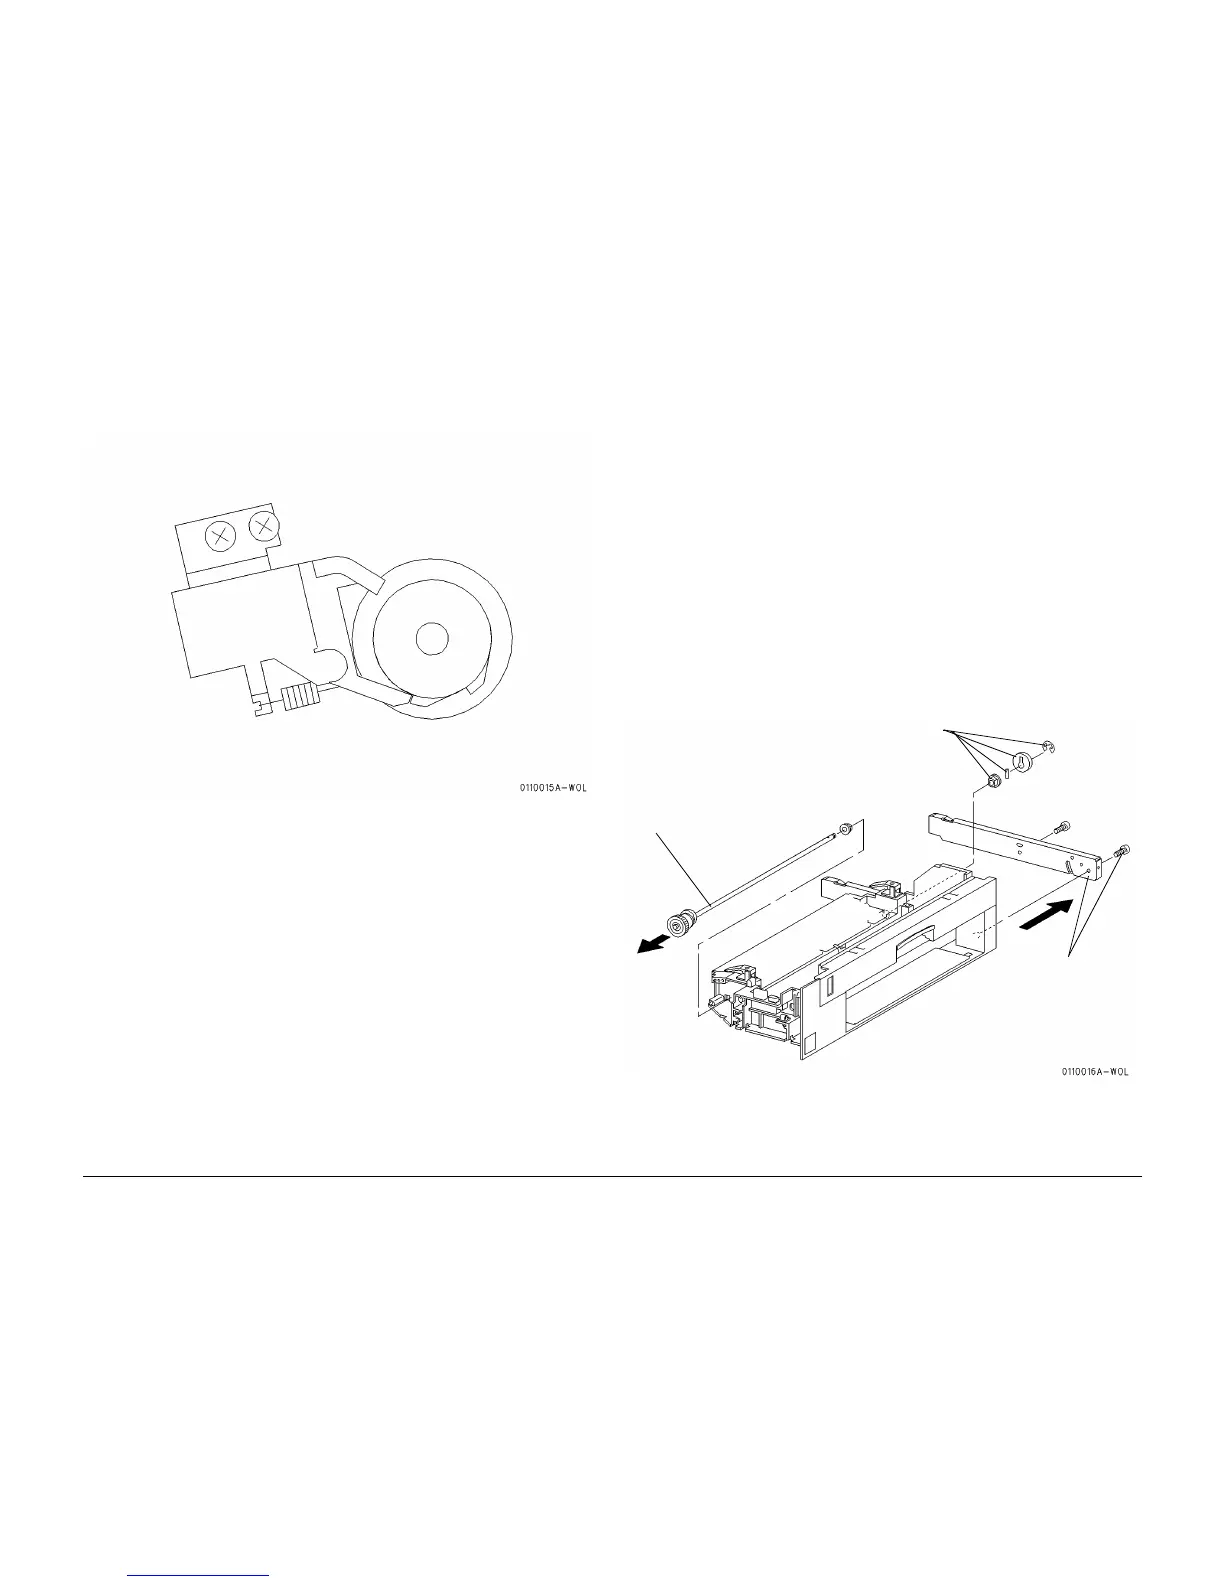
1. Position the Cleaner Cam Solenoid correctly (Figure 2).
2. Reinstall the Cleaner Cam Solenoid in the reverse order of removal.
Figure 2 Positioning the Cleaner Cam Solenoid
REP 10.16 Cleaner Cam Shaft
Parts List on PL 8.7
Removal
WARNING
To avoid personal injury or shock, do not perform repair activities with the power switch
on or electrical power applied to the machine.
1. Switch off the machine power and disconnect the machine Power Cord.
2. Remove the Exit Tray Assembly (REP 8.30).
3. Remove the Fuser Assembly (REP 10.1).
4. Remove the Main Fuser Assembly (REP 10.2).
5. Remove the Cleaner Cam Solenoid (REP 10.15)
CAUTION
Be sure not to drop and lose the Cleaner Cam Pin when removing the Cleaner Cam Shaft.
6. Remove the Cleaner Cam Shaft (Figure 1).
Replacement
1. Reinstall the Cleaner Cam Shaft in the reverse order of removal.
NOTE: The right/left direction of the cam must be adjusted after installing it.
Figure 1 Removing the Cleaner Cam Shaft
1
Armature touches the
spring clutch with arma-
ture at the vacuum posi-
tion
1
Remove the
screws. Then,
remove the
Fuser Front Rail
2
Remove the e-ring,
Cleaner Cam, Pin, and
Front Bearing
3
Remove the
Cleaner Cam Shaft
 Loading...


