10/00
4-141
Phaser 790/DocuColor 2006
REP 14.4
Repairs and Adjustments
Initial Issue
REP 14.4 Top Cover Assembly
Parts List on PL 1.2
Removal
WARNING
To avoid personal injury or shock, do not perform repair activities with the power switch
on or electrical power applied to the machine.
1. Switch off the machine power and disconnect the machine Power Cord.
CAUTION
Do not perform step 3 in the art if the machine is not equipped with a full stack detection func-
tion.
The Top Cover Assembly and printer are connected by a harness. Be careful not to pull too far
apart when performing the following.
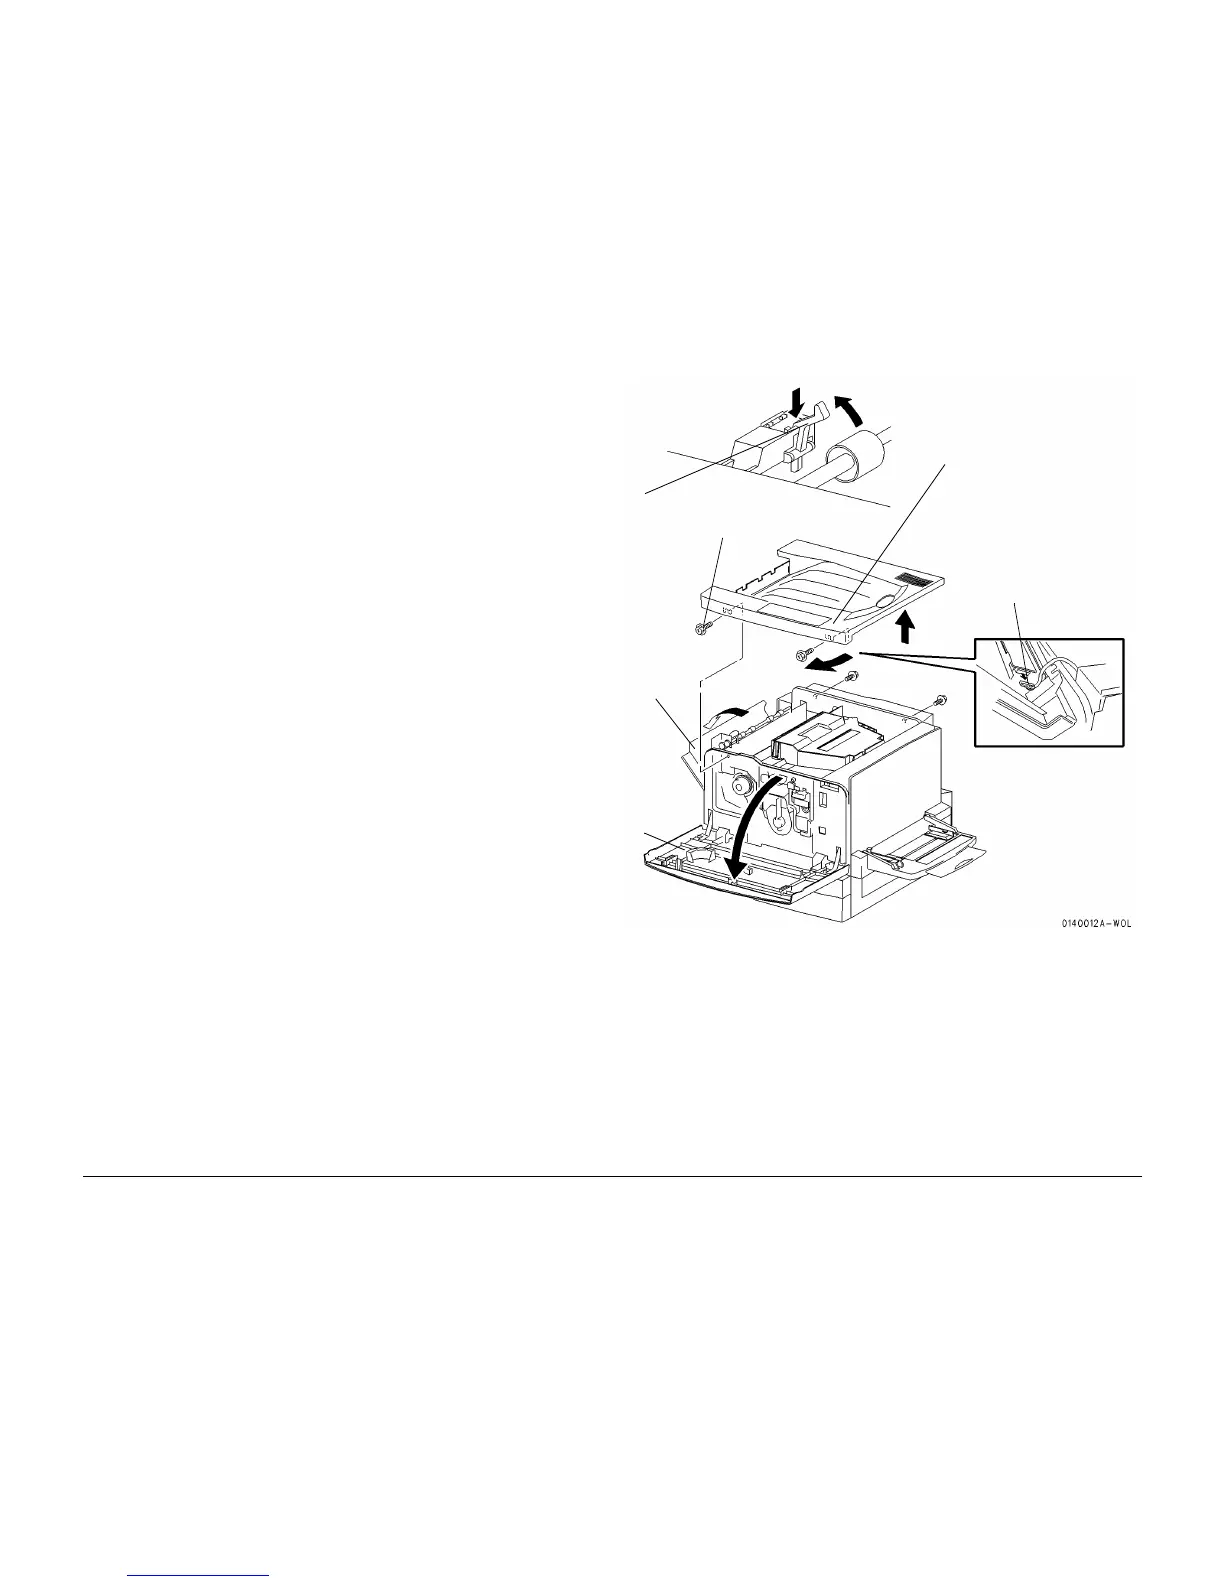
2. Remove the Top Cover Assembly (Figure 1).
Replacement
1. Reinstall the Top Cover Assembly in the reverse order of removal.
2. The two screws at the rear are also used to secure the Rear Cover Assembly. Be sure to
press the Top Cover Assembly down and securely tighten the left screw in order to ensure
that the Top Cover Switch is actuated correctly.
Figure 1 Removing the Top Cover Assembly
1
Open the
Front
Cover
Assembly
2
Open the
Exit Trans-
port Assem-
bly
3
Lift and
latch the
sensor
actuator
4
Remove the four screws
securing the cover
5
Rotate and remove the
Top Cover Assembly
with the Control Panel
6
Disconnect the
connector
7
Disengage the
Control Panel
from the Top
Cover Assembly
 Loading...


