03/01
6-20
Phaser 790/DocuColor 2006
GP 19
General Procedures and Information
GP 19 Diagnostic Mode (IIT)
Entering the Diagnostic Mode
1. Switch on the power to the Scanner.
2. Ensure that the Scanner display reads Ready to copy.
3. Press and hold the 0 key for at least three seconds.
4. While continuing to hold the 0 key, press the Start button. The display will reverse from
dark characters on light background to light characters on dark background.
5. Press the Tools button.
6. Press the Down Arrow button to highlight Administrator menu.
7. Press the Select button.
8. Press the Down Arrow button until SelfDiag is highlighted.
9. Press the Select button. The following menu is displayed:
• Auto diag
• Systemdata R/W
• ClearMem
• Memory R/W
• TestPrint
• Diag-Code
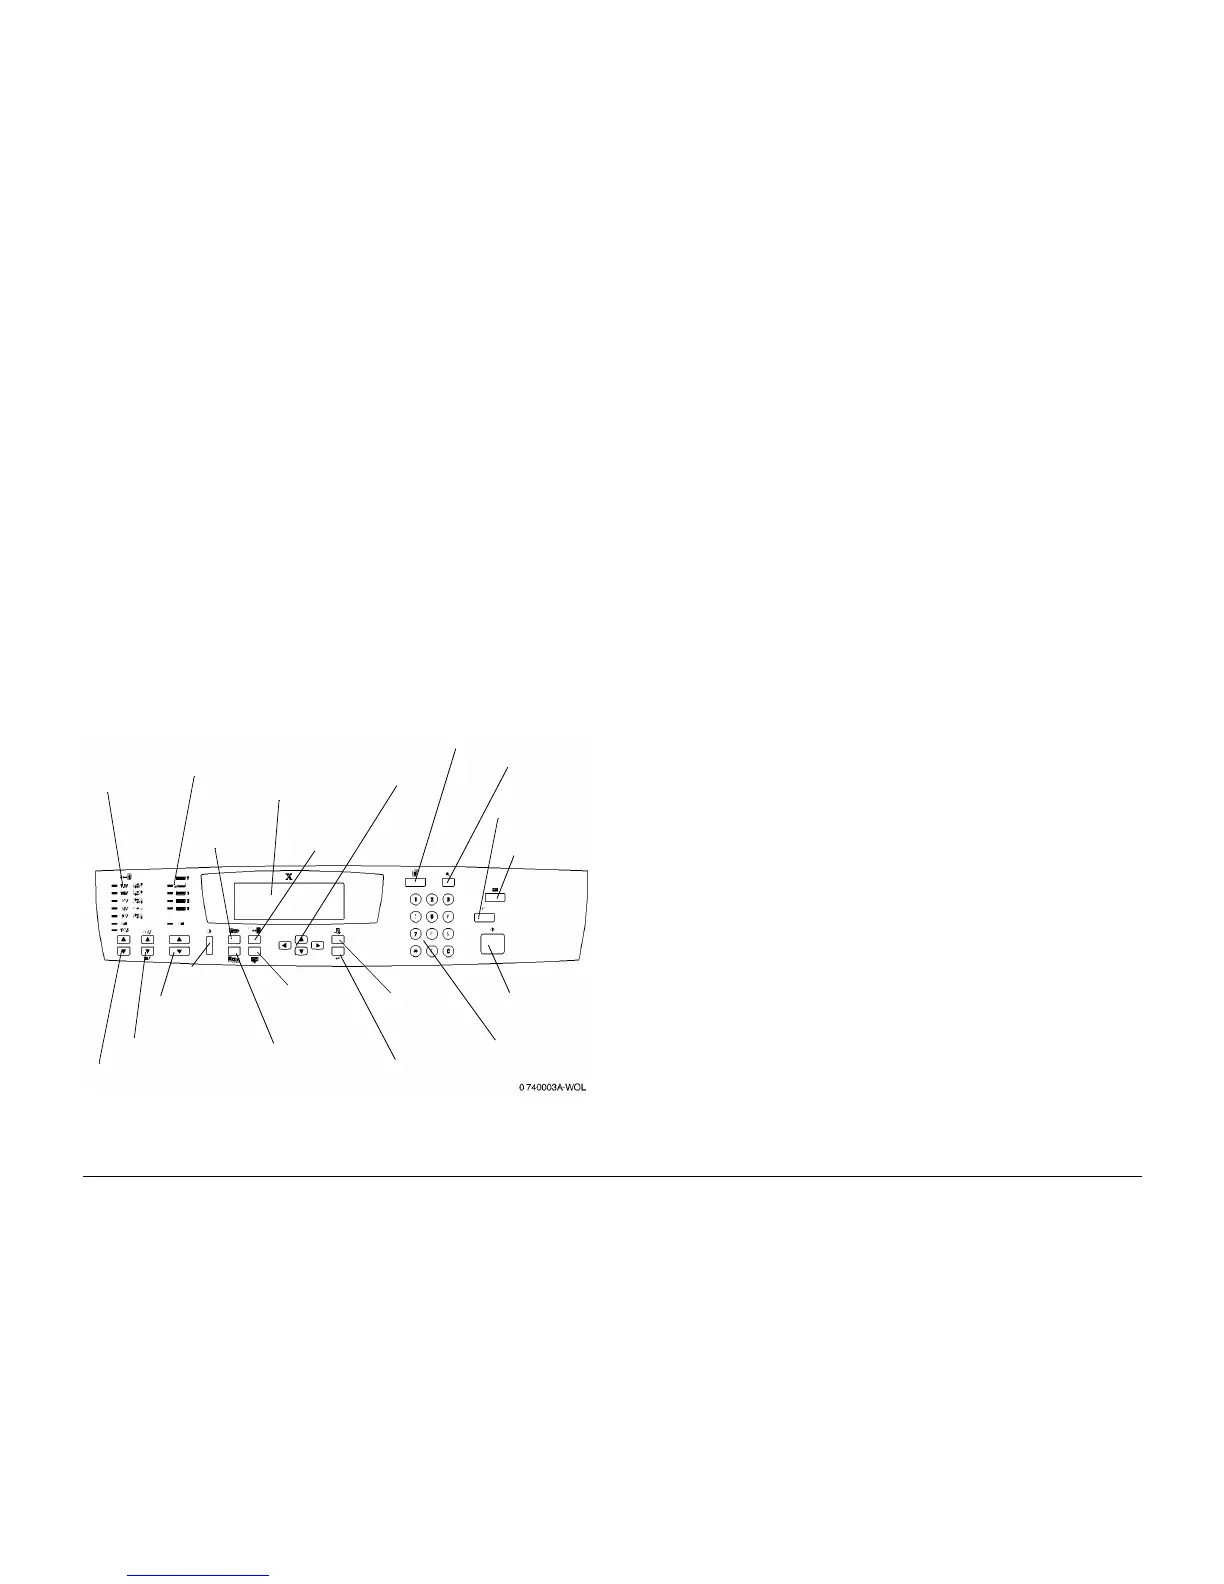
10. Figure 1 below shows the Scanner Control Panel.
Figure 1 The Scanner Control Panel
Exiting the Diagnostic Mode
To exit from IIT diagnostics mode, perform the following:
1. If a diagnostic test is under way, press the Exit button to stop the on-going test.
2. Press the Exit button until the Choose, and Press Select, Administrator menu screen
is displayed.
3. Press the Tools button.
Copy Button
Tools Button
Number Buttons
Stop Button
Clear All Button
Start Button
Control Panel
Screen
Paper Supply
Indicators
Reduce/Enlarge
Selection Buttons
Reduce/Enlarge
Scroll Buttons
Paper Supply
Selection
Buttons
Contrast
Dial
Original
Type
Button
Quality
Adjustment
Button
Advanced
Features
Button
Menu Arrow
Buttons
Select Button
Exit Button
Lighten
Darken
Button
R/E Preset
Indicators
 Loading...


