10/00
4-24
Phaser 790/DocuColor 2006
REP 5.2, REP 5.3
Initial Issue
Repairs and Adjustments
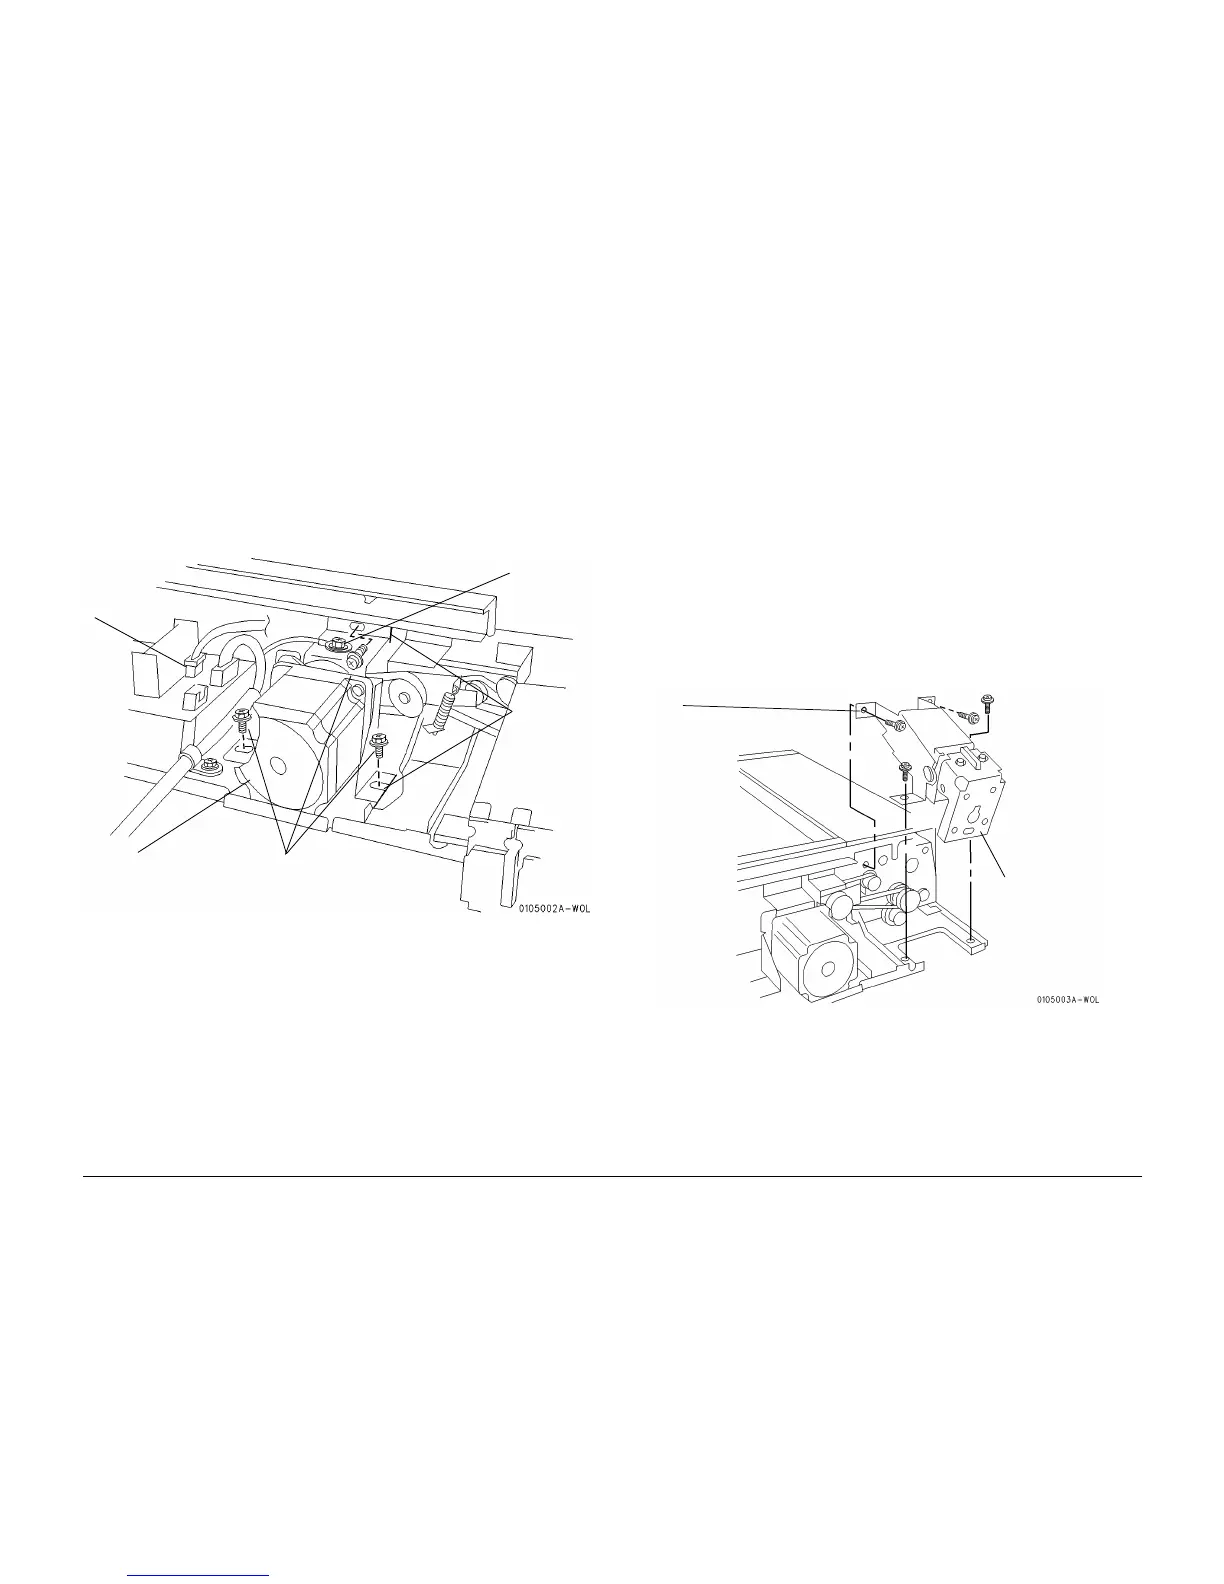
REP 5.2 ADF Drive Motor
Parts List on PL 17.2
Removal
WARNING
To avoid personal injury or shock, do not perform repair activities with the power switch
on or electrical power applied to the machine.
1. Switch off the machine power and disconnect the machine Power Cord.
2. Remove the ADF Rear Cover.
3. Remove the ADF Drive Motor. (Figure 1)
Figure 1 Removing the ADF Drive Motor
Replacement
1. Perform the procedure for removal in reverse.
2. Install the motor, using the previously scribed marks to set the proper belt tension.
REP 5.3 Counterbalance
Parts List on PL 17.2
Removal
WARNING
To avoid personal injury or shock, do not perform repair activities with the power switch
on or electrical power applied to the machine.
CAUTION
Different loads are applied to each side of the ADF. For this reason, the Counterbalance parts
are unique for each side. When replacing the Counterbalances, do not mix the left Counterbal-
ance parts with the right.
NOTE: Replacement steps are identical for both the left and the right sides of the Counterbal-
ance.
1. Switch off the machine power and disconnect the machine Power Cord.
2. Remove the ADF Assembly. (REP 5.1)
3. Remove the ADF Rear Cover.
4. Remove the Counterbalance. (Figure 1)
Figure 1 Removing the Counterbalance
Replacement
1. Perform the procedure for removal in reverse.
2. Perform an ADF Side Registration adjustment. (ADJ 5.1)
3. Perform an ADF Lead Edge Registration adjustment. (ADJ 5.2)
4. Perform an ADF Height adjustment. (ADJ 5.3)
1
Disconnect the connector
2
Remove the
screw and
ground wire
3
Use a scribe
to mark off
the ADF Drive
Motor bracket
position
4
Remove three screws and
remove the Drive Belt
5
Remove the ADF
Drive Motor
1
Remove four screws retaining
the Counterbalance
2
Remove the
Counterbalance
 Loading...


