10/00
4-94
Phaser 790/DocuColor 2006
REP 9.4
Initial Issue
Repairs and Adjustments
REP 9.4 ADC Sensor
Parts List on PL 5.1
Removal
WARNING
To avoid personal injury or shock, do not perform repair activities with the power switch
on or electrical power applied to the machine.
1. Switch off the machine power and disconnect the machine Power Cord.
2. Remove the Top Cover Assembly (REP 14.4).
3. Remove the Tension Lever (REP 9.15).
4. Remove the Copy/Print Cartridge (REP 9.1).
5. Remove the IBT Assembly (REP 9.16).
6. Remove the Left Inner Cover Assembly and the IBT Inner Cover (REP 14.5).
CAUTION
Be careful not to damage the surface of the IBT Belt or Magnetic Roll of the Developer Housing
when removing the ADC Sensor.
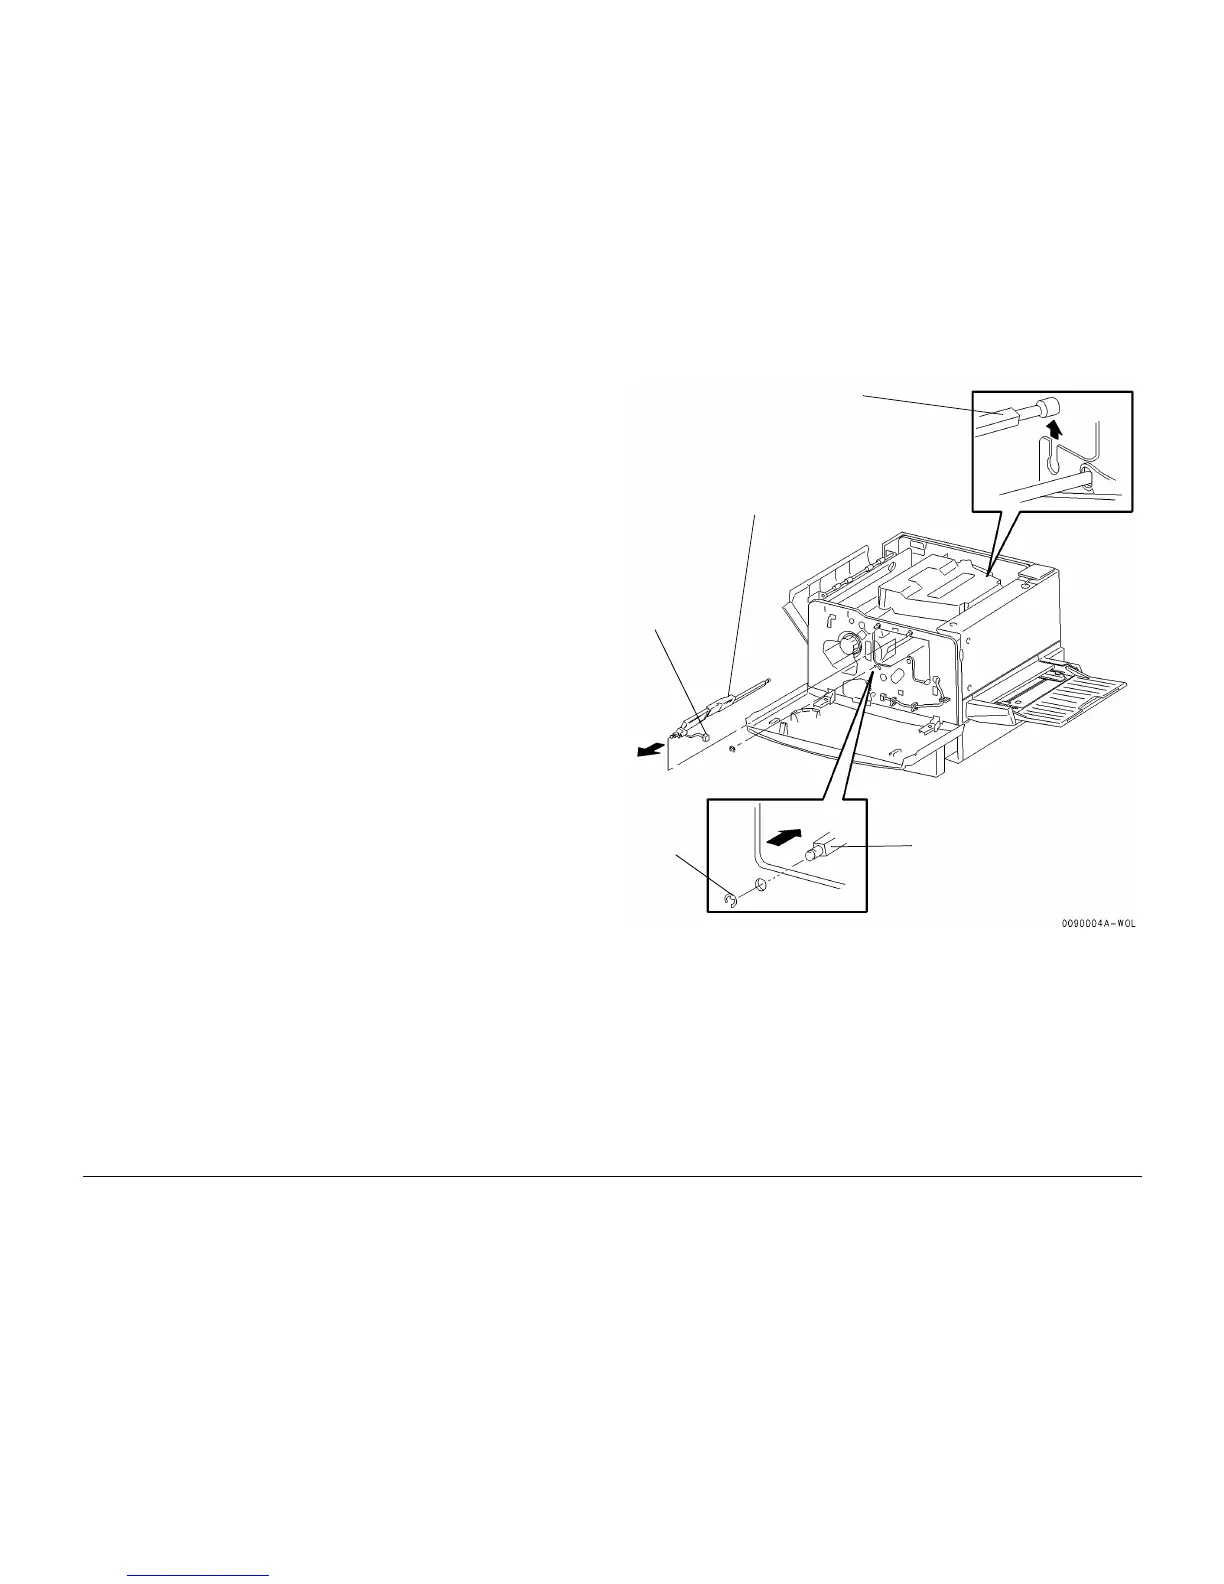
7. Remove the ADC Sensor (Figure 1).
Replacement
1. Securely mount the shaft of the ADC Sensor on the frame.
2. Reinstall the ADC Sensor in the reverse order of removal.
Figure 1 Removing the ADC Sensor
1
Disconnect the
connector and
disengage the
harness from
the clamps
2
Remove the
e-ring
3
Move the sensor
toward the rear to
disengage it from
the frame
4
Disengage the rear
end of sensor from
the frame
5
Remove the ADC
Sensor
 Loading...


