10/00
4-100
Phaser 790/DocuColor 2006
REP 9.12
Initial Issue
Repairs and Adjustments
REP 9.12 Rotary Frame
Parts List on PL 6.1
Removal
WARNING
To avoid personal injury or shock, do not perform repair activities with the power switch
on or electrical power applied to the machine.
1. Switch off the machine power and disconnect the machine Power Cord.
2. Remove the Front Cover Assembly (REP 14.1).
3. Remove the Top Cover Assembly (REP 14.4).
4. Remove the Copy/Print Cartridge (REP 9.1).
5. Remove the Tension Lever (REP 9.15).
6. Remove the Left Inner Cover Assembly (REP 14.5).
7. Remove the Rear Cover (REP 14.6).
8. Remove all Dry Ink Cartridges (REP 9.9).
9. Remove the Left Front Cover Interlock (REP 1.7).
10. Remove all Developer Housings (REP 9.10).
11. Remove the Rotary Sensor (REP 9.11).
12. Remove the Fuser Assembly (REP 10.1).
13. Remove the Exit Transport Assembly (REP 8.40).
14. Remove the Rotary Motor PWB (REP 4.8).
15. Remove the Rotary Motor (REP 4.7).
16. Remove the Dispense Clutch (REP 4.9).
17. Remove the LVPS (REP 1.1).
18. Remove the Fuser Drive Unit (REP 4.2).
19. Remove the Developer Clutch (REP 4.10).
20. Remove the Developer Tie Plate (REP 9.14).
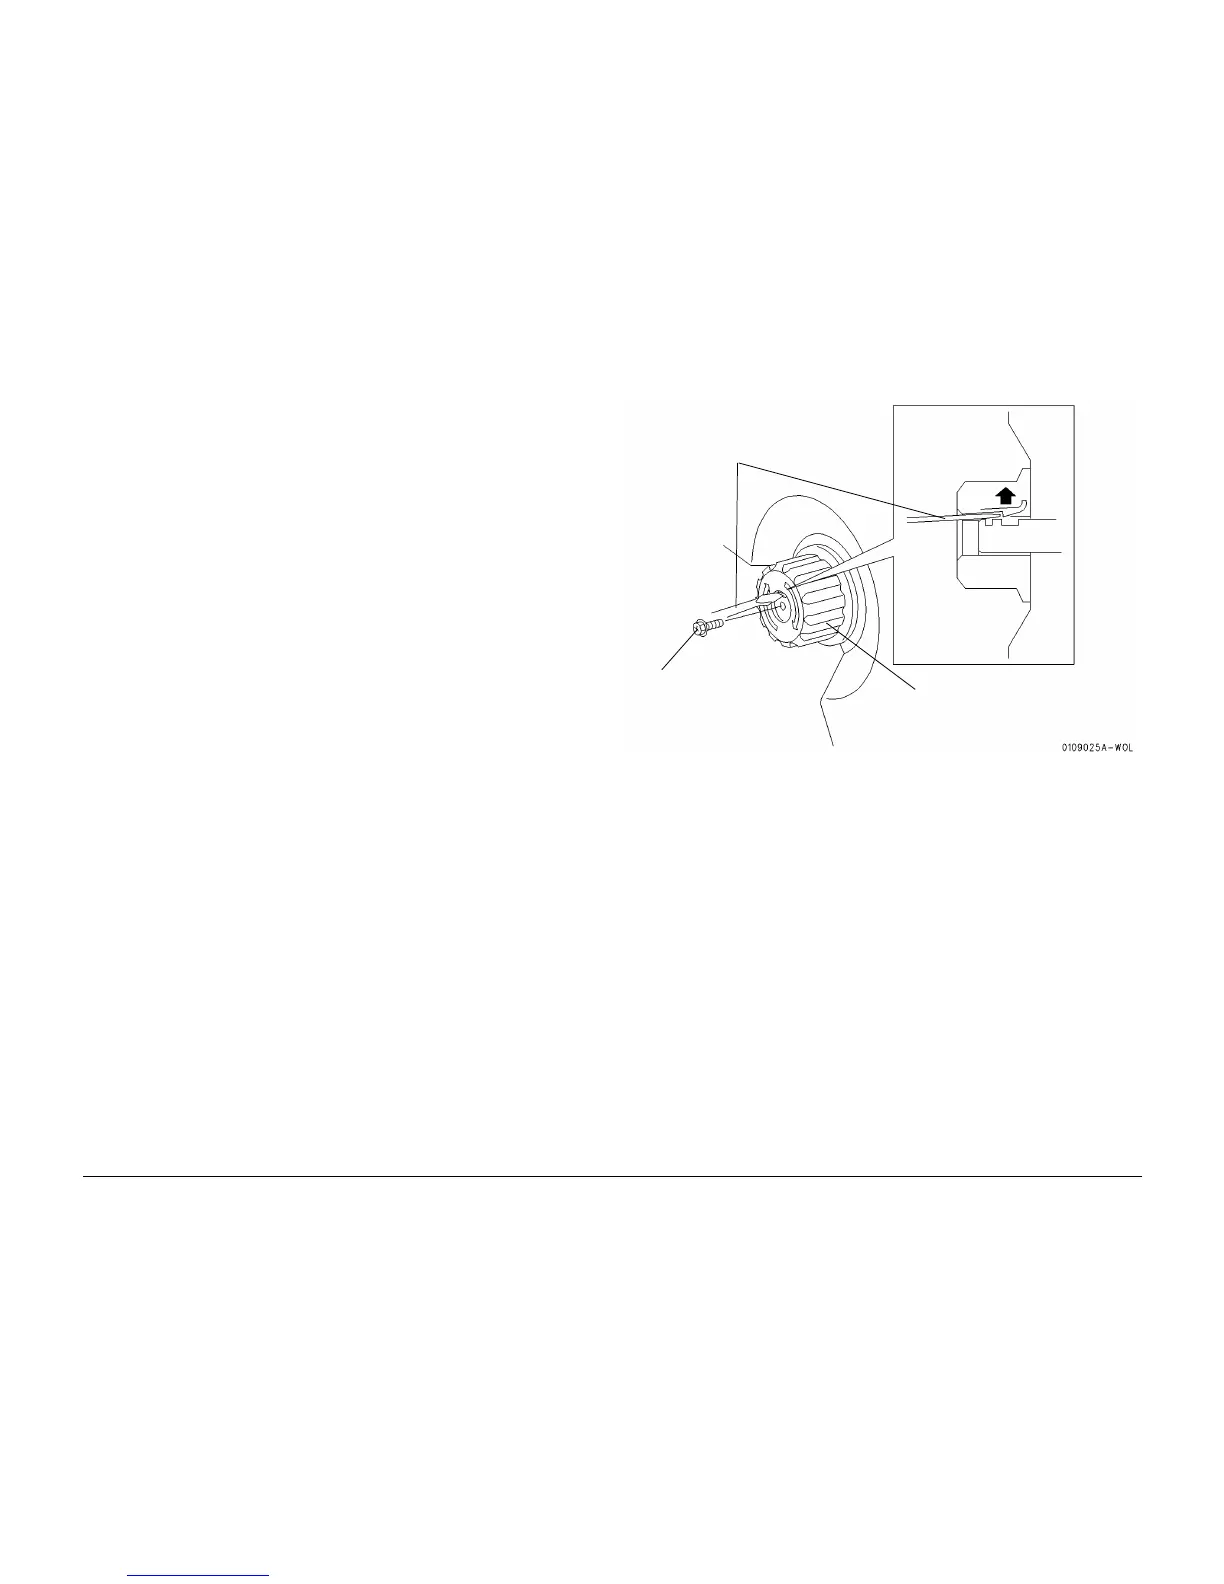
21. Remove the Rotary Knob (Figure 1).
Figure 1 Removing the Rotary Knob
1
Remove the screw
2
Disengage the knob
with a screwdriver
3
Remove the Rotary Knob
 Loading...


